advancedSmart Home & IoT17-Mar-2020
Starting the car with voice using Alexa on Raspberry Pi

Anton Shagaev
Tashkent, UZ
3 days
--
8

Friends, automation with Alexa continues, and recently I thought, why not give Alexa the ability to start my car by voice. The thing is, the car is parked far from the house, and my 868MHz remote is simply unable to start it from such a distance through the obstacle of nearby houses. The only way to start the car remotely is using a mobile phone. I call the alarm system, it 'picks up the phone,' then in tone mode, I enter the engine start code, and the engine starts remotely. I have to drive several times a day, and therefore I have to start the car several times in advance to warm it up, as I live in a cold region of our vast country. This example will be considered for a security system Pandora 5000NEW, but by analogy, you can do this for any other car alarm with GSM support.
What you'll need
Materials
- Voice assistant Alexa on Raspberry Pi (RPi)1 pc
- Car security system with GSM support and installed SIM card1 pc
- 1 pc
- 3 pcs
- 1 pc
- External power supply 5V/2.4A for SIM800L1 pc
Tools
- Electric drill1 pc
- Drill bit diameter 6.5mm1 pc
Steps
1
Connecting the SIM800L module
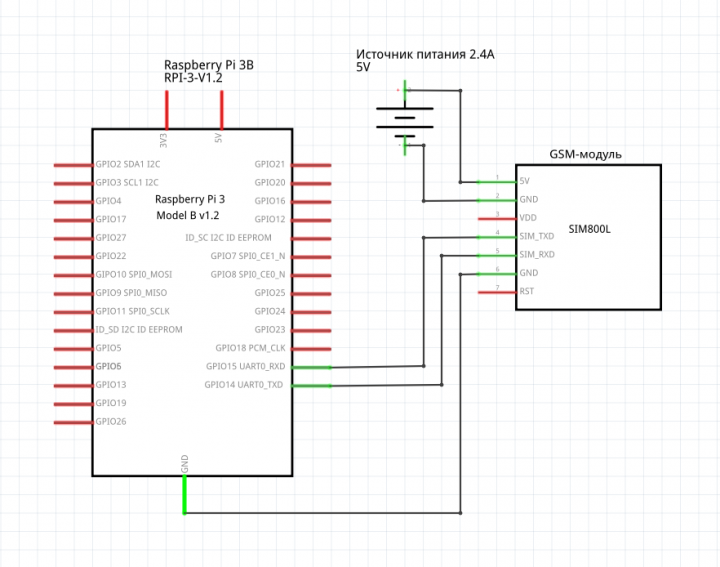
Connecting the SIM800L module

Connecting the SIM800L module
Connecting the SIM800L module
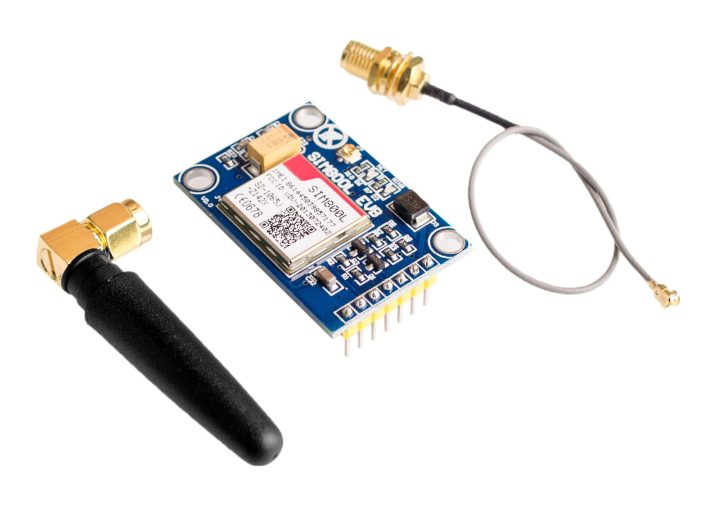
GSM module SIM800L v2.02
Disconnect power from the RPi and connect the SIM800L according to the diagram:
Just do not power the SIM800L from the 5V output on the RPi. When establishing a connection with the cellular tower, the GSM module consumes a current far exceeding what you can safely draw from the RPi.
Friends, I am providing a photo of the SIM800L from the internet, because the cover of my RPi case was closed with difficulty (there are already a lot of wires in the case) and I didn't want to disturb them unnecessarily. In the future, I will purchase a larger case for the RPi. Possiblysuch.
To install the antenna, make a 6.5mm hole in any convenient place on your RPi case and install the antenna.
Apply power to the RPi (having first connected it with a LAN cable) and access it via SSH:
tinkster@almalinux:~#
1
Next, we need to go into Rasbian Config and enable support for UART (Universal Asynchronous Receiver-Transmitter). In the terminal, type:
tinkster@almalinux:~#
1sudo raspi-config
Go to section 5 - Interfacing Options
and enter section 6 - Serial
Would you like a login shell to be accessible over serial? — Select No
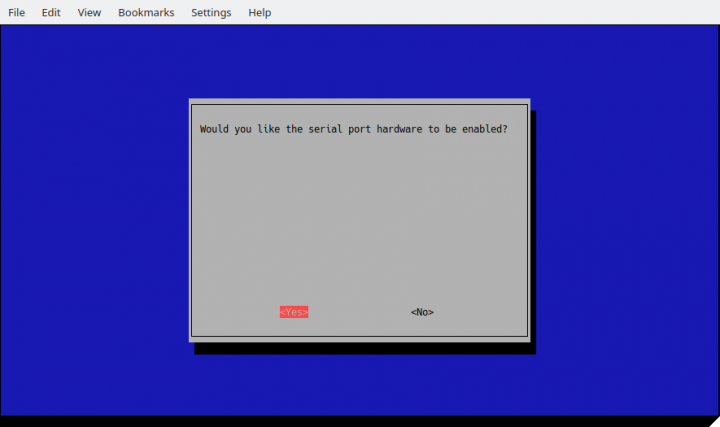
Would you like the serial port hardware to be enabled? — Select Yes
Next, go to the file config.txt:
tinkster@almalinux:~#
1sudo nano /boot/config.txt
And insert in the [all] section
tinkster@almalinux:~#
1enable_uart=1
Save the file and reboot the RPi:
tinkster@almalinux:~#
1sudo reboot
2
Testing SIM800L and registering SIM card number in the alarm system
Testing SIM800L and registering SIM card number in the alarm system
Testing SIM800L and registering SIM card number in the alarm system

Testing SIM800L and registering SIM card number in the alarm system
Testing SIM800L and registering SIM card number in the alarm system

+1
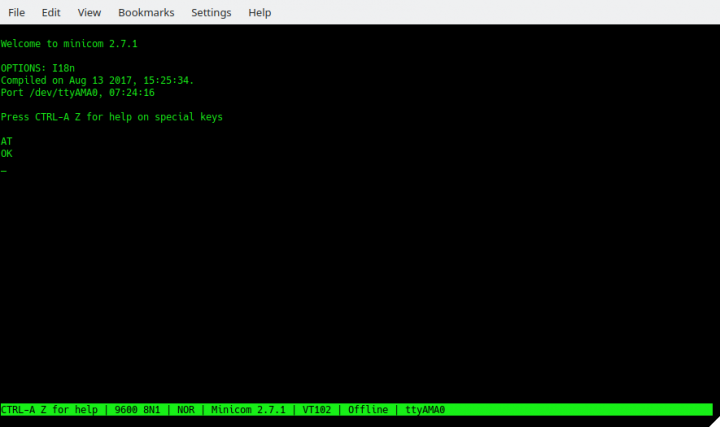
To check the functionality of the SIM800L, you need to install the program minicom:
tinkster@almalinux:~#
1sudo apt install minicom
Now we launch mincom:
tinkster@almalinux:~#
1minicom -s
Go to the section Serial port setup, then press the key A (which corresponds to Serial Device) and enter the path to the serial port /dev/ttyAMA0. PressEnter.
Then, press the key E, enter the menu Comm Parameters. Next, press the keyС(which corresponds to a speed of 9600), then press the key Q (which corresponds to 8-N-1). 8-N-1— is an abbreviated notation for setting or configuring serial port parameters in asynchronous mode, which includes one start bit, eight (8) data bits, no (N) parity bit, and one (1) stop bit.
Press Enter. Also, in the serial port menu, select the sections F (Hardware Flow Control) and G (Software Flow Control) and set both to No.
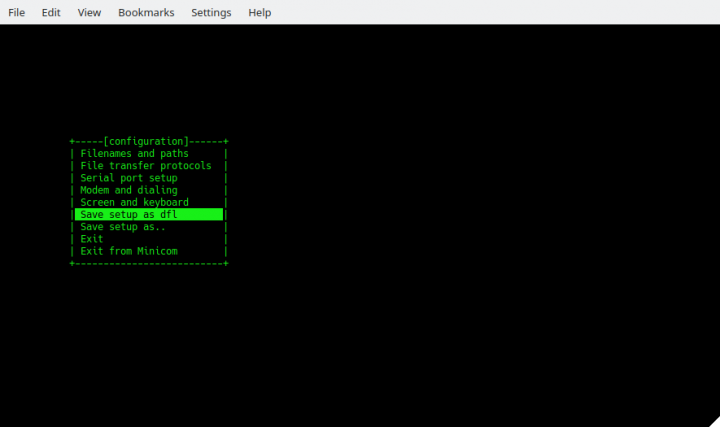
Exit to the main menu and save the settings by selecting Save setup as dfl. Next, press Exit and find yourself in the main terminal window of the program minicom.
Let's try to poll the GSM module. To start entering commands, you need to press CTRL+A, and then the key E.
Enter the command AT by pressing Enter. If the GSM module is available, then after pressing Enter you will see – OK. This means that we have connected the GSM module correctly and it responds to commands.
Next, let's try to make a test call to your mobile phone. In the same window, enter ATD+7XXXXXXXXXX; (where 7XXXXXXXXXX is your mobile number) and press Enter. If everything is normal, the GSM module will call you, and you will hear a ring. Do not answer the call, because you won't hear anything anyway (the SIM800L has no microphone or speaker support in principle). End the call either on your phone or via minicom by typing the command ATH, and pressing Enter. To exit minicom, first press CTRL+A, then the X.
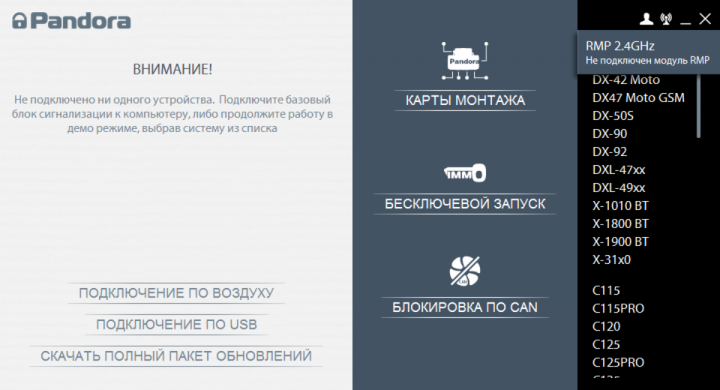
key. Next, take a laptop and install the program Pandora Alarm Studio of the latest version. You can connect to the alarm system via a USB cable or via the wireless module RPM-03. Since my car alarm unit was securely hidden inside the car, the only interface for connection without external assistance was the RMP-03 wireless module at 2.4 gigahertz. Insert the module into the laptop's USB port. Open the Pandora Alarm Studio program. On the alarm remote, press and hold the door unlock button together with the F button for three seconds. This will enter programming mode. In the program itself, click on the radio signal icon in the upper right corner and click search for new device.
When the connection is established, select our car brand and go to advanced devices.
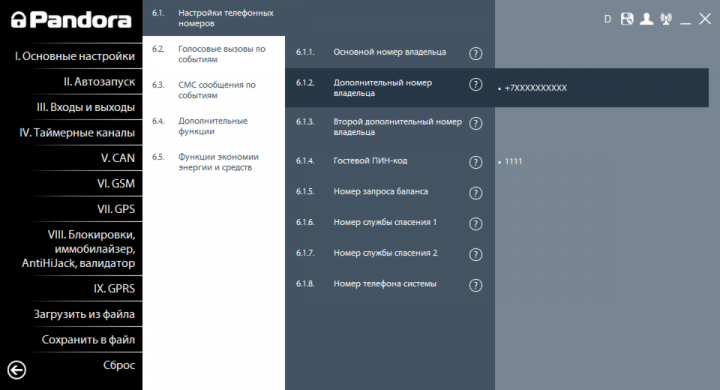
In the Pandora Alarm Studio settings, we need to go to the section VI.GSM / 6.1 Phone Number Settings / 6.1.2 Additional Owner Number. Also, you need to enter a guest PIN code in section 6.1.4.
After all this, save the car alarm configuration and exit programming mode by turning the ignition on and off.
3
Program for automated calling in Python and integration with Alexa
Go to the RPi and create a file power_train_on.py:
tinkster@almalinux:~#
1sudo nano power_train_on.py
Insert the following code into it:
tinkster@almalinux:~#
1import serial2import RPi.GPIO as GPIO3import os, time45GPIO.setmode(GPIO.BOARD)67port = serial.Serial("/dev/ttyAMA0", baudrate=9600, timeout=1) # Establish communication with the GSM module via serial port89port.write(str.encode('AT\r\n')) # Check communication with the GSM module10time.sleep(0.1)1112port.write(str.encode('ATE0\r\n')) # Disable echo from the GSM module13time.sleep(0.1)1415port.write(str.encode('ATD+7XXXXXXXXXX;\r\n')) # Call the security alarm, where 7XXXXXXXXXX; is the phone number of its SIM card.16time.sleep(12)1718port.write(str.encode('AT+VTS="1,1,1,1,#,1,2,3,*"\r\n')) # In DTMF mode, enter the guest PIN code and engine start code19time.sleep(6)2021port.write(str.encode('AT+CHUP\r\n')) # Hang up the call22time.sleep(1)
Save the file.
Next, in the web folder of our Apache server on the RPi, create a file power_train.php and insert the following code into it:
tinkster@almalinux:~#
1<?2if (isset($_POST['code'])) $code = $_POST['code']; else $code = "";34$code_power_train_on = "ViLmwBE4";5$cmd_power_train_on = "/usr/bin/python3 /home/pi/power_train_on.py'";6if ($code == $code_power_train_on) exec($cmd_power_train_on);7?>
Note: In this example, the code comparison structure is shown in a simplified version for clarity. In reality, all my codes as hash values are stored in a database for greater security. Also, the file on the web server must be accessible via the internet. To do this, you need to have a fixed IP address for your home router and set up port forwarding from the router to the RPi.
Next, connect this file to Alexa via the service IFTTT. To avoid repetition, you can read about this in my guide "I am a universal IR remote with Alexa voice control"
Now, a few minutes before leaving home, I just need to say: “Alexa, trigger engine on…” and the engine will start!
Profit! :)
Discussion (0)
No comments yet. Be the first!
Maker
Anton Shagaev
Tashkent, UZ
Anton is the Founding Engineer at Tinkster. He translates industrial reliability into software architecture, ensuring the platform's core is built to last. Anton studied oil and gas engineering in the United States and also holds two honors degrees from Tomsk Polytechnic University.
Related Projects


AI Project Assistant
Tinkster Neural Core
Hi! I am the AI assistant for this project. Ask me any questions about the assembly, code, or components.