intermediateSmart Home & IoT12-Aug-2022
Furniture backlighting on addressable LED strip

Anton Shagaev
Tashkent, UZ
1 day
--
7
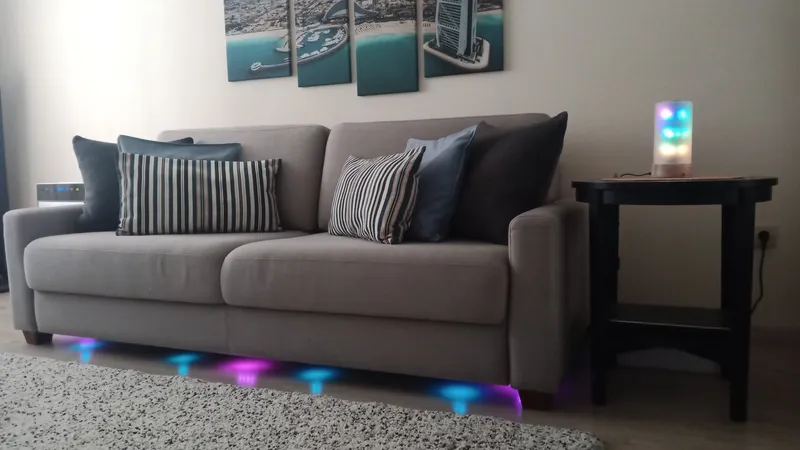
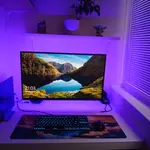
Hello everyone! Today there will be a short instruction on how to implement soft furniture lighting in your home. I am sure that this will add an original touch to the interior of your living room or bedroom. In this example, I implemented lighting under the bottom of a Finnish sofa Torino in the living room, and also connected it to voice control for turning on and off via Yandex Station Max и Home Assistant. All you need is to buy ready-made components on AliExpress, with the exception of decorative corners at the joints of the LED profile, which we will print on a 3D printer.
What you'll need
Materials
- 1 pc
- 1 pc
- 1 pc
- 5 Volt power supply1 pc
- Thermal glue1 pc
- Solder1 pc
- Wires1 pc
- 1 pc
Tools
- Soldering iron1 pc
- Dremel with micro cutting disc1 pc
Steps
1
Cutting of aluminum profile for LED strip
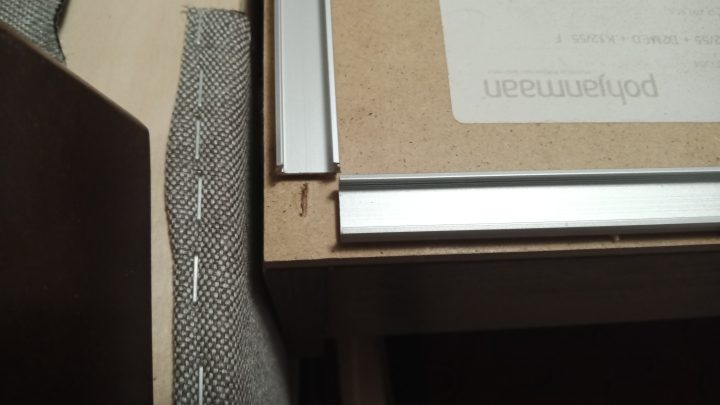
Cutting of aluminum profile for LED strip
If your sofa is placed against a wall, it is better to make the profile shape in the form of the letter U, because the lighting effects will not be visible between the wall and the back of the sofa. Turn the sofa over and measure the length and width of the bottom. Then take a Dremel with a micro-cutting disc and cut the LED strip profile based on the measurements taken. The cut ends of the profile can also be sanded with a micro-cutting disc or a similar abrasive attachment. In terms of length, I made 15mm offsets on the right and left, and in terms of width, I made an offset only on one side, so that the joint of the profiles would look like this:
2
Installation of LED strip profile brackets
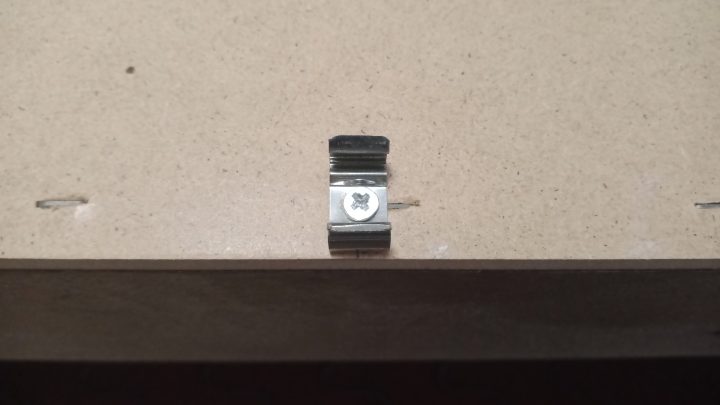
Installation of LED strip profile brackets
Determine the installation locations of the profile brackets. In my case, I set back 10 cm from each edge when installing the outermost brackets, and the number of intermediate brackets will be different for each because this will be determined by the length of the profile. In my case, I installed 4 brackets along the length and 3 along the width.
3
Installation of addressable LED strip in profile and soldering of contacts
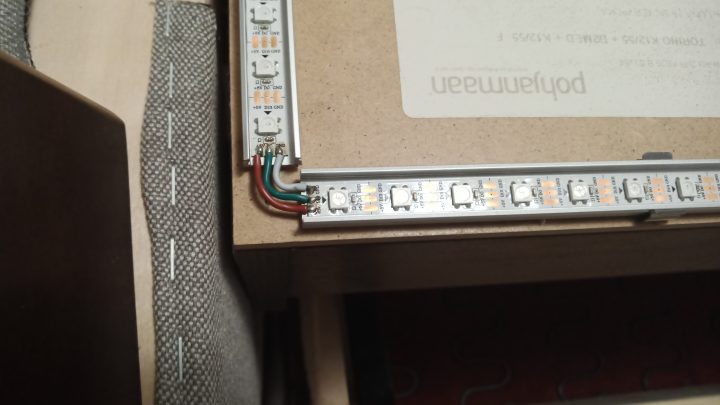
Installation of addressable LED strip in profile and soldering of contacts
First, lay the LED strip in the profile and see where it needs to be cut. Stick the strip into the profile and follow the direction of the arrows indicated on it. Next, take the wires that will go with the strip, cut them to the required length, tin the wires and the strip contacts with a soldering iron, and then solder the wires to the contacts. Also, desolder the connector with wires from the very beginning of the LED strip, carefully thread the wires through the end cap of the LED profile, then solder the wires to the beginning of the LED strip, and reinstall the cap into the profile.
4
3D printing of decorative corners and their installation
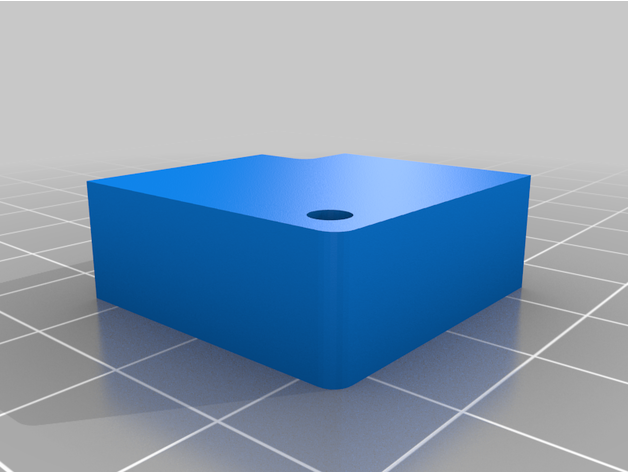
3D printing of decorative corners and their installation
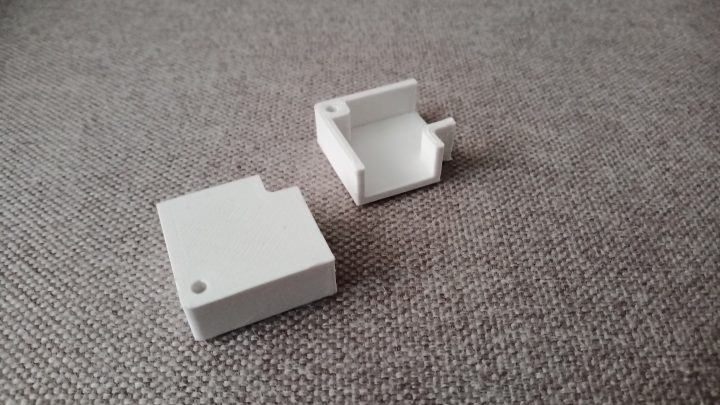
3D printing of decorative corners and their installation
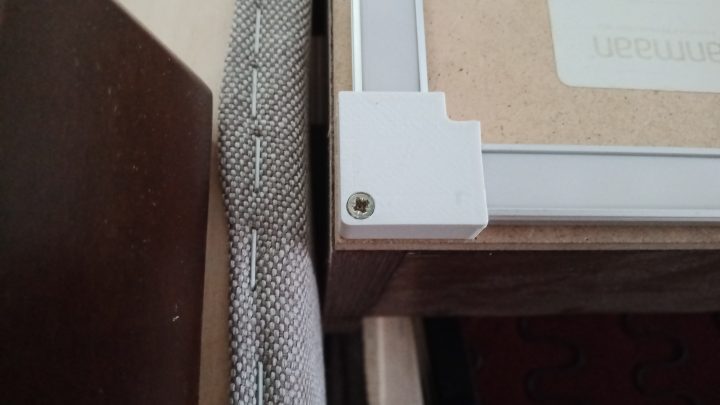
3D printing of decorative corners and their installation
To make the profile joints look professional and to avoid accidentally tearing off the wires under the sofa during cleaning, I designed in AutoCAD and printed these corners, which are attached to the bottom of the sofa at the profile joint with just one screw.
The chamfer for the screw I later made manually using a lever drill press and did not include it in the 3D model, as screw heads will be of different diameters for everyone.
5
Controller installation and cable management of wires
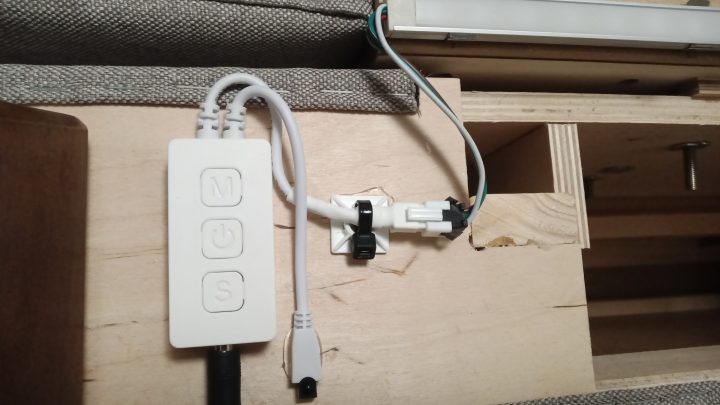
Controller installation and cable management of wires
We attach the LED strip controller with thermal glue near the beginning of the strip, connect the controller to the strip connector, and also arrange part of the wires using a plastic platform and a cable tie, having previously glued the platform to the bottom of the sofa with thermal glue. Finally, we turn the sofa over and connect the controller to the power supply. When calculating Amperage for power supply use formula: strip length * number of LEDs per meter * 0.3 Watt / 5 Volt.
Conclusion
Profit :)
Discussion (0)
No comments yet. Be the first!
Maker
Anton Shagaev
Tashkent, UZ
Anton is the Founding Engineer at Tinkster. He translates industrial reliability into software architecture, ensuring the platform's core is built to last. Anton studied oil and gas engineering in the United States and also holds two honors degrees from Tomsk Polytechnic University.
AI Project Assistant
Tinkster Neural Core
Hi! I am the AI assistant for this project. Ask me any questions about the assembly, code, or components.