OnStep for EQ2 mount
Description
<h1>🚀 EQ2 → OnStep Go-To Mount Conversion</h1>
<p><strong>Русский | English</strong></p>
<hr />
<h2>📖 О проекте / About the Project</h2>
<p><strong>РУС:</strong><br />
Превратите свою механическую монтировку EQ2 в полноценную астро-монтировку с GoTo и автогидом!</p>
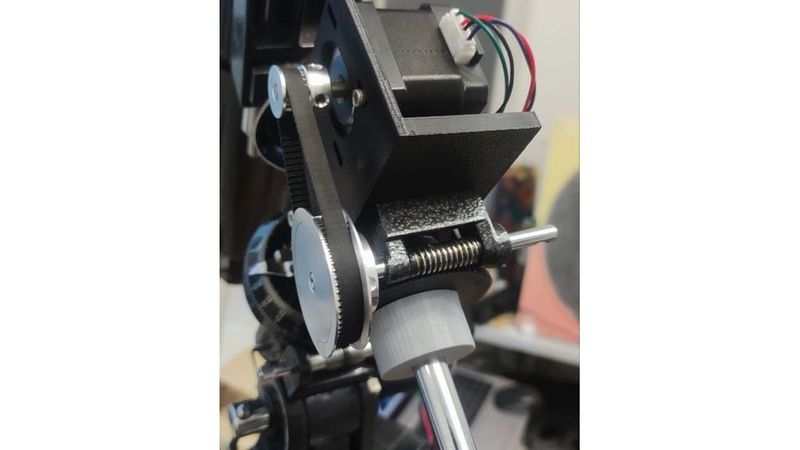
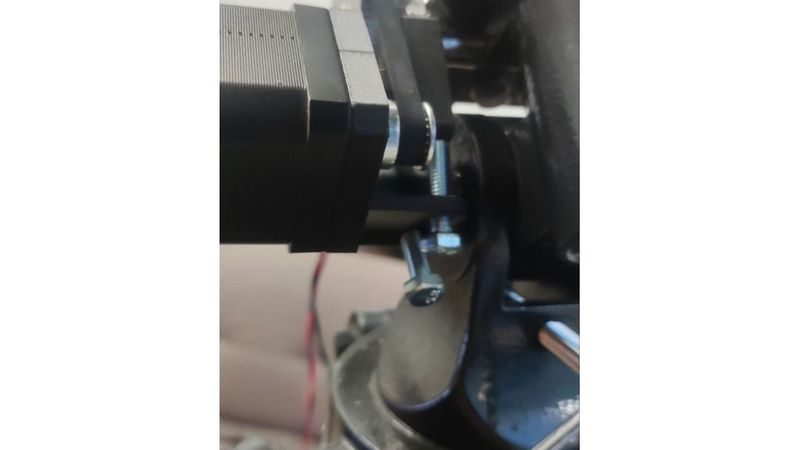
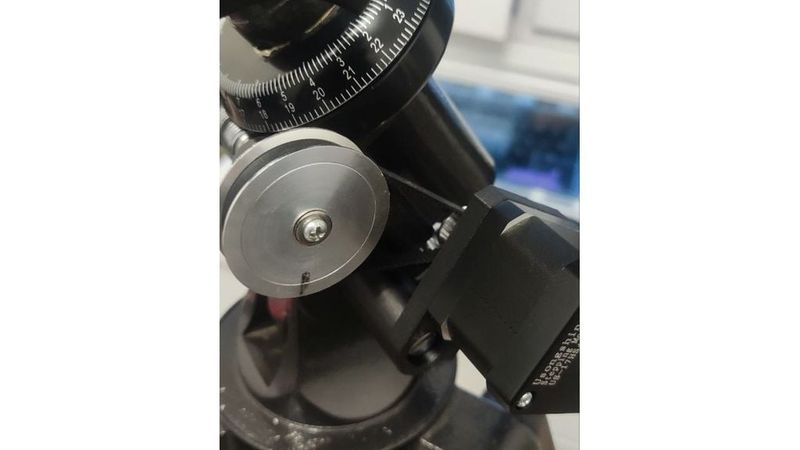
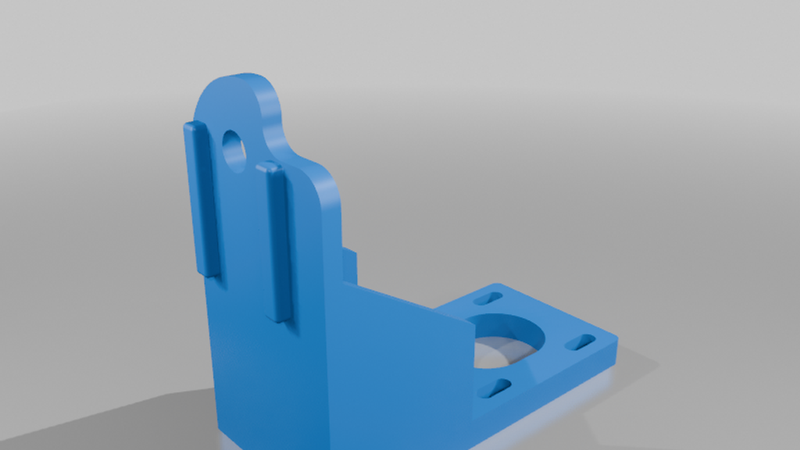
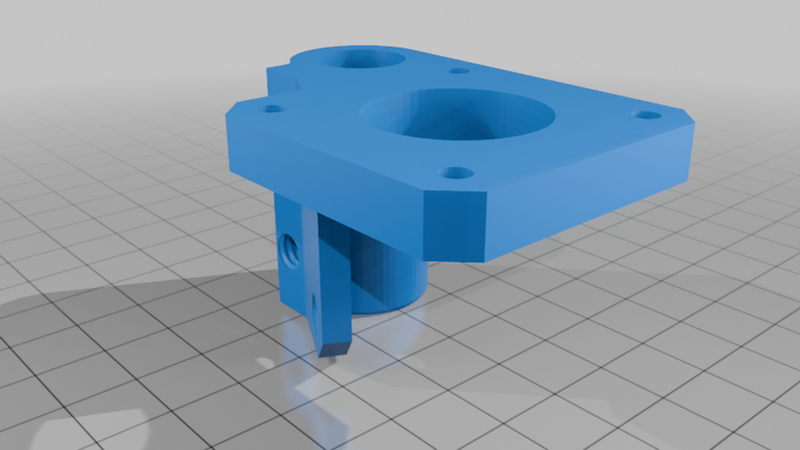
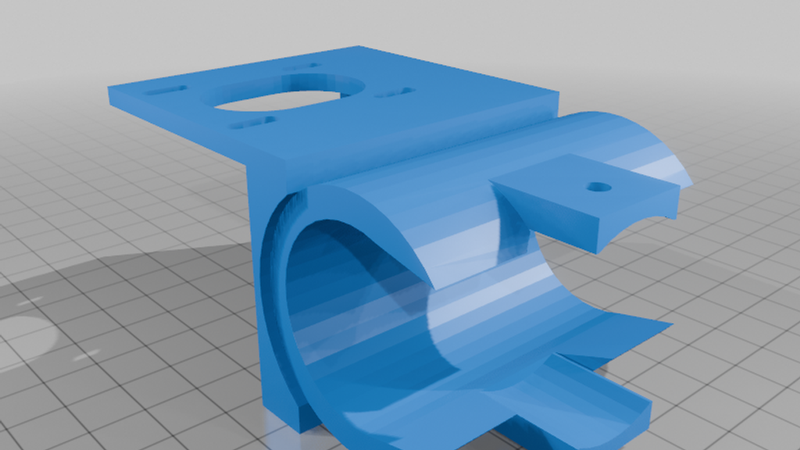
<p>Я долго искал готовое решение для установки OnStep на EQ2, но столкнулся с проблемой: для оси склонения (DEC) в открытом доступе не было внятных чертежей. Поэтому я спроектировал собственный узел привода DEC, используя лучшие наработки сообщества.</p>
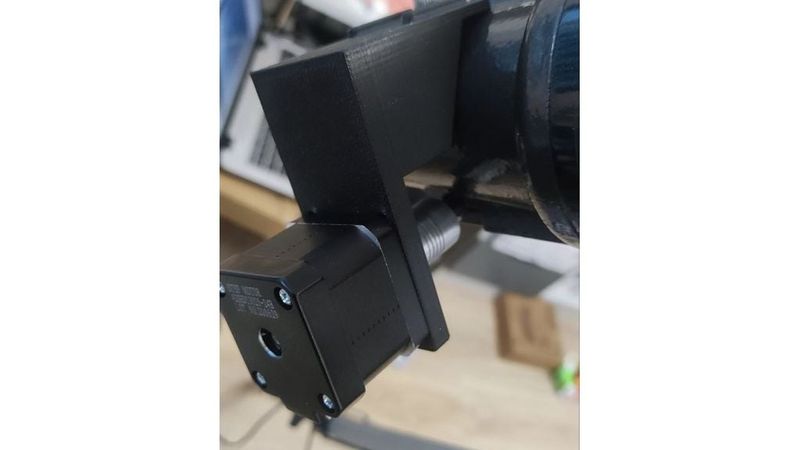
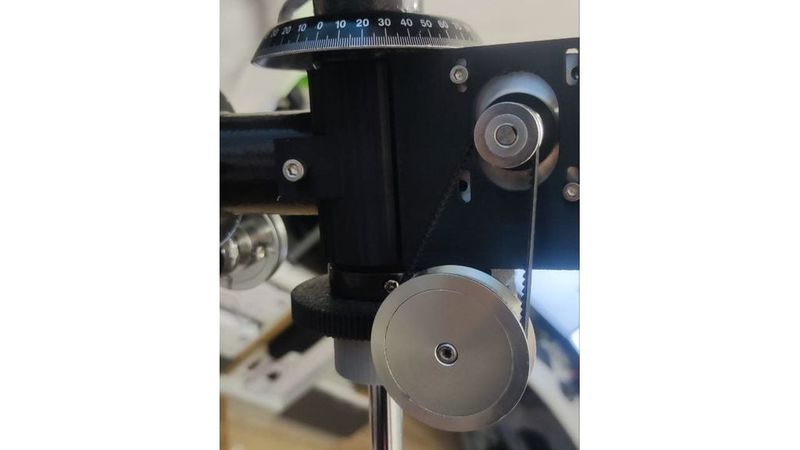
<p>В итоге — полностью рабочая система с тремя осями (RA, DEC и автофокусер).</p>
<p><strong>ENG:</strong><br />
Turn your manual EQ2 mount into a full-featured GoTo astrophotography mount with autoguiding!</p>
<p>I searched everywhere for a ready-made OnStep solution for the EQ2, but there was no decent open-source design for the DEC axis drive. So I designed my own DEC drive unit, building on the best community solutions.</p>
<p>The result is a fully working 3-axis system (RA, DEC, and motorized focuser).</p>
<hr />
<h2>📸 Фото / Photos</h2>
<p><em>(Вставьте сюда свои фотографии готового устройства с разных ракурсов)</em></p>
<hr />
<h2>📋 Список деталей / Bill of Materials (BOM)</h2>
<h3>🔩 Печатные детали / Printed Parts</h3>
<table border="1" cellpadding="5" cellspacing="0">
<tr>
<th>Деталь / Part</th>
<th>Источник / Source</th>
</tr>
<tr>
<td>Ось RA (ведро) / RA drive unit</td>
<td><a href="https://www.thingiverse.com/thing:4816425" target="_blank">tommyent on Thingiverse</a></td>
</tr>
<tr>
<td>Привод фокусера / Focuser drive</td>
<td><a href="https://www.youtube.com/@%D0%92%D0%93%D0%9E%D0%A1%D0%A2%D0%AF%D0%A5%D0%A3%D0%98%D0%9D%D0%96%D0%95%D0%9D%D0%95%D0%A0%D0%90/videos" target="_blank">YouTube: В ГОСТЯХ У ИНЖЕНЕРА</a></td>
</tr>
<tr>
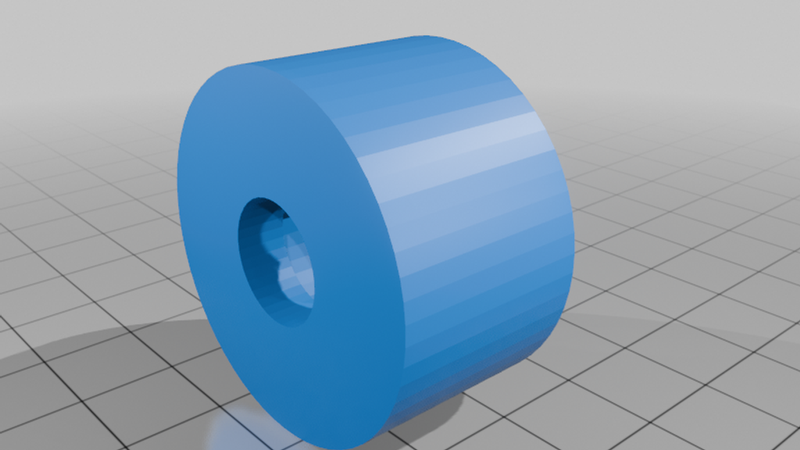
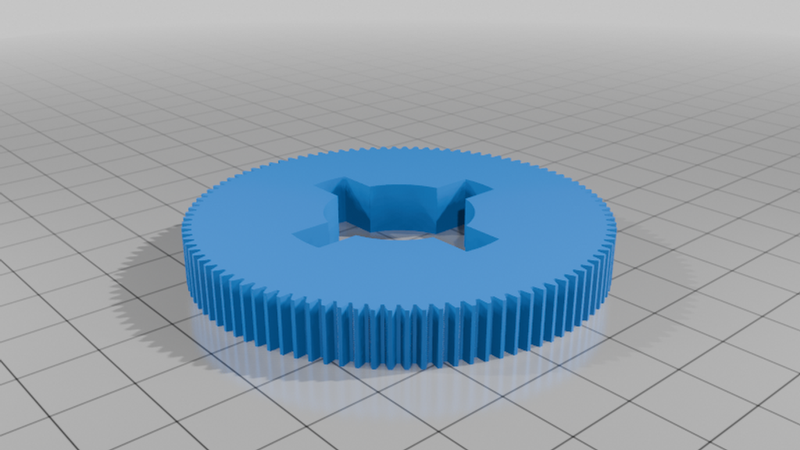
<td><strong>Шестерня DEC / DEC gear</strong></td>
<td><strong>Моя модель / My design</strong> <em>(приложена в файлах)</em></td>
</tr>
</table>
<blockquote>
<p><strong>⚠️ РУС:</strong> Шестерню DEC печатайте ТОЛЬКО из прочного пластика (PETG, ASA, нейлон), минимум <strong>5 наружных слоёв (периметров)</strong>! Нагрузка на неё большая.<br />
<strong>ENG:</strong> Print the DEC gear ONLY from strong filament (PETG, ASA, Nylon) with at least <strong>5 perimeters (outer shells)</strong>! It handles heavy load.</p>
</blockquote>
<h3>⚙️ Механика / Mechanics</h3>
<table border="1" cellpadding="5" cellspacing="0">
<tr>
<th>Количество / Qty</th>
<th>Деталь / Part</th>
<th>Примечание / Note</th>
</tr>
<tr>
<td>3</td>
<td>Двигатели Nema 17 / Nema 17 steppers</td>
<td></td>
</tr>
<tr>
<td>2</td>
<td>Шкив 2GT-20T (ширина 6мм, отверстие 5мм) / Pulley 2GT-20T (6mm width, 5mm bore)</td>
<td>На моторы / For motors</td>
</tr>
<tr>
<td>2</td>
<td>Шкив 2GT-60T (ширина 6мм, отверстие 6мм) / Pulley 2GT-60T (6mm width, 6mm bore)</td>
<td>На валы / For shafts</td>
</tr>
<tr>
<td>2</td>
<td>Ремень 2GT-202mm (ширина 6мм) / Belt 2GT-202mm (6mm width)</td>
<td></td>
</tr>
<tr>
<td>1</td>
<td>Пружинная муфта 9×5 мм / Spring coupling 9×5 mm</td>
<td>Если нашли 8×5 — рассверлите до 9мм / If you only have 8×5 — drill it out to 9mm</td>
</tr>
<tr>
<td>—</td>
<td>Крепёж (винты, гайки, стойки) / Screws, nuts, standoffs</td>
<td>По месту / As needed</td>
</tr>
<tr>
<td>1</td>
<td>Червячный вал RA (от монтировки EQ1) / RA worm shaft (from EQ1 mount)</td>
<td></td>
</tr>
</table>
<h3>💻 Электроника / Electronics</h3>
<table border="1" cellpadding="5" cellspacing="0">
<tr>
<th>Количество / Qty</th>
<th>Деталь / Part</th>
</tr>
<tr>
<td>1</td>
<td>Wemos D1 R32 (ESP32)</td>
</tr>
<tr>
<td>1</td>
<td>CNC Shield V3</td>
</tr>
<tr>
<td>3</td>
<td>TMC2209 драйвер / stepper drivers</td>
</tr>
<tr>
<td>1</td>
<td>Блок питания 24V DC / Power supply 24V DC</td>
</tr>
</table>
<hr />
<h2>🔧 Сборка и настройка / Assembly & Setup</h2>
<h3>Ось DEC / DEC Axis Assembly</h3>
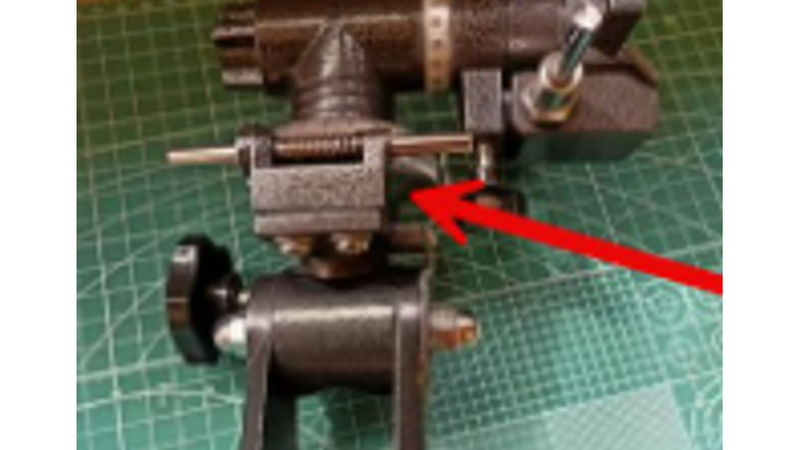
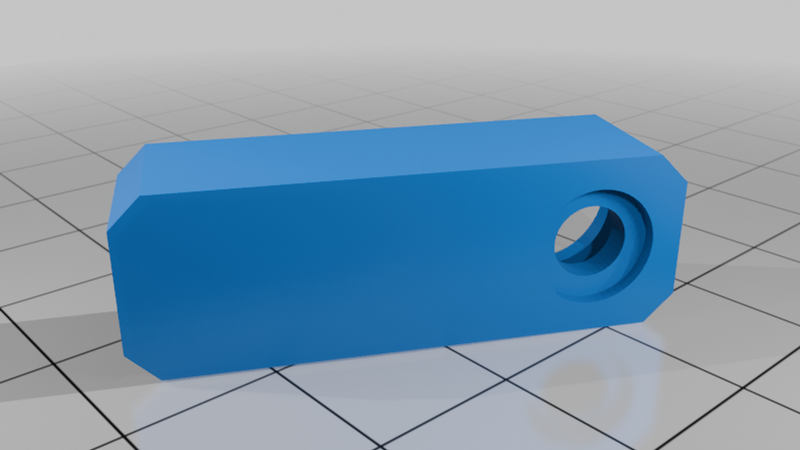
<p><strong>РУС:</strong> Шестерня надевается на гайку оси DEC и фиксируется стаканом, который поджимается штангой противовеса. Убедитесь, что люфт минимален.<br />
<strong>ENG:</strong> The gear fits onto the DEC axis nut and is secured by a cup that is tightened by the counterweight shaft. Make sure the backlash is minimal.</p>
<h3>🧩 Джамперы на CNC Shield / CNC Shield Jumpers</h3>
<p><strong>РУС:</strong></p>
<ol>
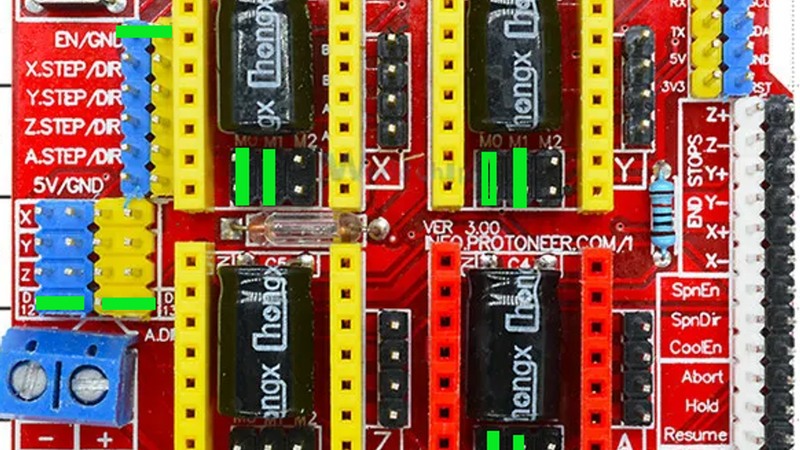
<li><strong>Обязательно</strong> установите перемычку <strong>ENABLE</strong> (рядом с разъёмом питания). Она подаёт общий сигнал разрешения на все драйверы — без неё ничего не запустится.</li>
<li>Под <strong>ВСЕМИ</strong> драйверами установите перемычки на контакты <strong>M0 и M1</strong> (для выбора микрошага).</li>
<li>Для активации оси фокусера (Axis A) замкните <strong>две перемычки</strong> в колодке дублирования осей на CNC Shield (колодка расположена отдельно на плате). Это соединяет пины A.STP и A.DIR с выводами D12 и D13 контроллера, позволяя использовать ось A как полноценную четвёртую ось.</li>
</ol>
<p><strong>ENG:</strong></p>
<ol>
<li><strong>Must do:</strong> Place the jumper on <strong>ENABLE</strong> (near the power connector). It provides the master enable signal to all drivers — nothing works without it.</li>
<li>Under <strong>ALL</strong> drivers, place jumpers on <strong>M0 and M1</strong> pins (for microstepping selection).</li>
<li>To activate the focuser axis (Axis A), close the <strong>two jumpers</strong> in the axis duplication header block on the CNC Shield (this block is located separately on the board). This connects the A.STP and A.DIR pins to the D12 and D13 pins of the controller, allowing you to use Axis A as a full fourth axis.</li>
</ol>
<h3>⚡ Напряжение Vref (без UART) / Vref Voltage (no UART)</h3>
<p><strong>РУС:</strong> Так как UART в этой сборке не работает — выставляйте напряжение мультиметром на потенциометрах драйверов:<br />
<strong>ENG:</strong> Since UART is not working in this build — set the voltage with a multimeter on the driver potentiometers:</p>
<table border="1" cellpadding="5" cellspacing="0">
<tr>
<th>Ось / Axis</th>
<th>Напряжение / Voltage</th>
</tr>
<tr>
<td>RA (прямое восхождение / Right Ascension)</td>
<td>0.65 – 0.70 V</td>
</tr>
<tr>
<td>DEC (склонение / Declination)</td>
<td>≈ 0.60 V</td>
</tr>
<tr>
<td>Focuser (фокусер)</td>
<td>≈ 0.45 V</td>
</tr>
</table>
<h3>📡 Прошивка и WiFi / Firmware & WiFi</h3>
<p><strong>РУС:</strong> В прошивке включен веб-интерфейс.</p>
<ul>
<li>Точка доступа / AP: <strong>OnStep</strong></li>
<li>Пароль / Password: <strong>password</strong></li>
</ul>
<blockquote>
<p><strong>⚠️ ВАЖНО / IMPORTANT:</strong><br />
<strong>РУС:</strong> У меня WiFi стабильно работает ТОЛЬКО при подаче питания 5В через USB-порт Wemos (возможно, баг или особенность моей конкретной платы). Если у вас заработает без USB — напишите в комментариях.<br />
<strong>ENG:</strong> On my board, WiFi works reliably ONLY when 5V power is supplied via the Wemos USB port (might be a bug or a quirk of my specific board). If yours works without USB — please let me know in the comments.</p>
</blockquote>
<hr />
<h2>🛠️ Известные проблемы / Known Issues</h2>
<table border="1" cellpadding="5" cellspacing="0">
<tr>
<th>Проблема / Issue</th>
<th>Статус / Status</th>
</tr>
<tr>
<td>UART на TMC2209 не работает / UART on TMC2209 not working</td>
<td>❌ Не решено / Unsolved</td>
</tr>
<tr>
<td>WiFi требует USB-питания / WiFi requires USB power</td>
<td>⚠️ Баг платы (?) / Board bug (?)</td>
</tr>
</table>
<p><strong>РУС:</strong> Если у вас получится реализовать UART — напишите в комментариях, я обновлю описание!<br />
<strong>ENG:</strong> If you manage to get UART working — please comment below, I'll update the guide!</p>
<hr />
<h2>🔧 Возможные доработки / Possible Upgrades</h2>
<p><strong>РУС:</strong></p>
<ul>
<li>Рекомендую установить радиаторы на <strong>все три</strong> драйвера TMC2209 (у меня они стоят на всех трёх). Особенно это актуально для оси RA — она работает практически непрерывно во время ведения.</li>
<li>Если захотите расширить функциональность — можно добавить датчик температуры, энкодеры или GPS-модуль для точного времени и координат.</li>
</ul>
<p><strong>ENG:</strong></p>
<ul>
<li>I recommend installing heatsinks on <strong>all three</strong> TMC2209 drivers (I have them installed on all three). This is especially important for the RA axis, which runs almost continuously during tracking.</li>
<li>If you want to expand the functionality — you can add a temperature sensor, encoders, or a GPS module for precise time and location data.</li>
</ul>
<hr />
<h2>🙏 Благодарности / Credits</h2>
<ul>
<li><strong>tommyent</strong> — за основу оси RA / for the RA drive base</li>
<li><strong>В ГОСТЯХ У ИНЖЕНЕРА</strong> — за идею привода фокусера / for the focuser drive idea</li>
</ul>
<hr />
<p><strong>РУС:</strong> Удачи в сборке! Ясного неба! 🌌<br />
<strong>ENG:</strong> Good luck with your build! Clear skies! 🌌</p>
<p><em>Если есть вопросы — пишите в комментариях! / Feel free to ask in the comments!</em></p>
<hr />
<h2>📎 Приложенные файлы / Attached Files</h2>
<ul>
<li>STL-модели / STL models</li>
<li>STEP-файлы (для модификации) / STEP files (for modifications)</li>
</ul>