Parametric electronic enclosure. Custom size and mounting options
Description
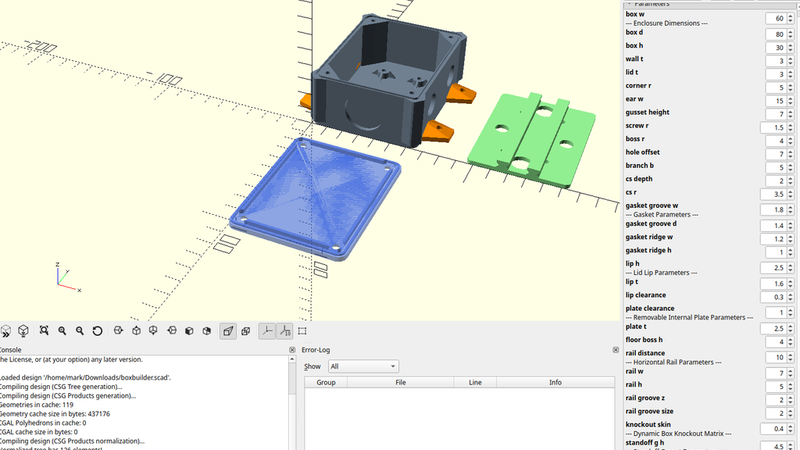
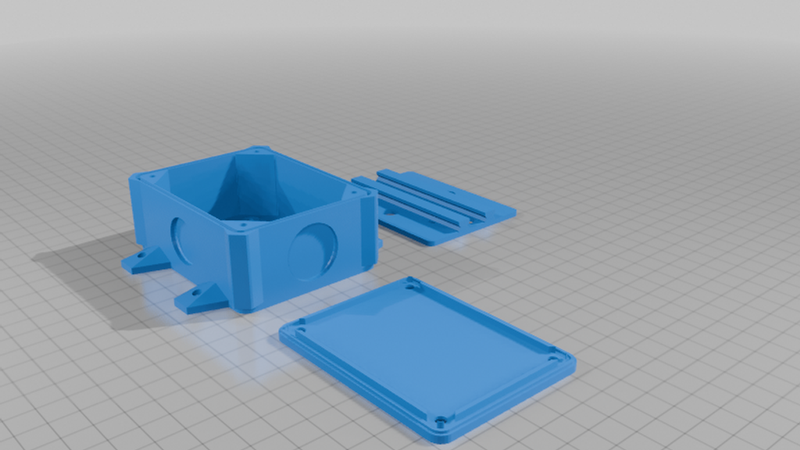
Heavy-Duty Waterproof Utility Enclosure with Internal PCB Mounting Plate
A highly optimized, professional-grade utility enclosure designed for demanding electronics and automation projects. This model features an integrated tongue-and-groove gasket system for moisture sealing, external mounting ears with countersunk screw holes, and internal structural features designed for flexible component mounting.
The design includes a removable inner plate equipped with integrated guide rails (featuring double-sided V-grooves) to slide a custom PCB or internal module into place, alongside strategic wire pass-through holes.
Key Features & Design Technicalities
- Moisture Resistance: Engineered with a continuous mating gasket system. The box rim features a `1.8mm x 1.4mm` groove to accommodate a TPU filament seal, paired with a matching compression ridge on the lid.
- Removable Internal Plate: Features a custom internal component mount `(p_w x p_d)` with built-in wire pass-through channels and pre-spaced alignment holes matching the reinforced floor bosses.
- Vertical / Horizontal PCB Rails: Features dual structural rail walls equipped with `2mm` V-grooves designed to securely lock a slider plate or custom circuit board vertically into place.
- Dynamic Knockouts: Four thin-skin `(0.4mm)` cylindrical wall areas are pre-rendered into the main body sides, allowing you to easily punch out custom openings for cable glands or connectors without compromising the default structural integrity.
- Reinforced Corner Bosses: Structural lid screw points are flared into the main enclosure walls using continuous branch fillets to prevent layer separation under fastening torque.
Hardware Bill of Materials (BOM)
Fasteners & Hardware
- Lid Screws: 4x M3 Screws (Shank clearance: 3mm, length depending on deployment).
- Enclosure Mounting: 4x M3 Countersunk Screws for the external mounting ears.
- Internal Plate Screws: 4x small M3 self-tapping screws or machine screws to anchor the plate into the structural floor bosses.
Gasket Material
- O-Ring Seal: A segment of 1.75mm TPU flexible filament works perfectly as a dynamic press-fit gasket when squeezed inside the perimeter channel.
3D Printing Guidelines
- Filament Choice: - Enclosure / Lid / Plate: PETG or ABS is highly recommended for industrial layouts, environmental stability, and dynamic snap/screw tolerances. Rigid PLA can be used for general indoor applications.
- Gasket (Optional): TPU/Flex for a true water-resistant seal.
- Infill: 25% to 35% Grid or Gyroid. Solid perimeters are more important than heavy infill for this structural style.
- Walls / Perimeters: Minimum of 4 vertical perimeters. This is critical to ensure the `3mm` walls are entirely solid and the `0.4mm` knockout skins slice accurately without gaps.
- Supports: No supports required. All overhanging geometries, including the countersinks, lid alignment lips, and gear-style gussets, are optimized for native bridging.
Assembly Instructions
1. Clean the Knockouts: If your wiring requires side exits, select the appropriate knockout locations on the main chassis and use a punch tool or drill bit to cleanly clear away the `0.4mm` thin-walled plastic windows.
2. Install the Internal Plate: Slide or position your internal components onto the plate. If using a PCB, mount it vertically using the V-groove guide rails. Pass the necessary wiring through the dedicated plate ports, then anchor the plate securely to the floor bosses using your internal M3 screws.
3. Insert the Perimeter Gasket: Press a cut length of 1.75mm TPU filament cleanly into the continuous `1.8mm` rim groove on the box body. Trim the filament flush so the ends meet tightly.
4. Fasten the Lid: Align the inner alignment lip of the lid with the inner box walls. The compression tongue will compress onto your TPU seal. Secure using 4x countersunk M3 screws through the top corner positions. Do not overtighten.