Nautinect Autopilot Enclosure


Description
Credit to https://www.thingiverse.com/thing:6477111 for providing the ESP32 expansion board base that I added in.
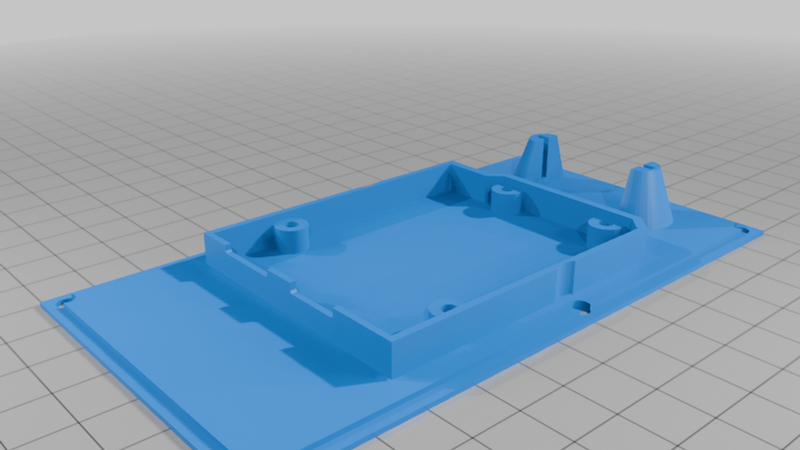
This is for a DIY Nautinect Autopilot build enclosure. It has mounting locations for the ESP32 + expansion board, the radio module (with antenna opening), the motor driver, and the compass module. The ESP32 mounts to the base, along with the radio module. The motor driver and compass mount to the cover, with the motor driver's heatsink popping out of the top, which should probably be sealed with some sort of caulking.
I used M3 screws to put everything together. The 3rd STL file is for 4 nuts that I used to mount the motor driver to the cover. Not necessary if you have M3 nuts. After printing, I was able to tap the holes with an M3 screws themselves. Lubricant helps a bit, especially if using a drill to tap the base to cover mounts. Take your time, as the heat build-up began melting the PETG if I drove the M3 bolt in and then took it out immediately after. It would come out covered in plastic. Instead I used different bolts, drove each in, and then waited for everything to cool off before removing them.
My only issue so far was the radio module not picking up the remote, even with the antenna outside of the enclosure. It ended up being interference from the radio module cables closely running past the ESP32. I looped my extra wiring around the radio module itself and have had great remote distance ever since (with enclosure closed). I figured the compass proximity to motor driver might be an issue, which is why I ran the power cables all through the opposite end, and after calibration haven't had problems.