Interactive Under-Desk Pi Pico Setup

Description
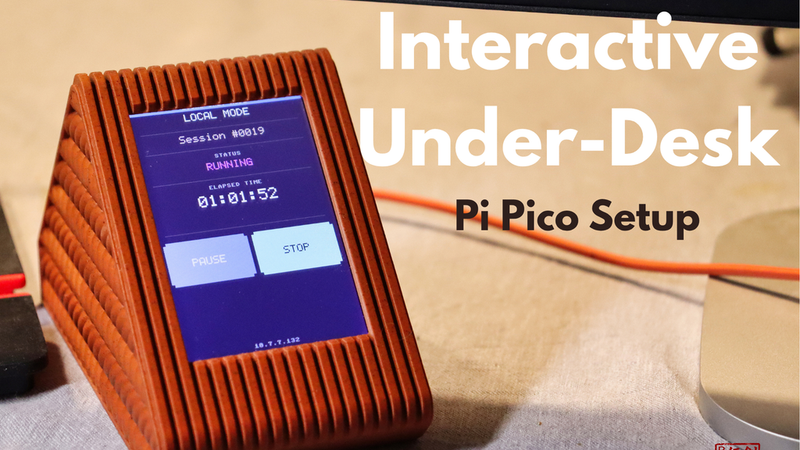
Upgrade your workspace with a sleek, modern desktop companion designed to fit perfectly under your monitor. This standalone interactive device connects over Wi-Fi to log your tasks to Toggl Track in real time. Plus, it's open for customization—write your own code or load custom software to completely personalize your experience.
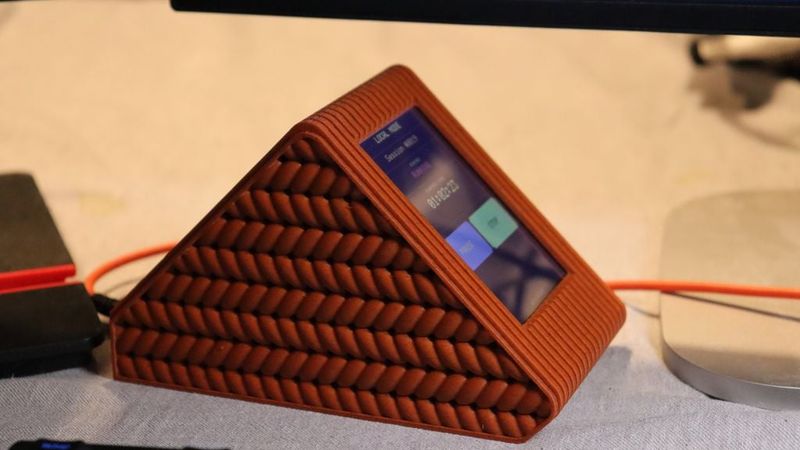
Featuring a premium, minimalist design with a signature striated/knitted texture, it blends effortlessly into any modern clean-desk setup.
✨ Features
Clean & Modern Aesthetic: Beautiful knitted/striated texture profile with a perfectly angled display for visibility.
100% Screwless Assembly: Everything snaps together snugly—no hardware needed besides your electronics.
Compact Footprint: Low-profile design made to sit neatly beneath your screen.
Fully Standalone: Powered by a Raspberry Pi Pico
🛠️ Hardware Required
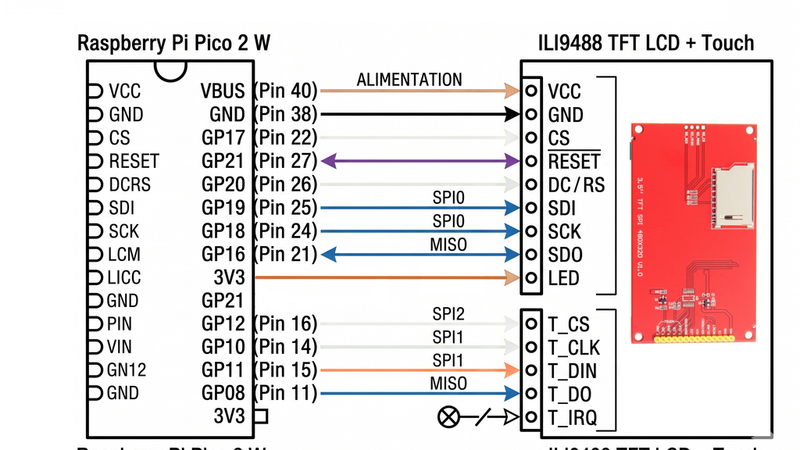
1x Microcontroller: Raspberry Pi Pico 2W (I used a RPi Pico with male pin headers to connect the Dupont jumper wires, but you can also solder the wires directly to the board if you prefer)
1x Display + Touch: ILI9488 3.5" TFT LCD Display with Touch (ILI9488 driver + XPT2046 touch controller)
13x Dupont Line: Female-Female and Male-Female (Minimal)
1x Connectivity: Micro-USB
🚀 Print Settings
Supports: Minimal tree supports
Infill: 10% Gyroid.
For assembly:
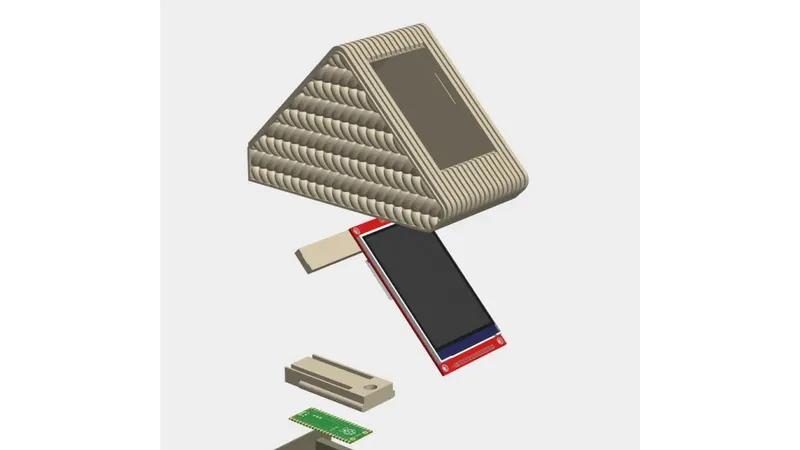
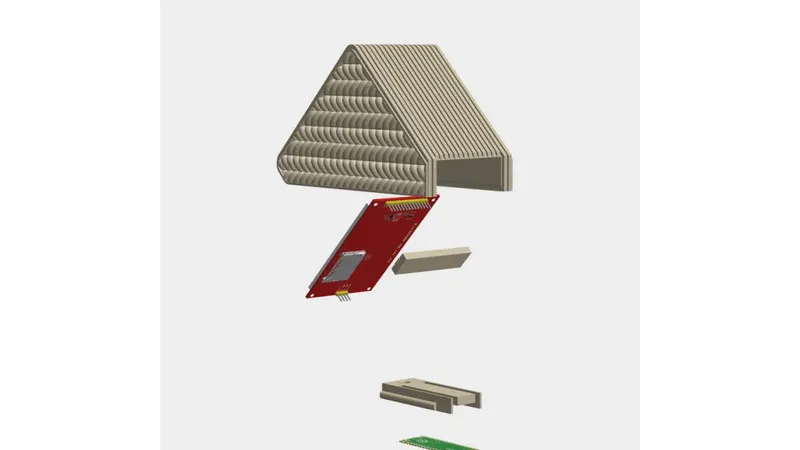
- Place your Pico onto the bottom cover and slide the clip into place. Make sure your Micro-USB port remains accessible when your cable is plugged in.
- Insert the screen into its slot. Gently press the clip onto the clear area at the back of the LCD (where there are no soldered components). Do not push too hard, as excessive pressure can cause the resistive touchscreen to malfunction.
- Push (not slide) the bottom into the main part.
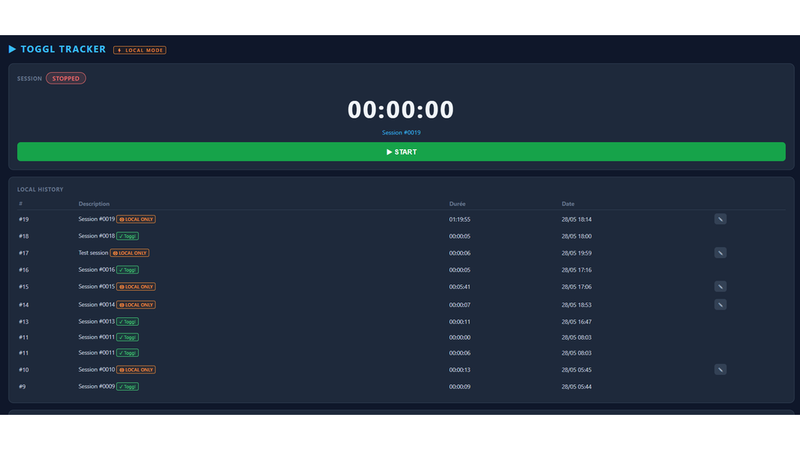
For this development project, I created a physical dashboard for Toggl. It uses the Toggl API to start, pause, and stop a live time tracker, which syncs instantly with my web-based Toggl dashboard. I use this to track my working hours since I bill my clients based on time.
The device sits right under my monitor so I never forget to start a timer when I begin working, and it allows me to view my current tracking status at a glance. I have shared my MicroPython code below (I recommend using Thonny to edit and upload the files to the Pi Pico).
To configure the software, you have third choices:
- Upload the three files and boot. You can then edit all parameters in the settings menu, though you will have to use a T9 keyboard.
- Upload the three files and boot, then edit the config.json file. You can find this file within the internal storage and edit it directly on your PC
- Upload the three files and boot the device. Configure the Wi-Fi connection to get the device online. Access the Pico's IP address in your web browser. Apply your API configuration via the web interface.
Release Updates
Hardware:
Version 3.1: Early Release ( Patreon Only)
Version 3.2: Minimal Fix
Software:
Version 2.0.0: Early Release (WIP - Patreon Only)
Version 2.0.2: Fixed the "Apply" settings bug and added a network check to block access if offline.
Version 2.1.2: Added a web page for settings and history tracking.
Version 2.2.2: Full Local Mode Option