Tripod Mount Lower Energy BB Trap for Daisy 499B

Description
WARNING & SAFETY LIMITS
The Daisy 499B is a very low velocity BB gun (rated at 240 fps).
DO NOT ATTEMPT TO USE WITH OTHER BB GUNS OR AIR RIFLES, THEY WILL MOST LIKELY PENETRATE THE ENTIRE TRAP. EVEN SOME AIRSOFT GUNS COULD LIKELY PENETRATE THIS TRAP. ALWAYS WEAR SAFETY GLASSES WHEN USING.
*
Overview
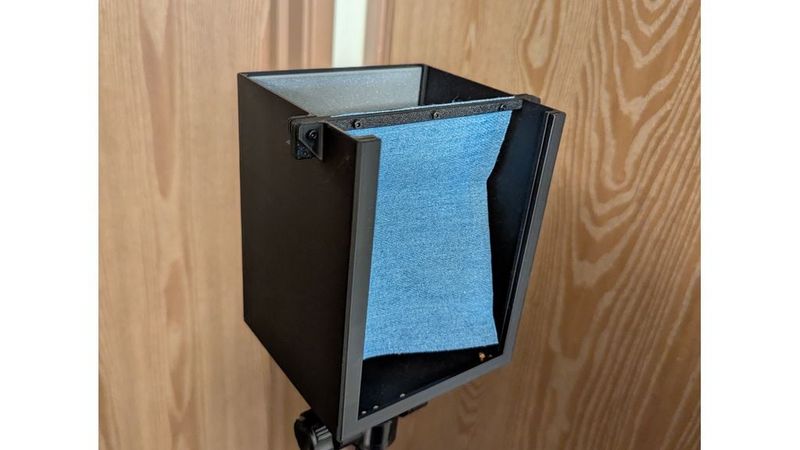
This is a BB trap designed specifically for the Daisy 499B. It is designed to mount to a standard tripod. I like to shoot in my apartment but all of the so called BB traps that I could find online were really just pellet traps and the BB’s would bounce out of them frequently. Although they did not have a lot of energy when they bounced out I did get tired of cleaning up the BB’s that were all over the floor. Additionally, this trap is very compact (easily printable on a small print bed), unlike many of the other traps I have seen.
This trap uses a cloth curtain to drop the energy of the BB and a TPU pad in the back to stop it. The TPU pad is really just there for insurance as the BB’s really don’t seem to damage the back even if it is just bare PLA. I would recommend printing the TPU pad but if you are not able to print TPU then a PLA plate would probably work fine.
There is a groove in the front for targets to drop in and it is sized for quarter sheets of 8.5 x 11 paper. You can fit six TQ-40 targets on a single 1/4 sheet if you only go to the 7 ring and have them all touch at the edges. This still leaves a comfortable margin for a BB gun as accurate as the 499B assuming you are only shooting at the standard 5 meters.
I have decided not to post the targets nor the template that I used for the curtains as they were generated with AI and I am marking this project as not AI designed, but it is very easy to get Gemini to create a template for the curtains as well as the target paper as shown in the picture. No AI was used in the design of the trap itself nor is it needed for the curtains or the targets as any target on a 1/4 sheet of paper will work and the curtain is just a square of fabric 134mm x 100mm. If nobody is opposed to me posting the AI generated target and curtain templates then I might do so later.
I did a lot of testing with it and I had no issues with bounce out or back wall penetration with the final version. You will need some 2mm x 10mm screws and nuts as well as some cloth for the curtain. I have tried both duck cloth and denim iron on patch material and both worked okay. The duck cloth started to fray badly but the patch material holds up a lot better due to the iron on coating on the back. You will also need a 1/4” nut for the tripod mount.
If you are using a lighter weight curtain you may want to run a rubber band over the top to hold the lid in place. The lid is required for proper function as without it the curtain will flip up over the hanger when hit with a BB.
Noise
I know this ends up being a concern for a lot of airgunners so here are my findings. This is louder than the average duct seal trap. If you have very thin walls it will probably be noticeable to your neighbors. I usually only shoot about 6 shots at a time before taking a break for 30 minutes to an hour so I am not very concerned about the noise but if I were to just fire shot after shot for an hour straight there might be complaints.
The type of curtain used makes a big difference in the noise level. I would say it is about 25% louder when using the patch material instead of the duck cloth. Since the back is capable of stopping a BB even without a curtain (as long as you are using a TPU pad) there is no harm in trying other materials. Just remember that you might get ricochets if the cloth does not drain enough of the BB’s energy.
*
Design Process & Iterations
* Version 1: Version one was much larger than it needed to be. I originally was worried about the BB’s penetrating the trap so the first version had 4mm thick walls and grooves to hang three curtains. The issue with this first revision was that the curtains kept popping out so I had to reset them after every shot. I did find that it was perfectly capable of stopping a BB though. Due to the 4mm thick walls and the overall size this took very long to print and used a lot of filament.
* Version 2: After seeing how well V1 worked it seemed I did not need the trap to be so large or so thick so I moved to a 2mm wall instead of the 4mm. I also shortened the box and added a thick lip around the top to stabilize the curtains to try and prevent them from flying out on each shot. This revision did not solve the issue though. The curtains were still capable of bouncing out but it still stopped the BB’s without issue. Fortunately these changes drastically reduced the print time though.
* Version 3: This version was the same size as V2 but this time I removed the thick lip and instead added ears and extended the curtain rods out. I then made holes that a piece of filament could pass through to lock the curtains in place. This stopped the curtains from bouncing out each time but it introduced a new problem. Now the curtains were bunching up with each other and causing gaps in the trap where BB’s could bypass the curtains. This was the first and only time I damaged a trap. A BB struck the back directly but did not penetrate, it just left a crack.
* Version 4: After seeing that the BB still did not penetrate the box even after a direct hit I decided that I probably only needed one curtain. This took care of the issue with the curtains bunching up with each other and also allowed me to shorten the trap a bit more. This one really had no issues aside from quality of life things.
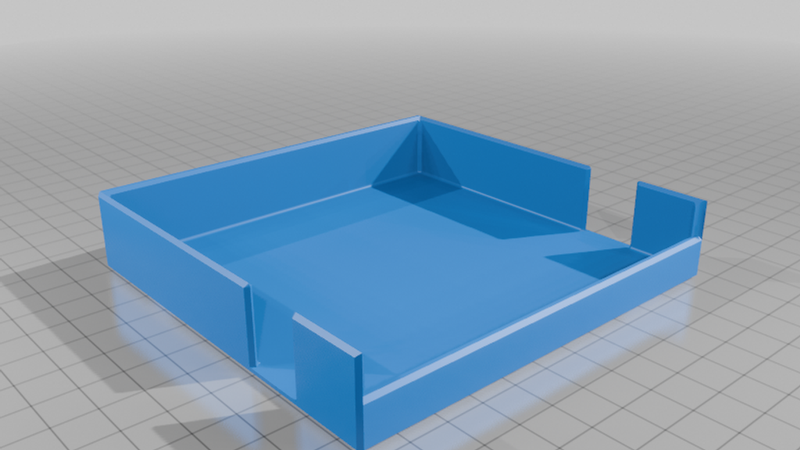
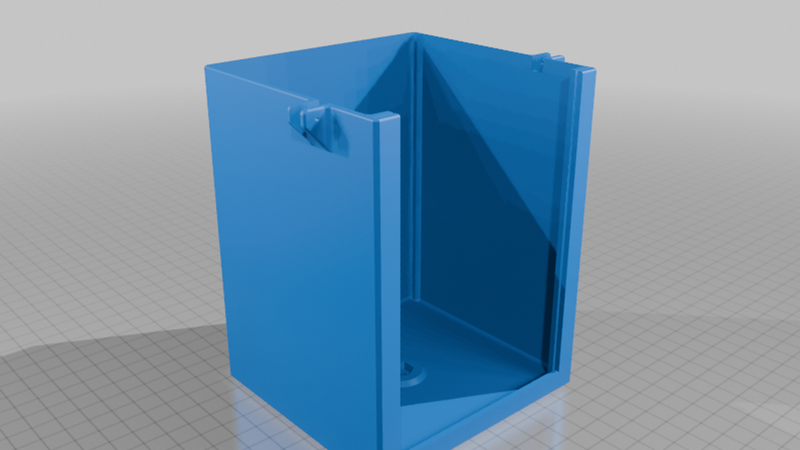
* Version 5 (Final Form): For the final version I have ramped the groove at the bottom for the target to make it easier to get the bottom of the target paper to drop in. I also added a slot in the back to accept a 2mm pad.
*
Hardware Summary Bill of Materials
* Curtain Fabric: Heavy cloth cut to 134mm x 100mm (Denim iron-on patch material highly recommended).
* Screws: 2mm x 10mm screws and matching nuts for the curtain hanger (Quantity: 5).
* Tripod Mount: Standard 1/4” hex nut.
* Optional: A standard rubber band to tame lid bounce.
*
Printing
* Enclosure: Print the enclosure. Default slicer settings should be fine but if you are getting infill in the wall then increase the perimeters. Infill in the floor is okay but the back wall should be solid.
* Hangers: Print two of the hangers with the dimples up.
* Lid: Print the lid. Straight forward here. Any settings work. This is not a structural part.
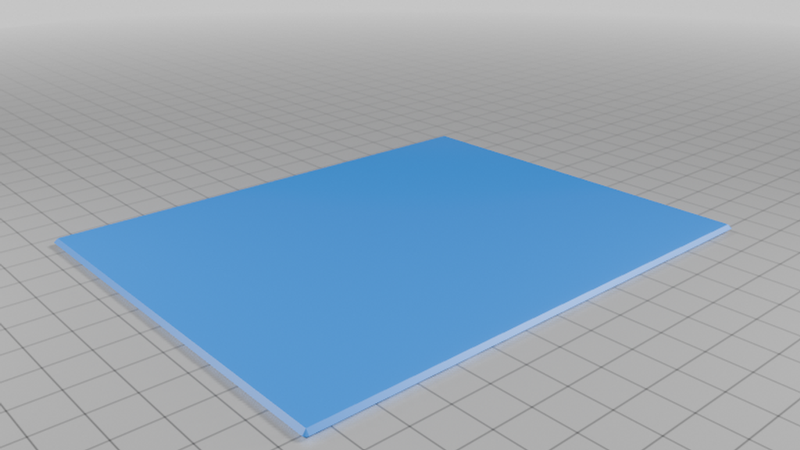
* Backstop: Print the backstop. This should be printed solid from solid TPU if possible but any other solid filament should work.
*
Assembly
1. Insert a 1/4” hex nut into the cavity in the bottom of the enclosure.
2. Cut your 134mm by 100mm curtain.
3. Lay one of your hangers down with the dimples facing up and align the edge of the curtain with the top of the hanger. Place the other hanger, dimple side down over the top and hold firmly. Insert the 2mm screws with nuts on the other side. They should be able to penetrate the cloth fairly easily even without punching it out. The hangers will interlock when placed face to face. The ears of the hanger should be facing down.
4. Insert the assembled hanger and curtain into the slots in the top of the enclosure and insert 2mm screws through the holes in the ears to lock the curtains down. Optionally you can slightly enlarge these holes and use a piece of filament instead.
5. Attach the tripod mount to the bottom of the trap and lock the trap down to the tripod.
6. Insert the backstop pad into the groove in the back of the enclosure.
7. Insert a 1/4 sheet target into the slot in the front.
8. Place lid on top and secure with a rubber band if desired.
9. Pew!