Tomat'O-Clock | Pi Pico-powered alarm clock


Description
Pico 2 W-powered alarm clock
Meet Tomat’O-Clock, a cute and smart tomato-shaped connected alarm clock! Powered by a Raspberry Pi Pico 2 W, this project features a touch screen, a web interface, and a fun mechanical twist.
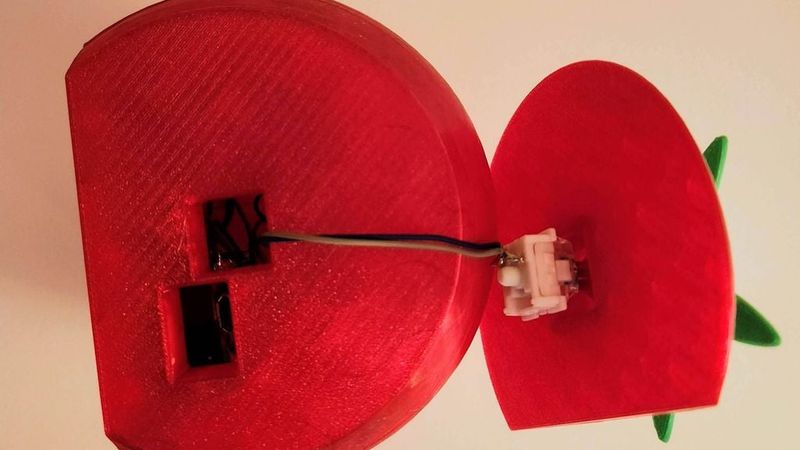
The tomato's stem is an actual mechanical keyboard switch used as the "Snooze" button.
🛠 Bill of Materials (BOM)
* Microcontroller: Raspberry Pi Pico 2 W (A classic Pico W should also work).
* Display: Waveshare Pico ResTouch LCD 2.8". The Pico plugs directly into the back.
* Touch Sensor: TTP223 Capacitive Touch Module. Hidden behind the front bezel to dismiss alarms with a tap.
* Snooze Button: Any mechanical keyboard switch of your choice.
* Sound: A standard passive buzzer.
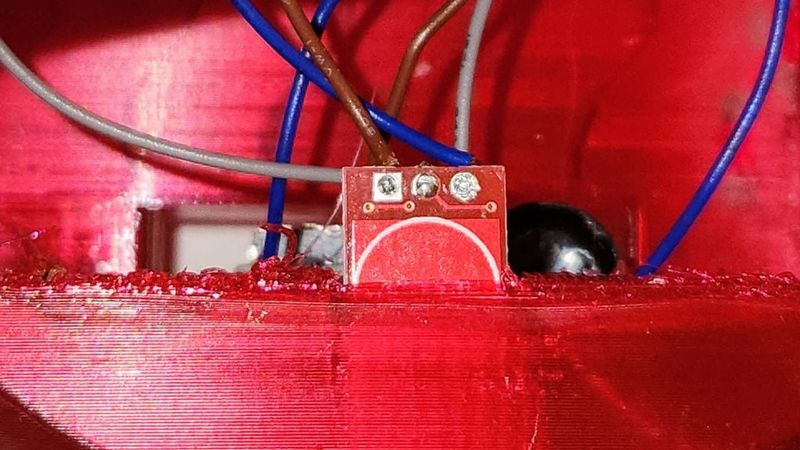
* Power: A basic 4-pin Type-C USB breakout board.
* Hardware (Optional): M3 threaded inserts and M3 screws for the backplate.
* Misc: Flexible wires, soldering iron, and glue.
🔌 Wiring Guide
The Pico is embedded directly into the back of the screen. Solder your wires to the Pico pins or the screen's exposed pads.
| Component | Pico Pin | Notes |
| --- | --- | --- |
| TTP223 Sensor (Dismiss) | GP0 | Signal pin |
| Keyboard Switch (Snooze) | GP1 + GND | Uses internal INPUT_PULLUP |
| Passive Buzzer | GP14 | Positive/Signal pin |
| USB-C Port | VBUS + GND | Power input |
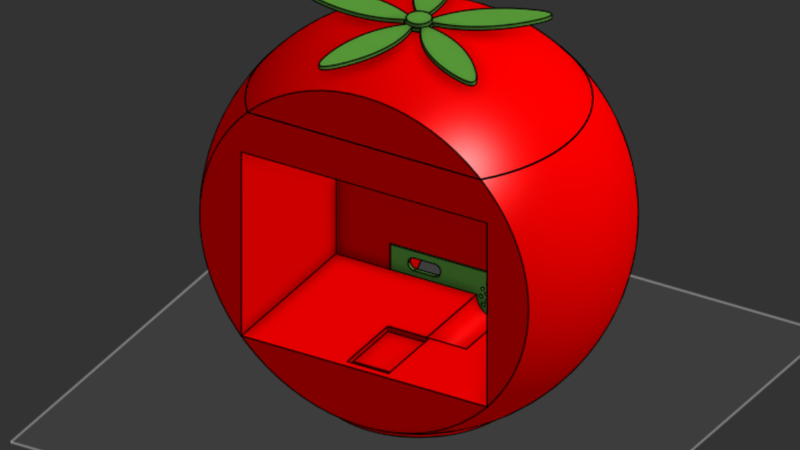
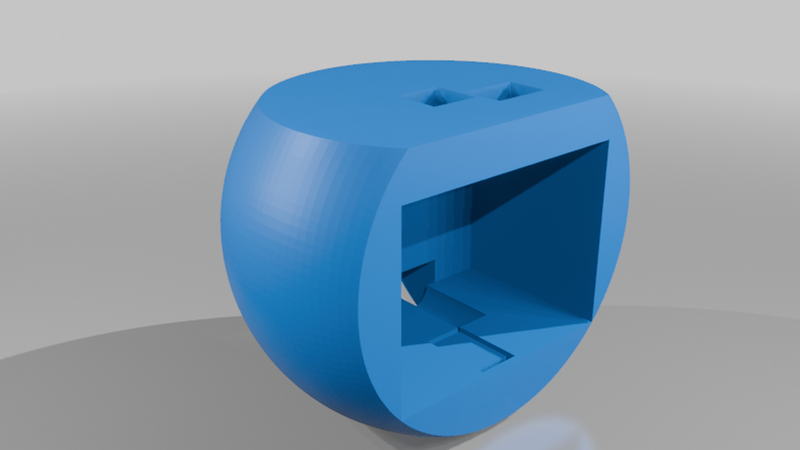
🏗 Building Instructions
1. Prepare the Screen: Plug the Raspberry Pi Pico 2 W into the back of the Waveshare screen.
2. Solder Components: Cut wires to a generous length. Solder the touch sensor, buzzer, and power wires to the Pico.
3. Mount USB-C: Glue the USB-C board to the back of the shell, aligned with the backplate opening.
4. The Stem (Snooze) ⚠️ Important: Route the wires through the top hole of the tomato shell before soldering them to the mechanical switch. Once soldered, click the switch into its housing.
5. Hide the Touch Sensor: Glue the TTP223 sensor inside the shell, directly behind the front face.
6. Close it up: Use M3 heat-set inserts and screws to secure the backplate, or leave it open for easy access.
💻 Flashing the Firmware
The source code is written using Arduino via PlatformIO. It handles:
* WiFi Setup: Creates a portal on first boot for network configuration.
* Time Sync: Automatically fetches time via NTP.
* Web UI: A sleek local dashboard to set multiple alarms, adjust volume, and manage schedules.
Get the full code and instructions here: