Door Hinge for Printer Enclosure
Description
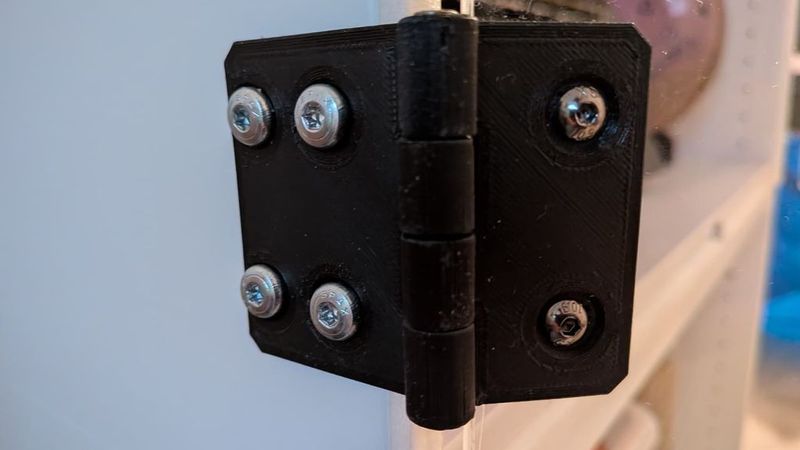
270° Acrylic Door Hinge for IKEA PLATSA 3D Printer Enclosure
This is a 3D-printed door hinge designed for a custom 3D printer enclosure based on IKEA PLATSA cabinets.
The enclosure consists of two stacked IKEA PLATSA cabinet frames:
- 1x IKEA PLATSA frame, 60 × 55 × 60 cm, white
- 1x IKEA PLATSA frame, 60 × 55 × 40 cm, white
- 4x wooden feet
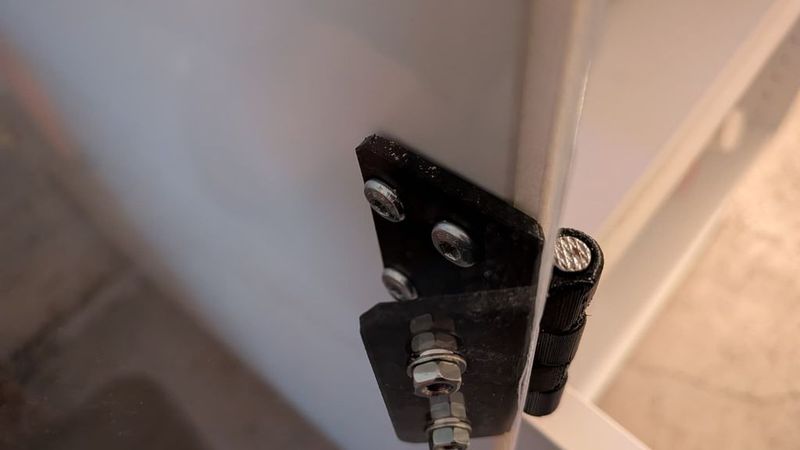
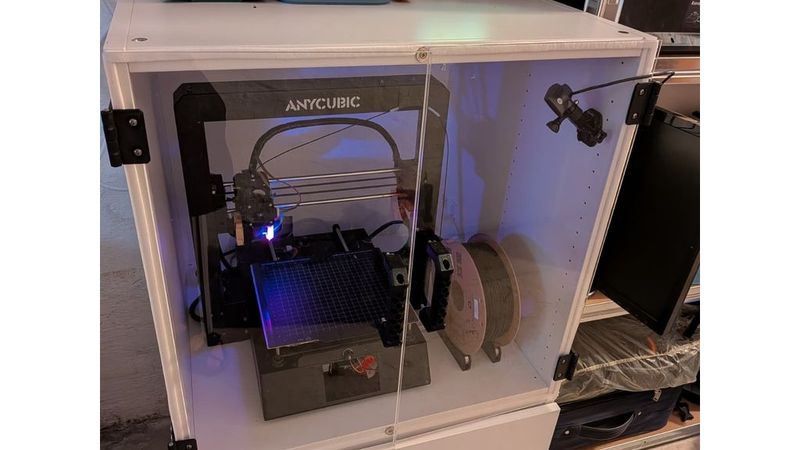
The smaller cabinet is placed at the bottom and can be closed with a standard IKEA door. The larger upper cabinet is used as the main printer chamber and is closed with two acrylic doors.
Each acrylic door is approximately:
- 30 × 60 cm
- 3 mm thick
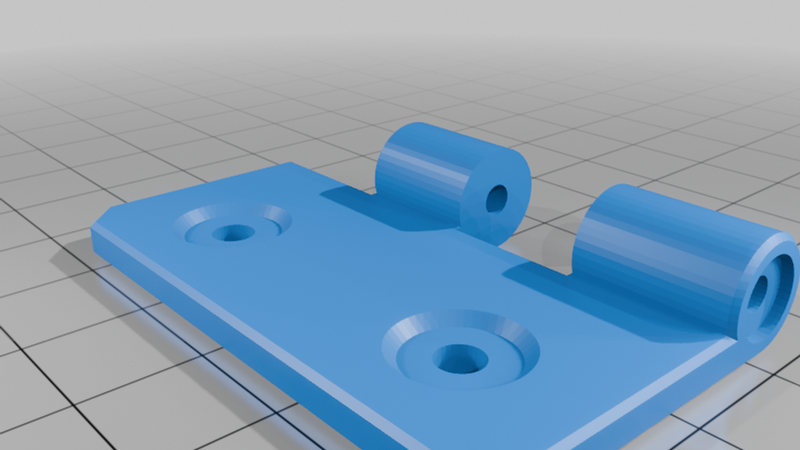
The acrylic doors are mounted externally to the cabinet frame using these printed hinges. The two hinge parts are connected with an 2,5 × 55 mm nail, pin or similar metal rod.
The main advantage of this hinge design is that the doors can rotate up to approximately 270 degrees. This allows the doors to open completely to the side of the enclosure, making it much easier to access the printer, remove prints, perform maintenance or work inside the enclosure.
Photos of the finished enclosure and hinge installation will be added later.
Features
- Designed for an IKEA PLATSA-based 3D printer enclosure
- Suitable for 3 mm acrylic doors
- External mounting on the cabinet frame
- Door opening angle of up to approximately 270°
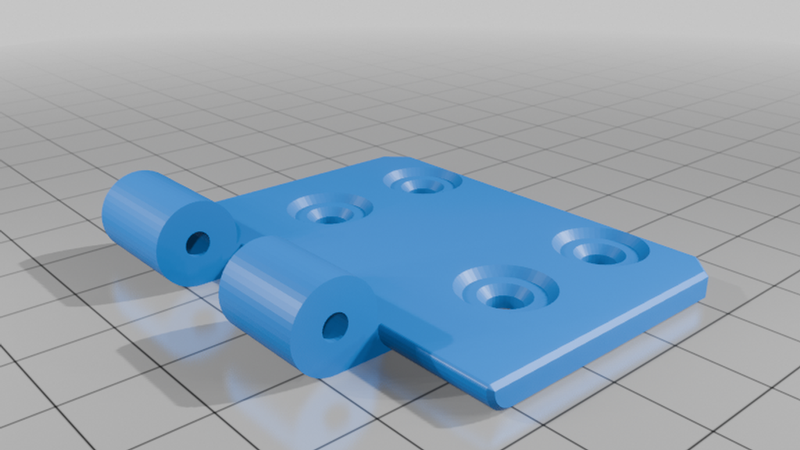
- Simple two-part hinge design
- Connected with an M5 × 55 mm nail, pin or rod
- Easy to print and assemble
- Useful for printer maintenance and better access to the build chamber
Required printed parts
For one hinge assembly:
- 1x `Hinge_I`
- 1x `Hinge_II`
Print as many hinge sets as needed for your door setup. For two acrylic doors, I recommend using at least two hinges per door, depending on the weight and stiffness of your acrylic panels.
Additional hardware
- M5 × 55 mm nail, pin or metal rod per hinge
- Screws for mounting the hinge to the IKEA PLATSA cabinet
- Screws for mounting the hinge to the acrylic door
- 3 mm acrylic sheets, approx. 30 × 60 cm each
Please choose screw lengths carefully so they match your acrylic thickness and cabinet wall thickness.
Recommended print settings
Suggested settings:
- Material: PLA, PETG or similar
- Layer height: 0.2 mm
- Nozzle: 0.4 mm
- Walls: 3–4 perimeters
- Infill: 30–50 %
- Supports: only if required by your print orientation
- Orientation: print in a way that gives the hinge knuckle good strength
PLA should work for normal room-temperature use. If your printer enclosure reaches higher temperatures, PETG or another more temperature-resistant material may be a better choice.
Assembly
1. Print both hinge parts.
2. Clean up the hinge holes if necessary.
3. Insert an M5 × 55 mm nail, pin or metal rod through both hinge parts.
4. Check that the hinge rotates freely.
5. Mount one side of the hinge to the outside of the PLATSA cabinet frame.
6. Mount the other side to the acrylic door.
7. Repeat the process for the remaining hinges.
8. Carefully test the full opening movement of the door.
9. Make sure the acrylic panel does not collide with the cabinet or nearby objects.
Notes
This hinge was designed for my own IKEA PLATSA 3D printer enclosure. Depending on your exact cabinet setup, acrylic panel size, screw choice and printer calibration, small adjustments may be required.
Use the design as a starting point and adapt it to your own enclosure if needed.