Model Railroad Signal Servo Rack/Pinion Drive
Description
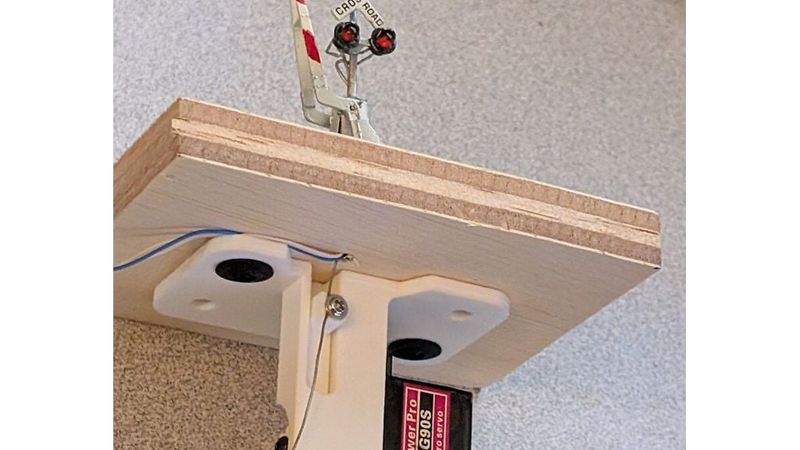
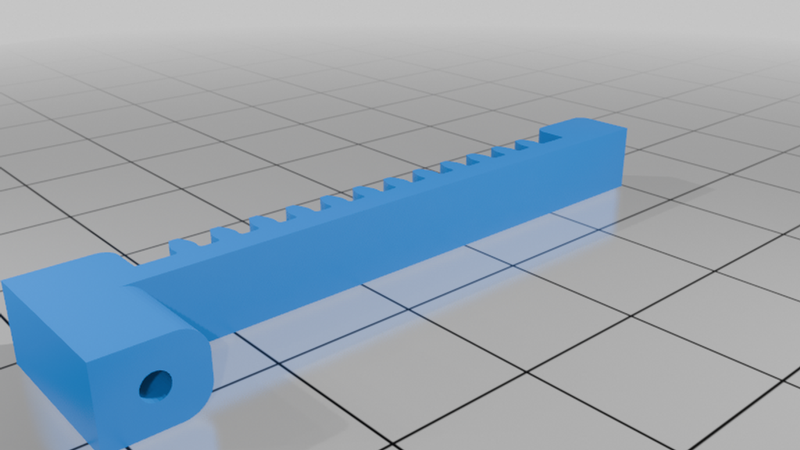
Here's a rack/pinion mount for MG90 9g servos make controlling model grade crossing signals, semaphores, and other layout animation easier.
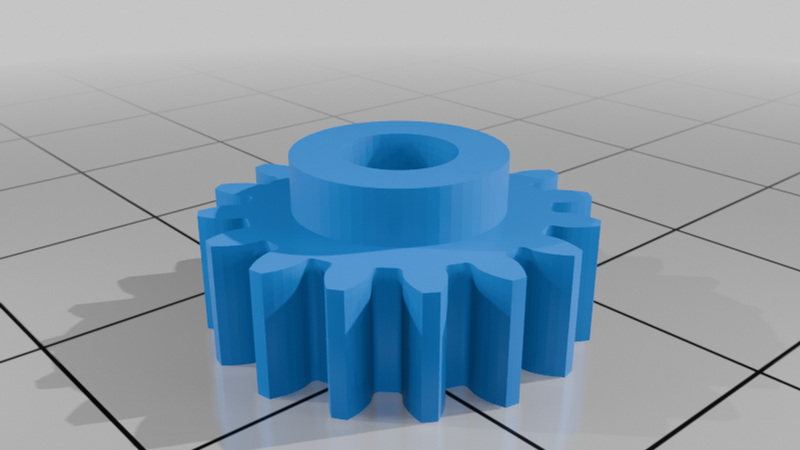
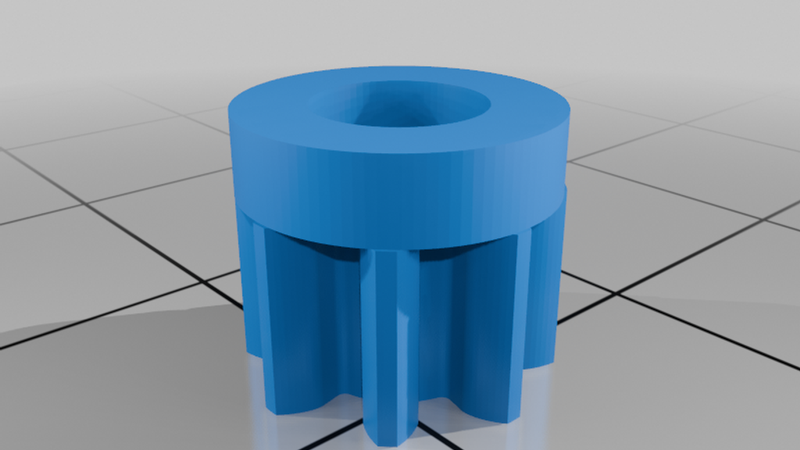
Two pinion gears are available, depending on how much travel you need. The smaller 8-tooth gear provides about 0.35" of travel, whereas the larger 16-tooth gear provides about 0.7". Use the smaller one to get more precision and smoother movements for things that need very little travel.
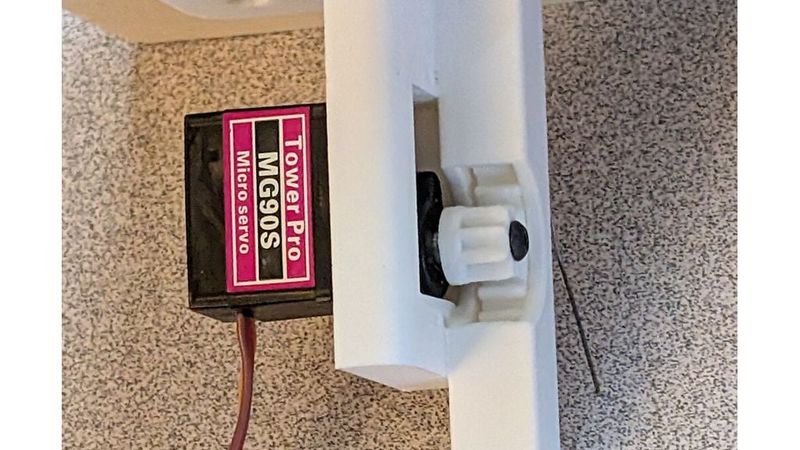
I really do recommend using the MG90 and not the plastic-geared SG90 or similar, just because it has better overall reliability and uses a real machine screw to secure things to the output shaft.
To assemble:
1 - Using a servo horn or some mechanism, turn the servo fully clockwise.
2 - Insert the rack into the rack channel.
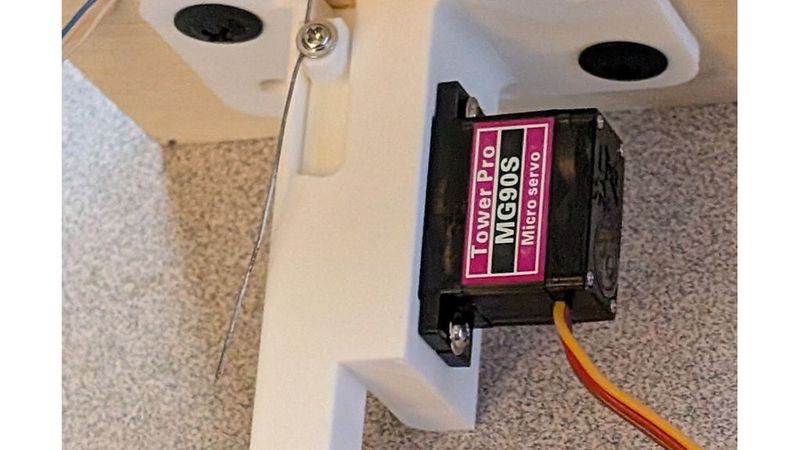
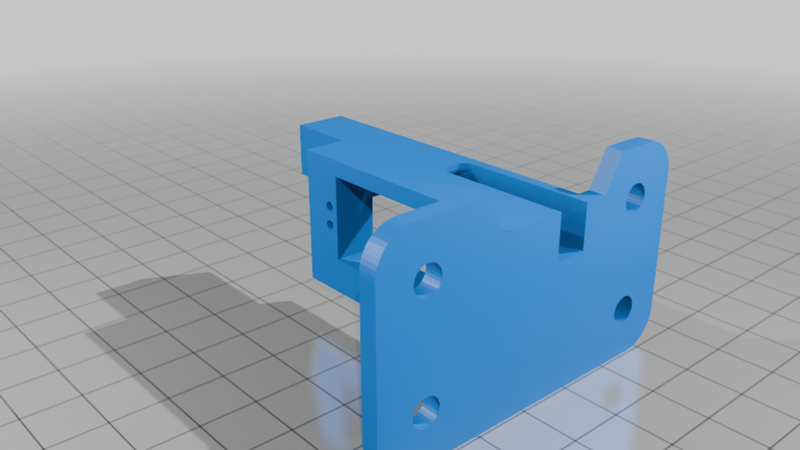
3 - Mount the servo using the two included self-tapping screws into the side away from the channel for the rack. Use the set of screws further from the rack for the larger pinion gear, and use the holes closer for the smaller gear.
4 - Press fit the pinion on to the output shaft (it will be tight and require some force), make sure it engages smoothly with the rack, and secure with an M2.5x8mm screw. Make sure when you do that the rack's mounting lug remains flush with the top surface if using the larger gear. If using the smaller gear, place the rack where you want the upper limit of travel. Since the servo is set full clockwise in step 1, this basically sets the upper limit of travel.
5 - Install under the layout using the mounting holes, and use another of the servo mounting screws (or similar) in the rack's attachment lug to secure the throw wire from the signal above.
Print the base with the large, flat mounting plate down if that wasn't obvious. Print the rack with the teeth to the side, not to the top, for strength and accuracy. Print the gears with the flat side of the gear down, not the round part that mounts to the servo.
As for circuits to drive this, for now you're on your own, but eventually this will be available with our RoadReady Pro grade crossing controller, and probably later on with a circuit for driving semaphores.
Fusion 360 files are provided for those wanting to modify the design. Please share any improvements.