Water Sensor with Remote Water Block

Description
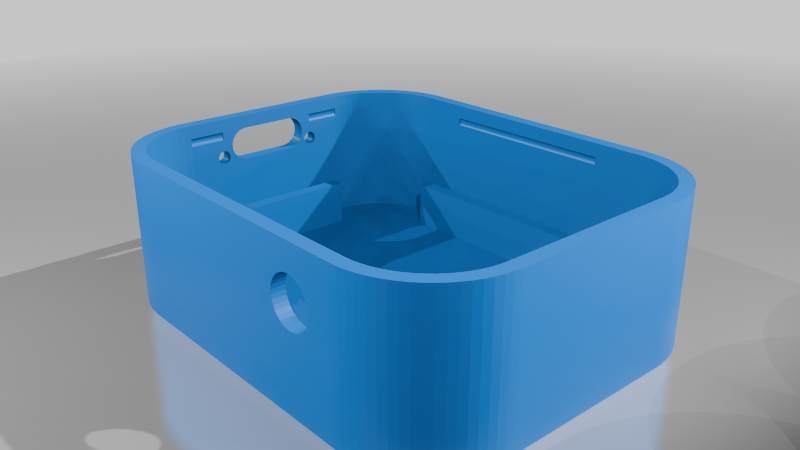
XIAO ESP32C6 Remote Water Sensor with Battery
<br>
I don't make any money from the Amazon links. Their just for reference.
Electronic Parts:
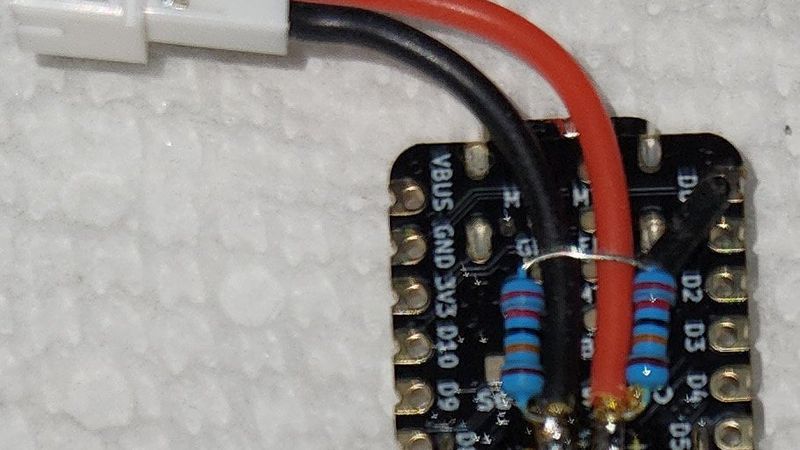
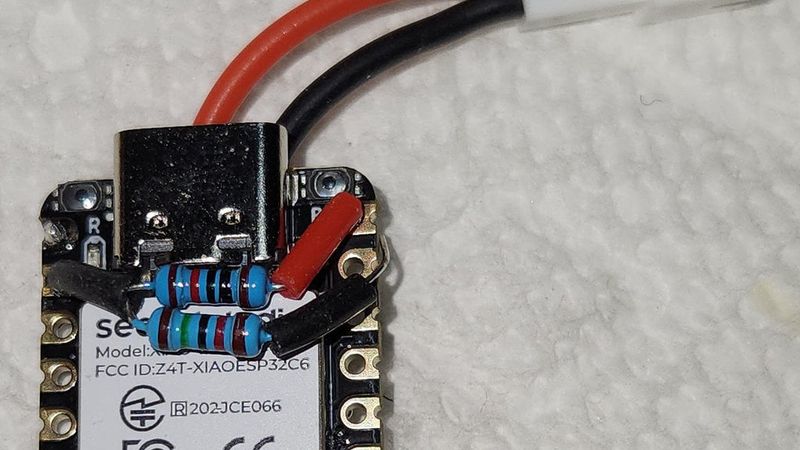
1 - Seeed Studio XIAO ESP32C6
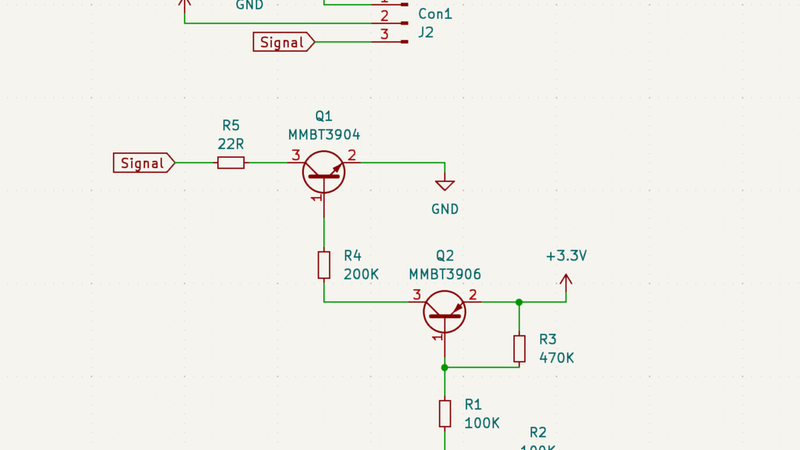
2 - 220K 1/4w 1% Resistors (Used to get battery voltage)
1 - 15k 1/4w 1% Resistor
2 - 10k 1/4w 1% Resistor (one for Pull-Up Resistor for Sensor Input and one for 5v monitor)
1 - uxcell 3.5 mm Audio Jack Connector PCB Mount Female Socket 4 Pin PJ-320A 20pcs
https://www.amazon.com/dp/B07KY862P6
1 - Adafruit Lithium Ion Polymer Battery - 3.7v 500mAh Product ID: 1578
1 - Pre-Crimped 2-pin JST-PH connector with silicon wire (Optional)
https://www.amazon.com/Connector-SIM-NAT-connectors-Inductrix/dp/B08SC3F658
Water Sensor Block:
1 - uxcell 3.5 mm Audio Jack Connector PCB Mount Female Socket 4 Pin PJ-320A 20pcs (optional if you don't want to add
another sensor block)
https://www.amazon.com/dp/B07KY862P6
1 - Leak Sensor for ESPHome, Arduino, ESP32, STM32 ($10 for 5 PCBs)
https://www.etsy.com/listing/1835505749/leak-sensor-for-esphome-arduino-esp32
1 - Extra-long break-away 0.1" 16-pin strip male header (5 pieces)Product ID: 400
https://www.adafruit.com/product/400
2 - Flat Steel Bar 1/2"x1/8"x 35mm long (found at Lowe's and maybe Ace Hardware, Home Depot) for weight
2 - 3x5x4mm M3 brass Inserts Voron Printer type
https://www.amazon.com/gp/product/B0CDH36ZMX (I haven't tried these but there the correct size)
2 - Flat Head Stainless Steel M3x14mm (12mm will work too)
1 - 6FT 3.5mm 1/8 to Speaker Wire TRS Stereo Right Angle Male Plug to Bare Wire Pigtail
https://www.amazon.com/dp/B0854B8K54
Extension Block:
1 - uxcell 3.5 mm Audio Jack Connector PCB Mount Female Socket 4 Pin PJ-320A 20pcs (optional if you don't want to add
another sensor block)
https://www.amazon.com/dp/B07KY862P6
1 - Extra-long break-away 0.1" 16-pin strip male header (5 pieces)Product ID: 400
https://www.adafruit.com/product/400
2 - Flat Steel Bar 1/2"x1/8"x 35mm long (found at Lowe's and maybe Ace Hardware, Home Depot) for weight
3 - 3x5x4mm M3 brass Inserts Voron Printer type
https://www.amazon.com/gp/product/B0CDH36ZMX (I haven't tried these but there the correct size)
3 - Flat Head Stainless Steel M3x14mm (12mm will work too)
1 - Male to Male Stereo Cable 3.5mm (1/8") plug.
Example: https://www.amazon.com/Amazon-Basics-Speaker-Subwoofer-Gold-Plated/dp/B00NO73MUQ
Some solid 26 AWG wire in several colors for connections.
https://www.amazon.com/dp/B09X466HK3
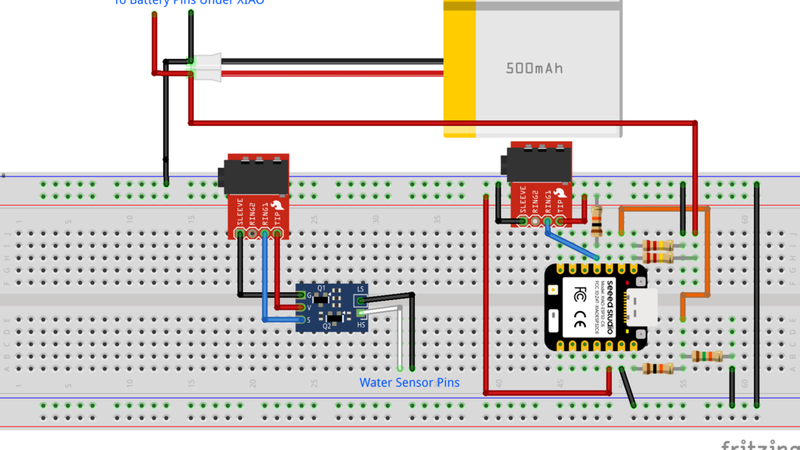
Construction Notes:
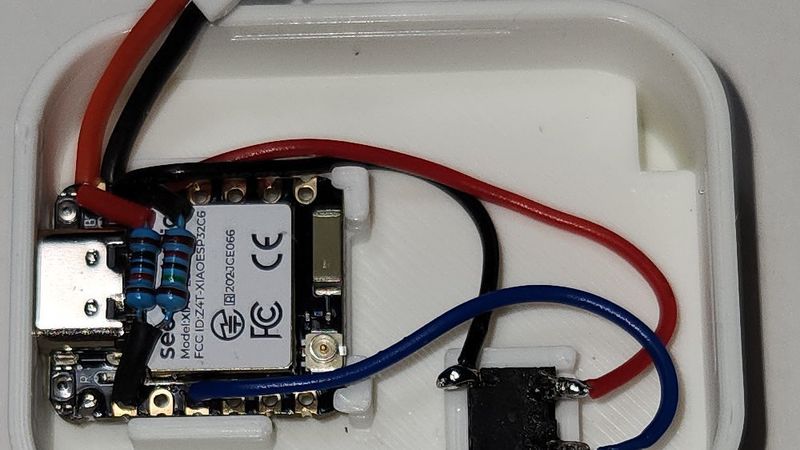
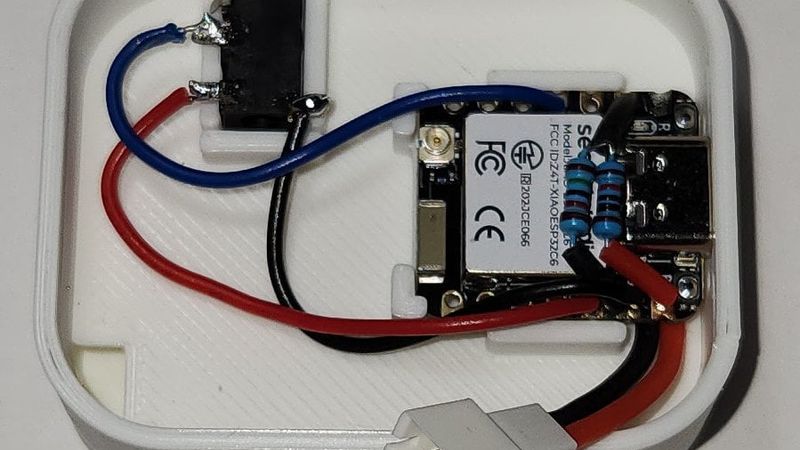
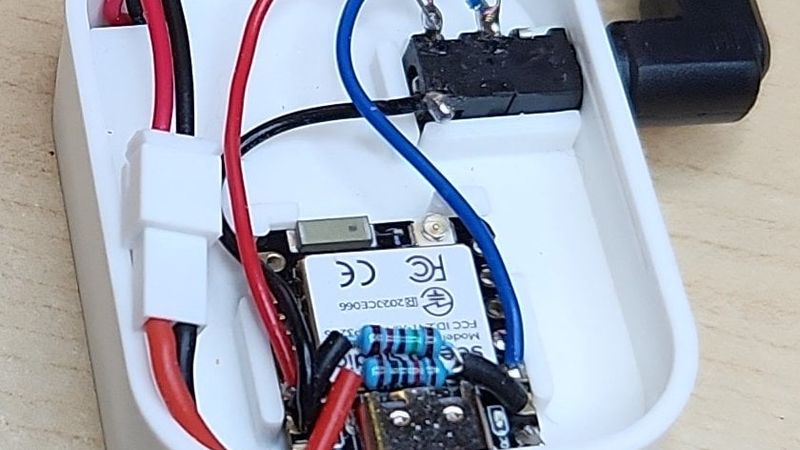
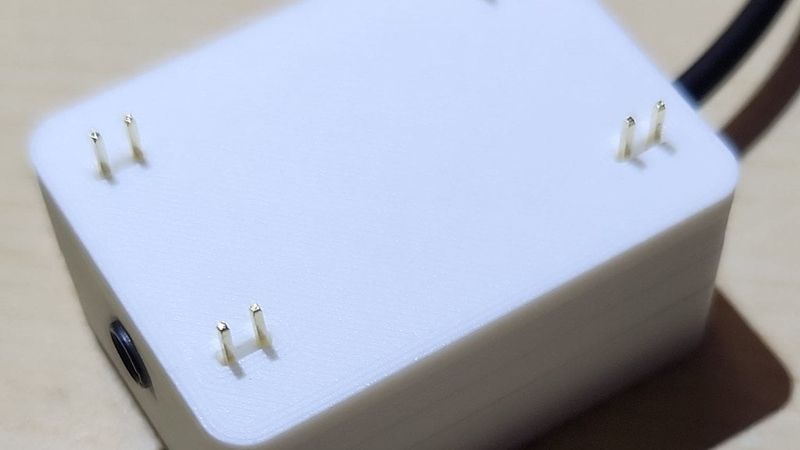
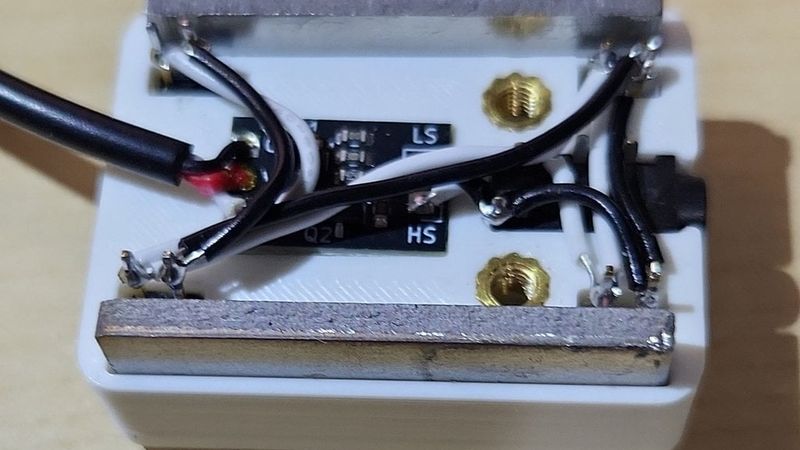
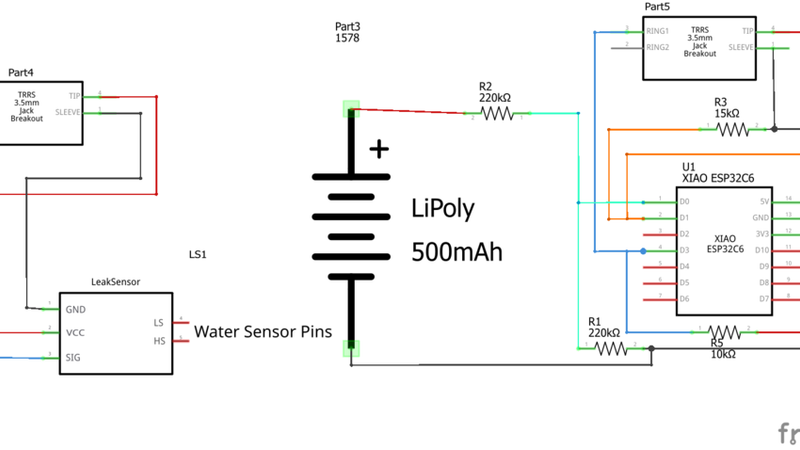
- I wired the TRRS Jack so the Tip(left) is 3.3v, Ring 1(right) is Data, Sleeve is Ground going to the sensor block.
- I always have to swap the Red and Black wires on the Pre-Crimped 2-pin JST-PH wires with the Adafruit batteries. Always check the polarity of your battery and connectors.
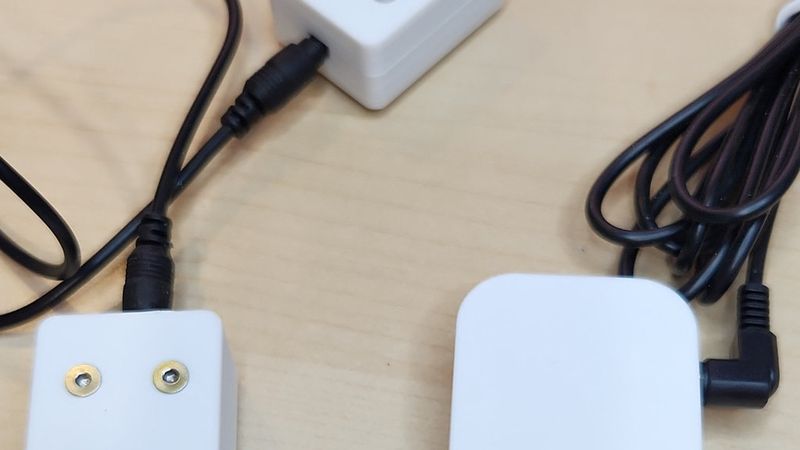
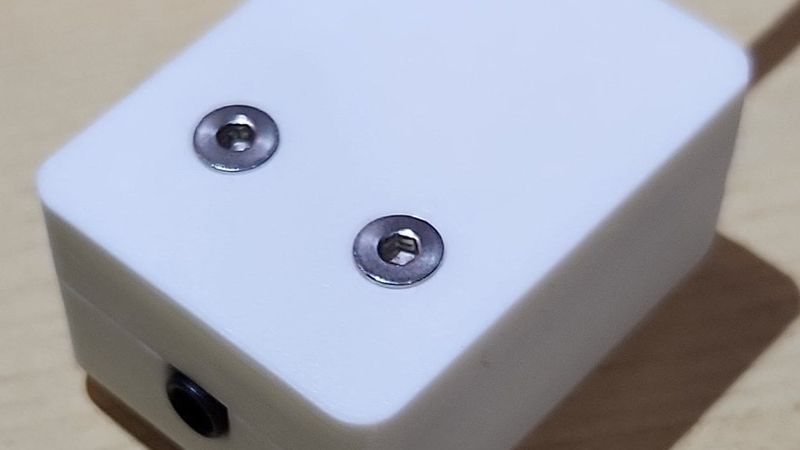
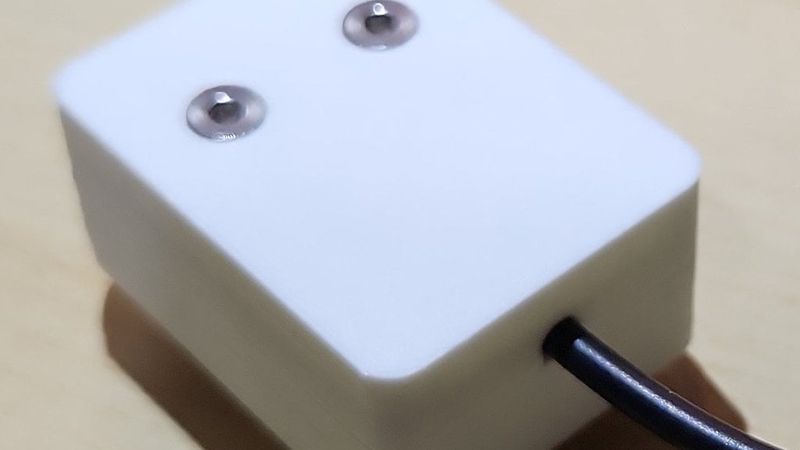
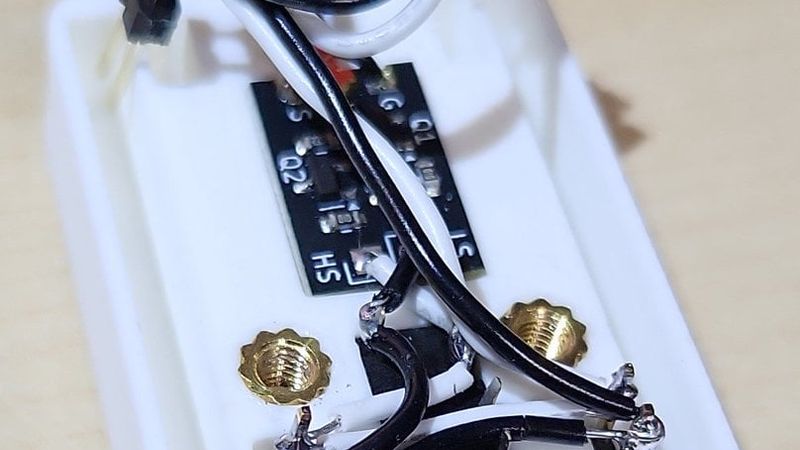
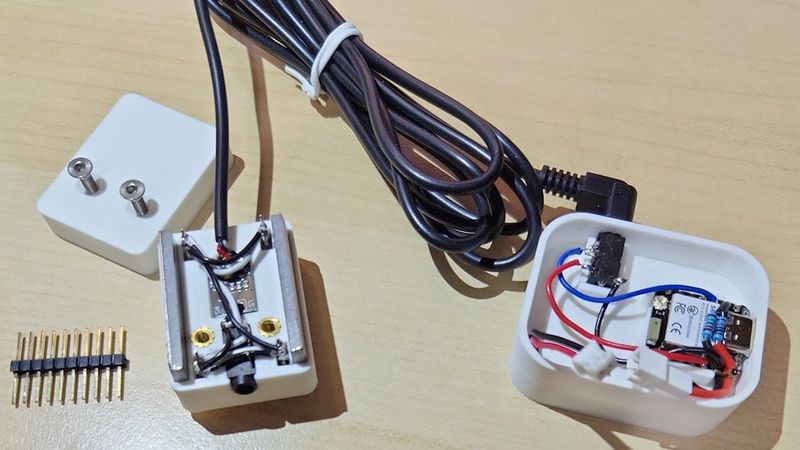
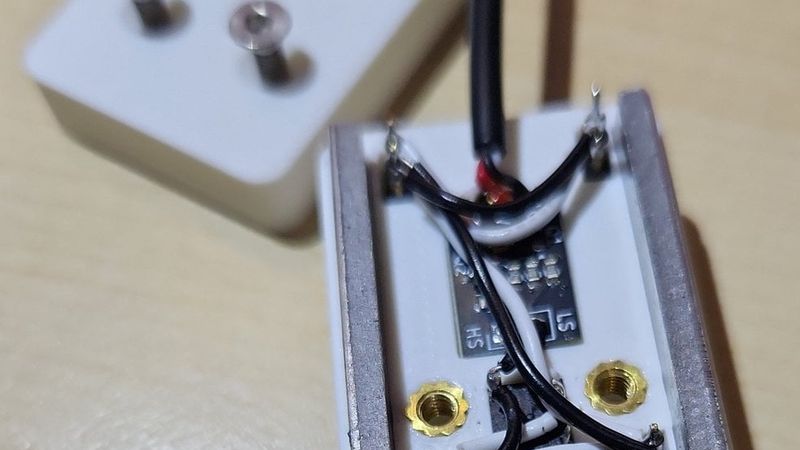
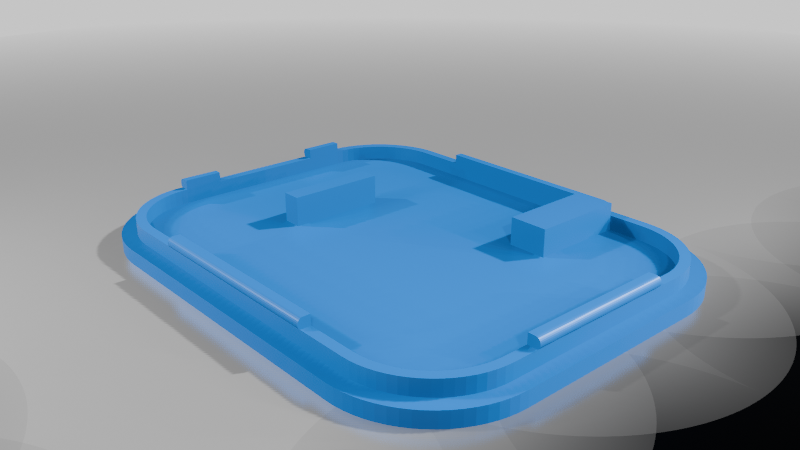
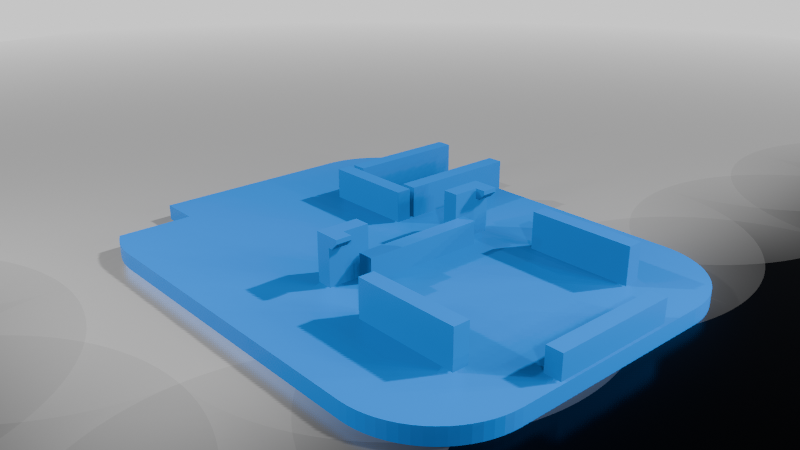
Water Sensor Block
- Wiring the pins uses about 100mm of wire, 110mm if you want to be safe.
- Take your time wiring the pins. If using a light colored wire use a marker to mark where you should strip the wire.
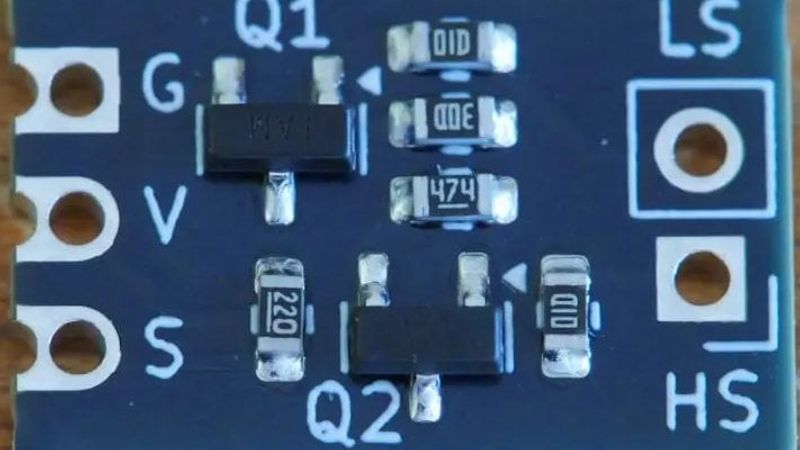
- I soldered the sensor pins with them in the lower case to hold them so they didn't move much. Solder at the top leaving a couple mm pin sticking up past the wire. Don't worry if the pins come out some as the top will hold them in the correct height. It doesn't matter which pin you place the black and white wires on just as long as each set of pins have them both.
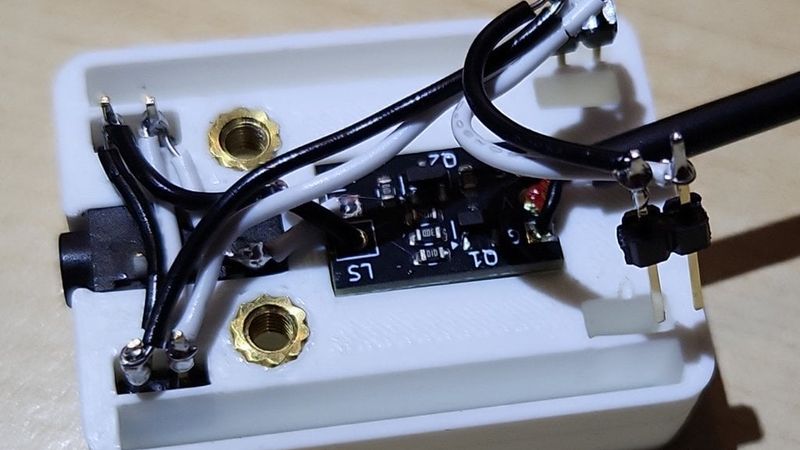
- The jack is soldered with the tip and the sleeve attached to the sensor pins. It doesn't matter which way as long as your consistent with your wiring.
- The audio cable is wired for the tip to go to V, Second ring to S, and sleeve going to G. If it doesn't say use a multimeter to determine which wire is which.
Extension Block
- Wiring is about the same as the Water Sensor Block except no PCB.
Danger Warning
Lithium Ion Polymer Batteries can be dangerous. Do not short out the battery. If you get the Pre-Crimped cable for the battery make sure that the wires match the color on the battery. Just hold it together like your going to plug it in and check. Mine was not correct. The Pre-Crimped cable is great because you can switch the Red and Black wires in the connector if needed and you are not directly soldering the battery to the ESP32C6 which would be a bad idea anyway.
As with any battery and devices like many ESP32 and other boards that have a battery socket soldered to the board always check the polarity before plugging it in.
From Adafruit Website about this battery.
The included protection circuitry keeps the battery voltage from going too high (over-charging) or low (over-use) which means that the battery will cut out when completely dead at 3.0V. It will also protect against output shorts. However, even with this protection, it is very important that you only use a LiIon/LiPoly constant-voltage/constant-current charger to recharge them and at a rate of 500mA or less. We suggest our Micro Lipo charger, which has a 100mA default rate. You can also set the Micro Lipo to 500mA rate for a faster charge.
Code:
I did the project code using Visual Studio Code and pioarduino to use the latest version of Arduino core for the ESP32 (version 3).
The project code can be found here: https://github.com/jaseiffert/XIAO_ESP32C6_Water_Sensor_with_Battery
Operation:
The XIAO ESP32C6 will when powered on or woke up will check the status of the sensor. It will transmit the data to the MQTT Server setup in Home Assistant.
After 15 seconds it will go to sleep but transmit the current status to the MQTT Server.
If water is detected it will wake up and send the information to Home Assistant. If the water is still there it will change it's wake up to detect when the water is gone waking it up again.
It will also wake up every 12 hours to send the state to Home Assistant to update the battery voltage.
Because of the long wake up times Home Assistant may not update for a long time. If after charging the battery you can manually trigger the sensor with a wet finger to update Home Assistant.
Home Assistant Entity card examples are in the files. The Home Assistant Sensor YAML is in with the code on Github.
Charging on the XIAO ESP32C6 is a bit different than the C3, the LED will blink until it is charged then it will go off when charged.
It is also on the opposite side than the C3 so it's on the right side looking at the USB Port.
Please let me know if I missed any information.
Updates: