expertSmart Home & IoT5-Feb-2020
Voice assistant Alexa on Raspberry Pi

Anton Shagaev
Tashkent, UZ
4 days
--
7
Amazon Echo - is a small voice assistant for the home with Alexa 'living' inside, but if you have a single-board computer Raspberry Pi 3b (hereinafter RPi) at hand—you can make your own assistant. However, Alexa communicates exclusively in English, but I don't think that will be a hindrance for you.
The idea to make a voice assistant on an RPi didn't come up by chance. The thing is, the voice assistants currently available on the market connect to the Internet exclusively via Wi-Fi, and I needed a device that connects via an Ethernet cable to an RJ45 port, because all my devices at home are connected to the Internet via network cables for my own reasons. I turn on Wi-Fi as needed; the rest of the time it is turned off. The only device available on the market with an RJ45 input is the voice assistant Sonos One, but it costs around 15 thousand rubles (including delivery), so I first decided to test Alexa's functionality on an RPi. The greatest interest lies in using Alexa to control 'smart home' devices. Currently, Alexa can turn my desktop computer on and off using the IFTTT service in combination with my home web server. The next step will be installing 433MHz radio-controlled sockets, but that will be a separate guide.
*** To install the latest version of Alexa, you can skip Step 4 and go to the Addendum section.
What you'll need
Materials
- 1 pc
- 1 pc
- 1 pc
- 1 pc
- 1 pc
- 1 pc
- 1 pc
- Micro USB to USB Type-C cable (for connecting microphone to RPi)1 pc
- 1 set
- Keyboard with USB 2.0 input1 pc
- HDMI cable for connecting RPi to TV1 pc
Steps
1
Installing Raspbian Buster Lite system on an SD card
Installing Raspbian Buster Lite system on an SD card
Installing Raspbian Buster Lite system on an SD card
Installing Raspbian Buster Lite system on an SD card
First, you need to install the Raspbian Buster Lite operating system on the RPi. This is a lightweight terminal version without a graphical interface. I downloaded the programs and installed the system from another Linux machine with the Kubuntu shell. This can also be done in Windows.
Unpack the downloaded archive balena-etcher-electron-1.5.73-linux-ia32.zip. (The version name of your archive may differ, as the program is constantly updated)
If you don't have an archiver unzip, then install it via the terminal:
tinkster@almalinux:~#
1sudo apt-get install unzip
Next, go to the folder with the downloaded archive and enter the command:
tinkster@almalinux:~#
1sudo unzip balena-etcher-electron-1.5.73-linux-x64.zip
It will unpack the file into the current folder. Then launch balenaEtcher:
tinkster@almalinux:~#
1sudo ./balenaEtcher-1.5.70-x64.AppImage
Insert our micro SD card into the adapter and plug it into the USB port.
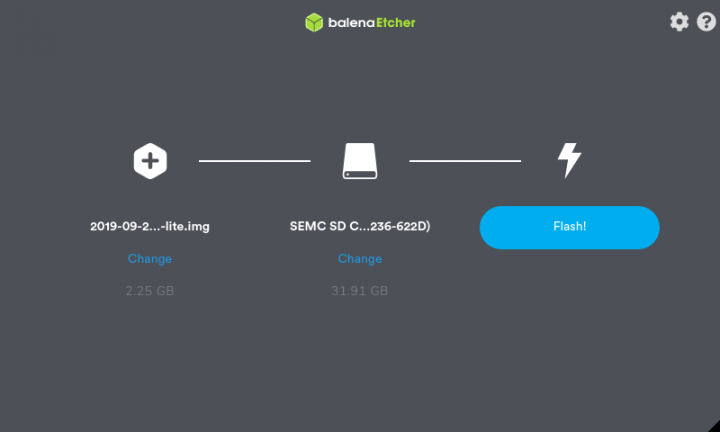
In the window that opens, select the downloaded Raspbian Buster Lite image, the location of our micro SD card, and click Flash.
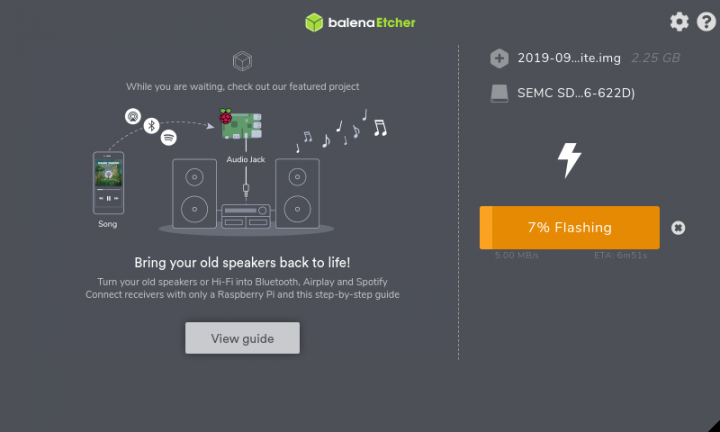
The system flashing process has started.
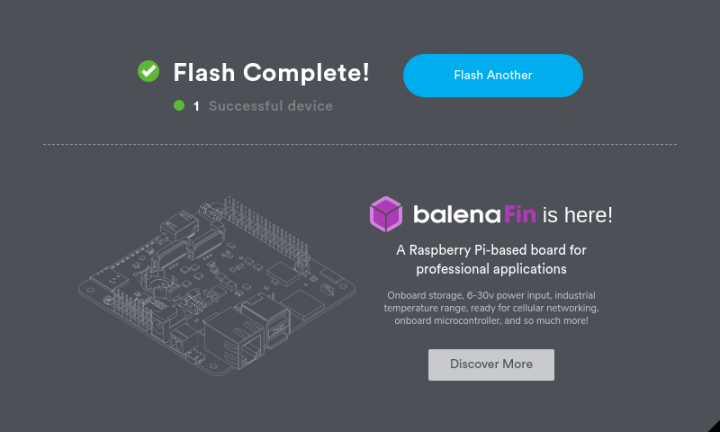
After the process is complete, you will see the following window.
That's it, the installation of Raspbian Buster Lite is complete, remove the micro SD card and insert it into the RPi.
2
First launch of Raspbian Buster Lite
First launch of Raspbian Buster Lite
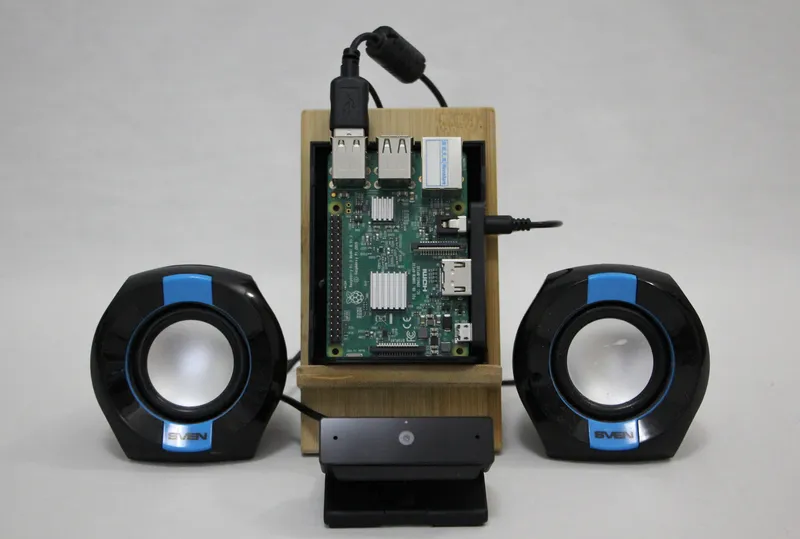
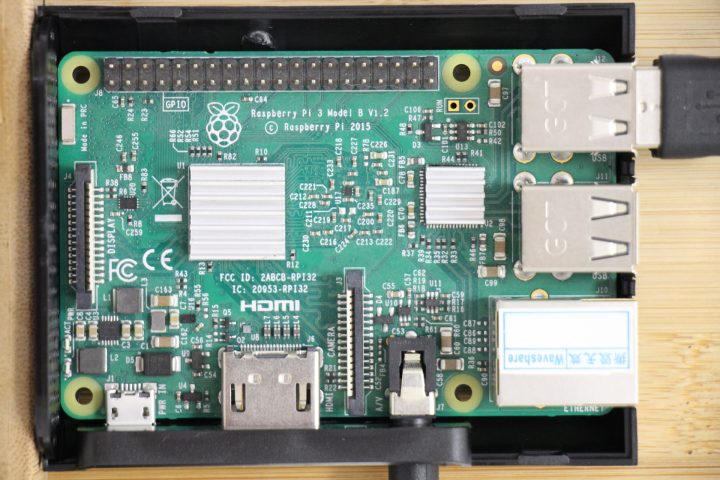
First, we stick our mini-radiators onto the Broadcom BCM2837 chip and the SMSC LAN9514 chip.
Connect a USB microphone, speakers, and keyboard to the RPi, and connect the RPi itself via HDMI to the TV, plug the network cable into the RJ45 port, and supply 5-volt power.
When the system boots, you will see a prompt to enter a username and password. By default, the username is pi, and the password is raspberry.
The very first thing is to update the system packages:
tinkster@almalinux:~#
1sudo apt-get update && sudo apt-get upgrade && sudo apt-get dist-upgrade
Next, you need to configure the USB microphone. If you will be using a Respeaker microphone (it's a very cool microphone), then for its detailed setup on the RPi, read the manualhere(the manual is in English):
In my Alexa build, I used a Sony webcam with a microphone for Skype calls on Sony TVs. But since Skype discontinued support for the VOIP messenger on my TV, the webcam could have been thrown away, but I found another use for it. I've already ordered a Respeaker from Aliexpress, and soon it will work as the main microphone.
In the terminal, enter:
tinkster@almalinux:~#
1arecord -l
Then find your USB microphone in the list of devices. Write down the number after card and the number after device.
Then you need to configure the speakers.
In the terminal, enter:
tinkster@almalinux:~#
1sudo raspi-config
Next, go to Advanced options > Audio and select Force 3.5mm (‘headphone’) jack.
Next, in the terminal, enter the command:
tinkster@almalinux:~#
1aplay -l
Find your speakers in the list of playback devices. Write down the number after card and the number after device. Note that the 3.5mm jack is usually labeled as analog or bcm2835 ALSA (not bcm2835 IEC958 / HDMI).
Next, go to the directory:
tinkster@almalinux:~#
1cd /home/pi
In it, create a file .asoundrc:
tinkster@almalinux:~#
1nano .asoundrc
Use the configuration below, but replace <card number> and <device number>with the numbers you wrote down in the previous step. Do this for pcm.mic and pcm.speaker. Only enter the numbers without brackets.
tinkster@almalinux:~#
1pcm.!default {2type asym3capture.pcm "mic"4playback.pcm "speaker"5}6pcm.mic {7type plug8slave {9pcm "hw:<card number>,<device number>"10}11}12pcm.speaker {13type plug14slave {15pcm "hw:<card number>,<device number>"16}17}
Now adjust the playback volume. In the terminal, enter:
tinkster@almalinux:~#
1alsamixer
Press the up arrow key to set the playback volume level to about 70.
Perform a sound test (it will be a human voice) by typing the command in the terminal:
tinkster@almalinux:~#
1speaker-test -t wav
Press Ctrl + C, when finished. If you don't hear anything when it runs, check the speaker connection.
Then record a short audio file by typing the following command in the terminal:
tinkster@almalinux:~#
1arecord --format=S16_LE --duration=5 --rate=16000 --file-type=raw out.raw
Check the audio recording by playing it with the command in the terminal:
tinkster@almalinux:~#
1aplay --format=S16_LE --rate=16000 out.raw
If recording and playback work, then you have done everything correctly.
3
Register on Amazon
Register on Amazon
Register on Amazon
Register on Amazon
Register on Amazon
+1
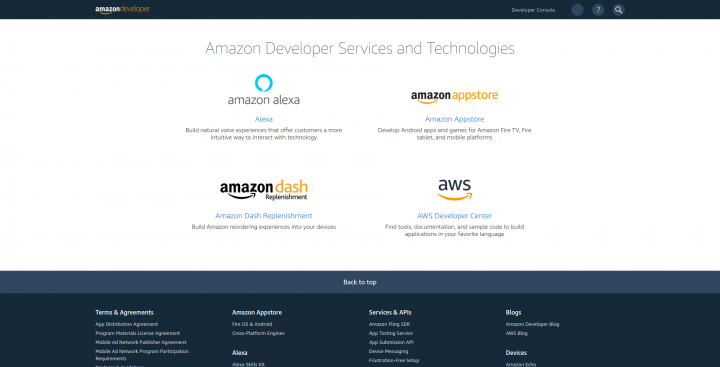
Before you can proceed with setting up the Raspberry Pi, you need to create an Amazon Developer account. This can be done by going to Amazon Developer Services (Amazon Developer Services), following the procedure and instructions for creating an account.
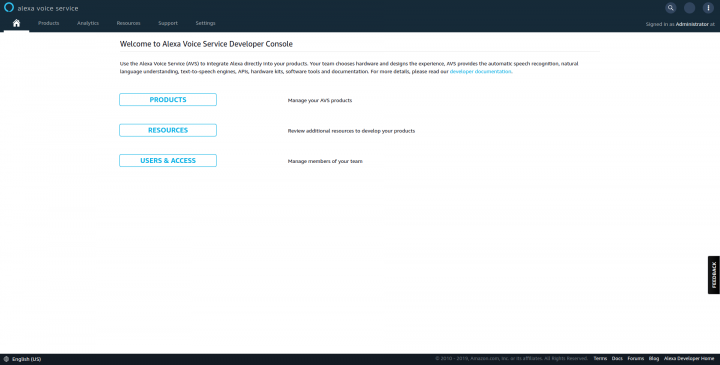
Now that you are logged into your Amazon Developer account, you need to set up the Alexa service under the developer account so you can use it on the Raspberry Pi.
Return to the home page Amazon Developer Services and select Amazon Alexa from the available options.
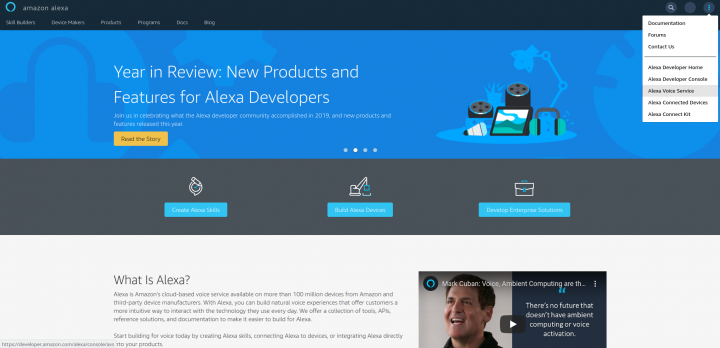
Then, in the very top right corner of the screen, you will see an icon with a vertical ellipsis. Click on it with the mouse and select Alexa Voice Service.
On the next page, you need to click on the Products button.
Then click on Create Product (Create Product) on the next page.
Next, by fields:
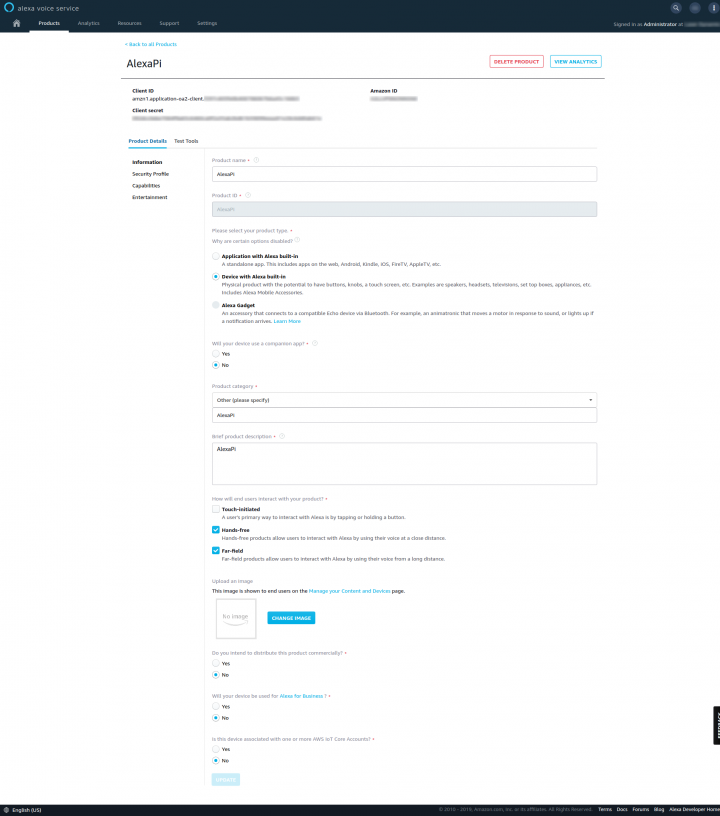
On this page, you will need to enter Product name (Product name) and Product ID (Product ID). I entered AlexaPi, for both fields, but you can use your own Product name and Product ID.
Next, select Device with Alexa built-in (Device with Alexa built-in) as the product type and select No for Will your device use a companion app?
As the product category, select Other (Please specify)/ Other (please specify), and in the text field below, enter AlexaPi as the description.
Check the boxes Hands-free (Hands-free) and Far-field under How will end users interact with your product?, and then for the remaining radio buttons, select No for all of them. Then click the Next button.
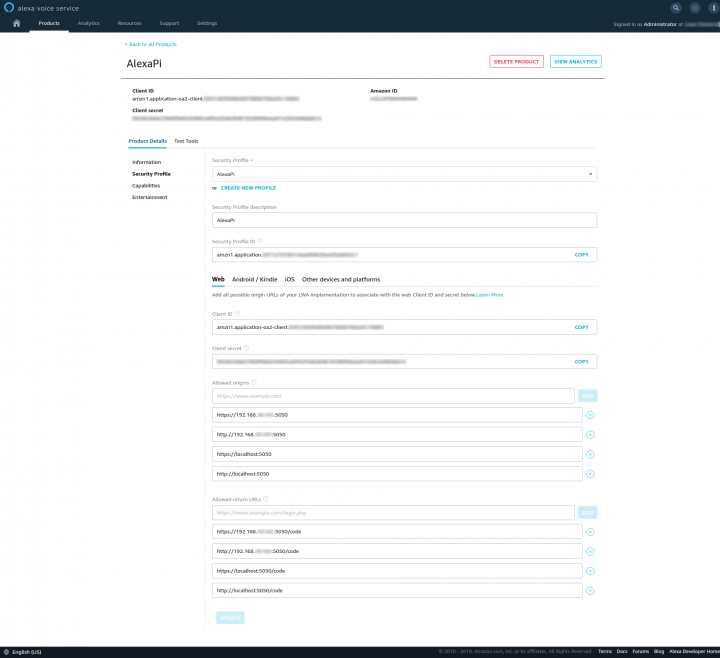
Now you need to create a security profile for the product you just created. Click Create New Profile and in Security Profile Name and Security Profile Description enter AlexaPi. Press again Next.
Now that we have completed the initial product setup, we need to add several URLs to the Allowed origins and Allowed return URLs sections at the bottom of the page.
For this section, you will need the IP address of your RPi on your home local network. To find it, you can enter ifconfig in your RPi terminal. I recommend making the RPi IP address static. To do this, you need to do the following:
In your RPi terminal, enter:
tinkster@almalinux:~#
1sudo nano /etc/dhcpcd.conf
Then, at the very top, add the lines (the parts of the IP addresses '10.50' and '10.1' will be your own):
tinkster@almalinux:~#
1interface eth0 # In my case, this is a wired connection2static ip_address=192.168.10.50/24 # Local IP address of RPi3static routers=192.168.10.1 # Local IP address of your router4static domain_name_servers=192.168.10.1 # Local IP address of your router
Save the file and reboot the RPi:
tinkster@almalinux:~#
1sudo reboot
Return to the Amazon Developer Service page and enter the URLs.
Under the heading Allowed Origins add the 4 lines with URLs:
http://localhost:5050
https://localhost:5050
http://192.168.10.50:5050
https://192.168.10.50:5050
Then under the heading Allowed return URLs add the 4 lines with URLs:
http://localhost:5050/code
https://localhost:5050/code
http://192.168.10.50:5050/code
https://192.168.10.50:5050/code
Having done this, accept the agreement terms (I agree to Amazon Developer Services Agreement, including the Alexa Voice Service Program Requirements) and click the Finish button.
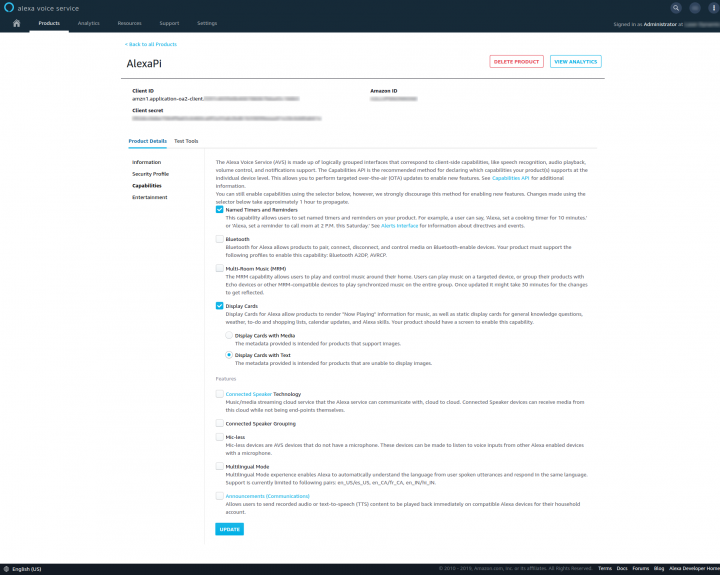
Now some capabilities need to be added to the product, so click on the product name and click Capabilities on the left side. Check Named Timers and Reminders, Display Cards and Display Cards with Text.
Having done this, click the Update button at the bottom of the page. Now it's time to move to the RPi.
I recommend connecting to the RPi via SSH at this stage, as during the application installation you will need to enter Client ID, Client secret and Security Profile ID. These keys are very long and it is better to enter them by copying to avoid errors.
By default, SSH access on the RPi is disabled and needs to be enabled. In the RPi terminal, enter:
tinkster@almalinux:~#
1sudo systemctl enable ssh2sudo systemctl start ssh
The default login is pi, the default password is raspberry. Immediately after logging into the RPi via SSH, it is recommended to change the password. In the terminal, type:
tinkster@almalinux:~#
1sudo raspi-config
Select in the menu Change User Password and change the password.
Client ID and its Client secret can be found on any page of the product you created, and the Security Profile ID can be found on the tab Security Profile.
4
Installing AlexaPi
Now that all the preparation is complete, it's time to install the Alexa service on our RPi. For this, we will use software called AlexaPi.
Although AlexaPi is no longer under active development, it still works well at the time of writing this guide.
Access the RPi terminal via SSH or directly.
Go to the /opt folder:
tinkster@almalinux:~#
1cd /opt
Since the AlexaPi repository is hosted on GitHub, we will need git:
tinkster@almalinux:~#
1sudo apt-get install git
Clone the repository:
tinkster@almalinux:~#
1sudo git clone https://github.com/alexa-pi/AlexaPi.git
Run the installation script:
tinkster@almalinux:~#
1sudo ./AlexaPi/src/scripts/setup.sh
Next, you should follow the prompts that appear in the terminal; many of them will be pre-filled, but you will be asked if you want the AirPlay functionality for Alexa to start automatically on system boot. You will also need to enter the product keys from Amazon Developer Services.
Pay attention to the suggested option Do you want to run AlexaPi on boot. You need to select the number 1. Then Alexa will start automatically on every system reboot.
When the installer asks for the Device Type ID, enter Product ID. In this case, enter AlexaPi.
After that, you need to copy and paste your Client ID, Client secret, and Security Profile ID into the terminal.
After entering them, a URL to log into your Amazon account will appear in the terminal. Copy it and paste it into a browser. Then you need to click the Allow button.
Now you can close the window, and AlexaPi is set up!
Reboot the RPi:
tinkster@almalinux:~#
1sudo reboot
After rebooting, Alexa should say - "Hello" You can start asking Alexa, for example, say - "Alexa", she should immediately respond - "Yes". And immediately after this phrase, you continue - "Please play some music".
Conclusion
And in conclusion, I want to recommend the STL model of the microphone case for ReSpeaker for 3D printing. The case model can be downloaded here.
Addition
Friends, after numerous tests and checks, I came to the conclusion that Alexa on RPi needs to be compiled from the very latest AVS SDK. As it turned out, AlexaPi uses a very old SDK and Alexa itself is very slow. Often, music that is played on AlexaPi interrupts itself or Alexa reacts to something and constantly says Yes. :) I compiled Alexa from AVS SDK version 1.18.0 and was pleasantly surprised by the speed of Alexa's responses and the stability of music playback.
The order of actions for compiling the SDK is as follows:
1. Install clean Raspbian Buster Lite on RPi.
2. Return to Amazon Developers Services to our product AlexaPi. Go to the section Security Profile / Other devices and platformsand in the field Client ID name write AlexaPi. After that, press Generate ID. Then you will have an option to download the file config.json with your Client ID inside. This file will need to be uploaded to the home directory on RPi /home/pi. If you are on Linux and, say, the file is in the home folder, then copy it to RPi:
tinkster@almalinux:~#
1scp config.json [email protected]:/home/pi
Next, go to Login with Amazon Console and select Security Profile - AlexaPi. In the next window, in the field Consent Privacy Notice UR specify any URL and press Save.
3. Next, log into RPi:
tinkster@almalinux:~#
1
And then enter in the terminal:
tinkster@almalinux:~#
1wget https://raw.githubusercontent.com/alexa/avs-device-sdk/master/tools/Install/setup.sh2wget https://raw.githubusercontent.com/alexa/avs-device-sdk/master/tools/Install/genConfig.sh3wget https://raw.githubusercontent.com/alexa/avs-device-sdk/master/tools/Install/pi.sh
Next, we need to install Gstreamer and its add-ons:
tinkster@almalinux:~#
1sudo apt install libgstreamer1.0-dev gstreamer1.0-plugins-{bad,base,good,ugly} gstreamer1.0-{omx,alsa}
After installation, enter the following command:
tinkster@almalinux:~#
1cd /home/pi/2sudo bash setup.sh config.json
The process of compiling Alexa from the SDK will begin. Follow the installation process instructions, as you will have to enter the word AGREE when installing third-party libraries (Third-party Libraries) and yes when installing the wake word engine (Sensory Wake Word).
4. Now let's check Alexa's functionality and set the refresh token. In the terminal, enter:
tinkster@almalinux:~#
1sudo bash startsample.sh
After this command, you will see a series of quickly scrolling debug messages in the terminal window with the label Checking for authorization. Scroll through the debug messages and find the field with the URL address, it contains your Alexa authorization code.
Log into your Amazon account at:
and enter this code (without stopping Alexa in the terminal).
After confirming the code, stop Alexa - CTRL+C and start it again. Try saying: "Alexa, what time is it?" and it should respond.
4. Now we need to do 2 things — assign an audio signal to indicate that Alexa is listening to you after the wake word and make Alexa start automatically after rebooting the RPi.
Let's download sounds for Alexa from the Amazon website from the page:
Next, click on Alexa sound library for AVS (v1.2)
After downloading the file, rename it to sounds.zip (for convenience) and copy it to the RPi:
tinkster@almalinux:~#
1scp sounds.zip [email protected]:/home/pi
Next, unzip the zip archive:
tinkster@almalinux:~#
1sudo unzip sounds.zip
Go to the folder 'Alexa sound library for AVS'/ful and copy the sounds from there to the ~/sounds folder:
tinkster@almalinux:~#
1cd 'Alexa sound library for AVS'/ful2sudo cp * ~/sounds
Return to the home folder:
tinkster@almalinux:~#
1cd ~
Next, open the file UIManager.cpp:
tinkster@almalinux:~#
1sudo nano /home/pi/avs-device-sdk/SampleApp/src/UIManager.cpp
After the line #include <sstream> add #include <cstdlib>.
Then go to the very end of the file and after ConsolePrinter::prettyPrint(«Listening…»); insert:
tinkster@almalinux:~#
1system("play /home/pi/sounds/ful_ui_wakesound.wav");
Also, in the file UserInputManager.cpp an insertion needs to be made. Open the file itself:
tinkster@almalinux:~#
1sudo nano /home/pi/avs-device-sdk/SampleApp/src/UserInputManager.cpp
After the code block:
tinkster@almalinux:~#
1SampleAppReturnCode UserInputManager::run() {2bool userTriggeredLogout = false;3m_interactionManager->begin();4while (true) {
Add the lines:
tinkster@almalinux:~#
1std::this_thread::sleep_for(std::chrono::hours(1));2continue;
So that in the end it looks like this:
tinkster@almalinux:~#
1SampleAppReturnCode UserInputManager::run() {2bool userTriggeredLogout = false;3m_interactionManager->begin();4while (true) {5std::this_thread::sleep_for(std::chrono::hours(1));6continue;
This additional code will stop any input processing from the terminal and Alexa will stop freezing.
Let's recompile Alexa:
tinkster@almalinux:~#
1cd ~2sudo bash setup.sh config.json
Now let's set up Alexa to run as a service.
Create a file alexa.sh in the home folder:
tinkster@almalinux:~#
1sudo nano alexa.sh
And insert the following lines into it:
tinkster@almalinux:~#
1#!/bin/bash23cd "/home/pi/build/SampleApp/src"4PA_ALSA_PLUGHW=1 ./SampleApp "/home/pi/build/Integration/AlexaClientSDKConfig.json" "/home/pi/third-party/alexa-rpi/models" NONE
Save the file and make it executable:
tinkster@almalinux:~#
1sudo chmod +x alexa.sh
Next, create a file alexa.service:
tinkster@almalinux:~#
1sudo nano /lib/systemd/system/alexa.service
And insert the following lines into it
tinkster@almalinux:~#
1[Unit]2Description=Amazon Alexa3Wants=network-online.target4After=network-online.target56[Service]7Type=simple8ExecStart=/home/pi/alexa.sh9Restart=on-abort10User=pi11Group=pi1213[Install]14WantedBy=multi-user.target
Save the file and activate the service:
tinkster@almalinux:~#
1sudo systemctl enable alexa.service
Next, change the user/group of the ~/db folder and all its files so that Alexa can play timers, reminders, and alarms:
tinkster@almalinux:~#
1sudo chown -R pi:pi ~/db
Reboot the RPi and enjoy voice control with Alexa!
tinkster@almalinux:~#
1sudo reboot
Addition from 18.03.2020: Friends, the day before yesterday I received a long-range microphone board from ReSpeaker. I got ReSpeaker with 7 digital microphones and an XMOS2000 chip + a beautiful case. I bought the microphone on eBay, and the case directly from Seeed Studio. All together cost 51 US dollars including delivery to Russia.
ReSpeaker Mic Array
In the box with the microphone board, there was a separate 3.5mm Jack input, which had to be soldered manually. Also, the outer diameter of the input was 5.5mm, while the holes for it in the case were 5mm. Appreciate the genuine Chinese quality. :) I had to take a 6mm drill and carefully enlarge the inner diameter to 6mm on a machine. Also, the recess for the microUSB input is about 2 millimeters away from the connector itself. That is, everything is done crookedly and through ... (insert an appropriate word here). The microUSB cable barely reached the connector, and I managed to supply power.
What can I say about the microphone. So far, nothing good. I updated its firmware; in silence, it hears from about 6 meters away, but with low noise, it doesn't hear at all. My old microphone from a Sony camera could hear me even with low noise. Also, the LED control for it is written in Python via bytearray, and this language is very slow, so when the activation word is spoken, the LEDs light up with a half-second delay. There is no C++ control available online. I tried compiling the Python libraries for LED control using Cython to at least speed them up a bit, but that didn't help.
What I liked is that I made the audio output through the microphone board, and I disabled loading the drivers (snd_bcm2835) on the RPi itself (i.e., disabled audio output via the 3.5mm Jack), and the RPi processor temperature dropped by 20 degrees!
You can check the processor temperature on the RPi with the command:
tinkster@almalinux:~#
1vcgencmd measure_temp
Also, the network interface stopped dropping. Alexa works without freezing 24/7!
To do the same with the Respeaker microphone board, open the file:
tinkster@almalinux:~#
1sudo nano /etc/modprobe.d/raspi-blacklist.conf
and at the bottom of the file, insert the line (this will block loading the standard audio driver on the RPi):
tinkster@almalinux:~#
1blacklist snd_bcm2835
I also recommend disabling the video drivers, as we won't need them in this system:
tinkster@almalinux:~#
1blacklist videobuf2_dma_contig2blacklist videobuf2_vmalloc3blacklist videobuf2_memops4blacklist videobuf2_v4l25blacklist videobuf2_common
Then open the file config.txt (sudo nano /boot/config.txt) and comment out the line:
tinkster@almalinux:~#
1#dtparam=audio=on
My .soundrc file currently looks like this:
tinkster@almalinux:~#
1pcm.!default {2type asym3playback.pcm {4type plug5slave.pcm "hw:1,0"6}7capture.pcm {8type dsnoop9ipc_key 543210slave {11pcm "hw:1,0"12buffer_size 9600013}14}15}
To control the LEDs in Python, you need to do the following.
Install the ReSpeaker library for Python:
tinkster@almalinux:~#
1sudo pip3 install respeaker
Next, to control the LEDs as the pi user, not sudo, open the file 51-respeaker.rules:
tinkster@almalinux:~#
1sudo nano /etc/udev/rules.d/51-respeaker.rules
and insert the following into it:
tinkster@almalinux:~#
1SUBSYSTEM=="input", GROUP="input", MODE="0666"2SUBSYSTEM=="usb", ATTRS{idVendor}=="XXXX", ATTRS{idProduct}=="XXXX", MODE:="666", GROUP="plugdev"
The values ATTRS{idVendor} and ATTRS{idProduct} will be your own. To find them out, type the command:
tinkster@almalinux:~#
1lsusb
You will see something similar for your ReSpeaker:
tinkster@almalinux:~#
1Bus 001 Device 002: ID 0424:9514
where 0424 is ATTRS{idVendor}, and 9514 - ATTRS{idProduct}.
Save the file and reload the rules:
tinkster@almalinux:~#
1sudo udevadm control —reload-rules
Next, download the packages necessary for ReSpeaker to work:
tinkster@almalinux:~#
1sudo pip3 install pyusb2sudo pip3 install webrtcvad
And download the library itself:
tinkster@almalinux:~#
1git clone https://github.com/respeaker/respeaker_python_library.git
Go to Raspbian settings:
tinkster@almalinux:~#
1sudo raspi-config
Go to the Interfacing Options section:
tinkster@almalinux:~#
15 Interfacing Options Configure connections to peripherals
Then to the section:
tinkster@almalinux:~#
1P4 SPI Enable/Disable automatic loading of SPI kernel module
Select Yes for this question:
tinkster@almalinux:~#
1Would you like the SPI interface to be enabled?
Exit raspi-config by pressing Esc several times in a row.
Run the file pixel_ring.py:
tinkster@almalinux:~#
1python3 ~/respeaker_python_library/respeaker/pixel_ring.py
The LEDs on the ReSpeaker should light up!
Addition from 03/24/2020: Friends, if you are going to use the ReSpeaker as a USB microphone, I advise you to output the sound through the 3.5mm Jack output on the RPi. When I output the sound through the 3.5mm Jack on the microphone itself, Alexa completely refuses to hear you when playing music or other external noises.
Configuration of .asoundrc has now become like this:
tinkster@almalinux:~#
1pcm.!default {2type asym3playback.pcm {4type plug5slave.pcm "hw:0,0"6}7capture.pcm {8type dsnoop9ipc_key 543210slave {11pcm "hw:1,0"12buffer_size 9600013channels 114rate 1600015format S16_LE16}17}18}
Profit! :)
Discussion (0)
No comments yet. Be the first!
Maker
Anton Shagaev
Tashkent, UZ
Anton is the Founding Engineer at Tinkster. He translates industrial reliability into software architecture, ensuring the platform's core is built to last. Anton studied oil and gas engineering in the United States and also holds two honors degrees from Tomsk Polytechnic University.
Related Projects


AI Project Assistant
Tinkster Neural Core
Hi! I am the AI assistant for this project. Ask me any questions about the assembly, code, or components.