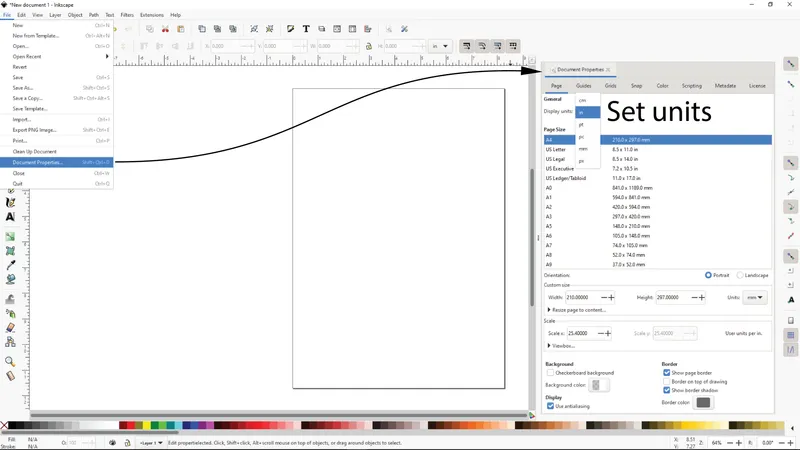
• After launching Inkscape and starting a new document, go to the File menu and select Document Properties to set your preferred units, which is in the Page tab, General, Display units:. Page size is irrelevant for our use. After selecting your preferred units, you can exit the Document Properties.
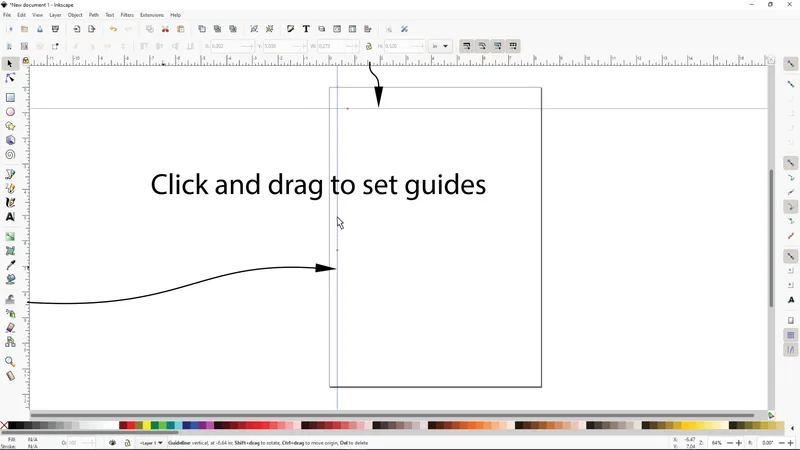
• Next, create two guides by clicking and dragging once from each ruler located at the top and left side of the drawing area. Place them anywhere for now.
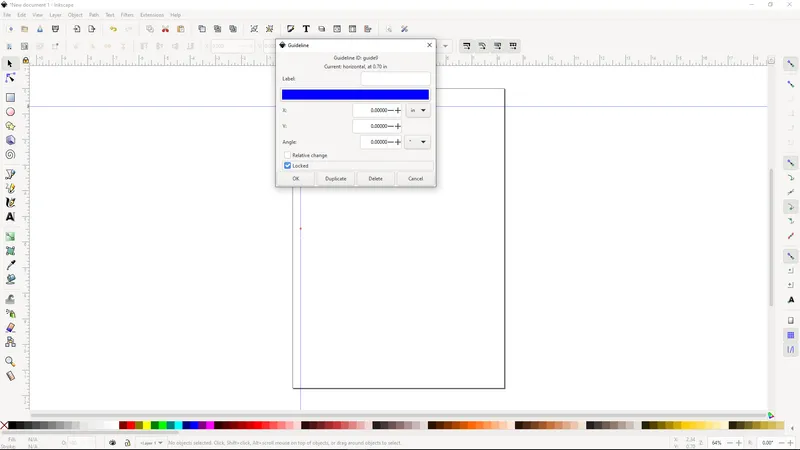
• Hover over the horizontal guide until the cursor changes to a “hand” and the guide highlights to red, then double click the guide to open the guideline properties dialogue box. Set the “x” and “y” values to 0.00 and select the “Locked” check box.
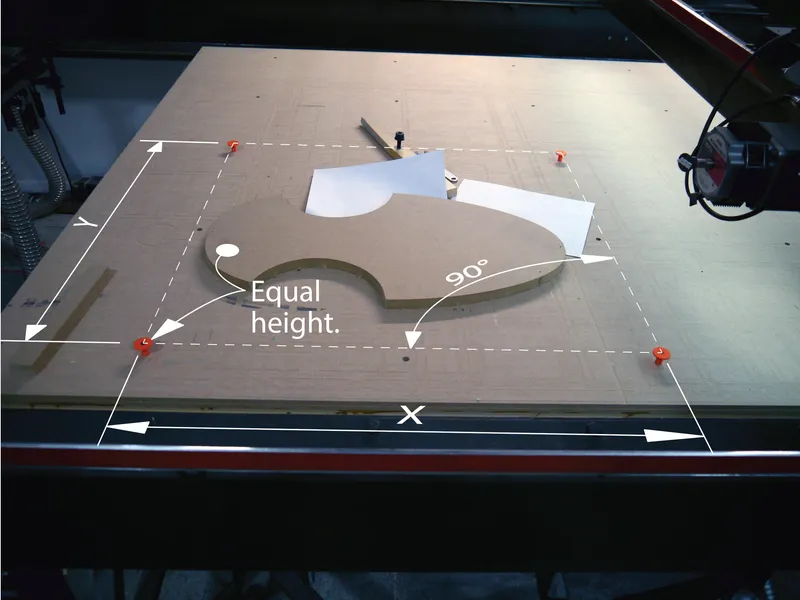
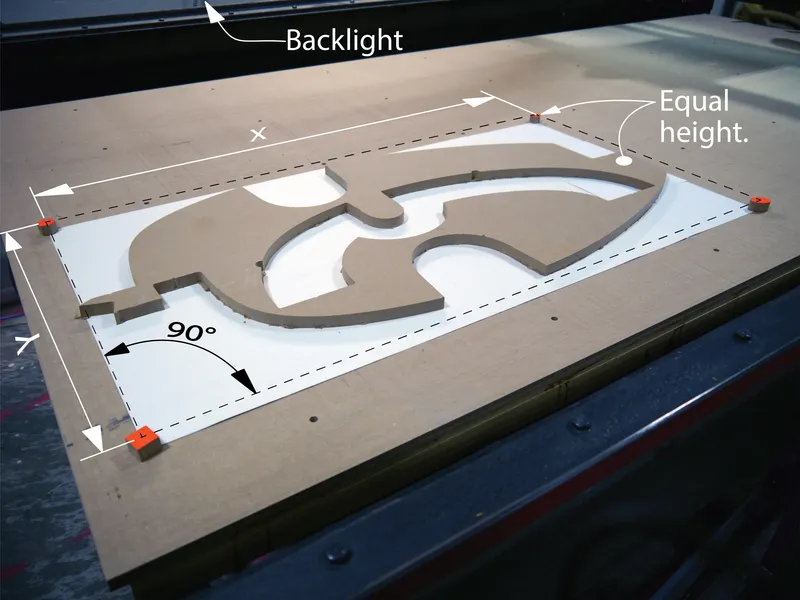
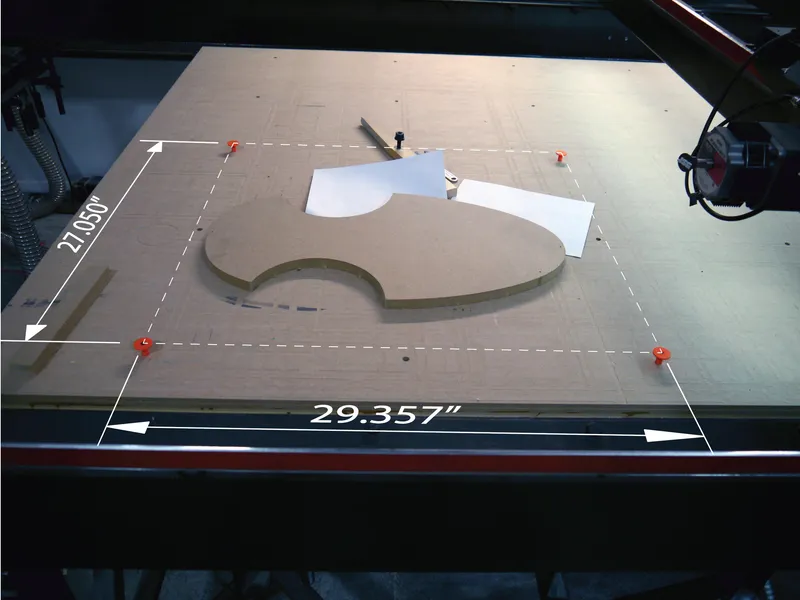
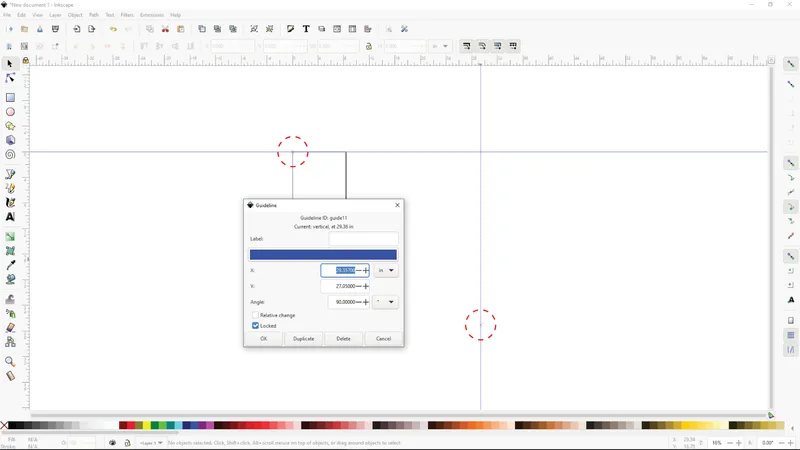
• Next, double click the vertical guideline as before and set the “x” and “y” values to the measurements taken from your target rectangle earlier during the photo process. Note the tiny x's on the guide lines. These will be the upper left and lower right corners of the image exported from GIMP.
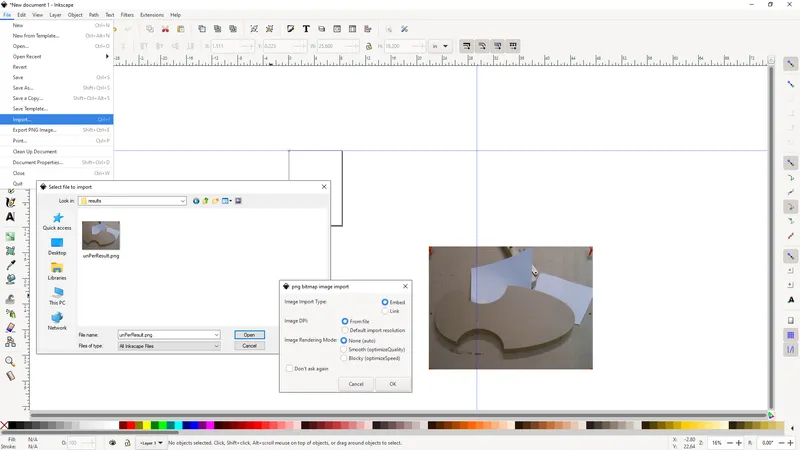
• After setting up the guides, go to the File menu and select the Import option. Navigate to, and select the image you saved from GIMP with the perspective removed and image cropped, and click Open. "OK" the defaults in the following pop-up. The image will be placed somewhere in the drawing area.
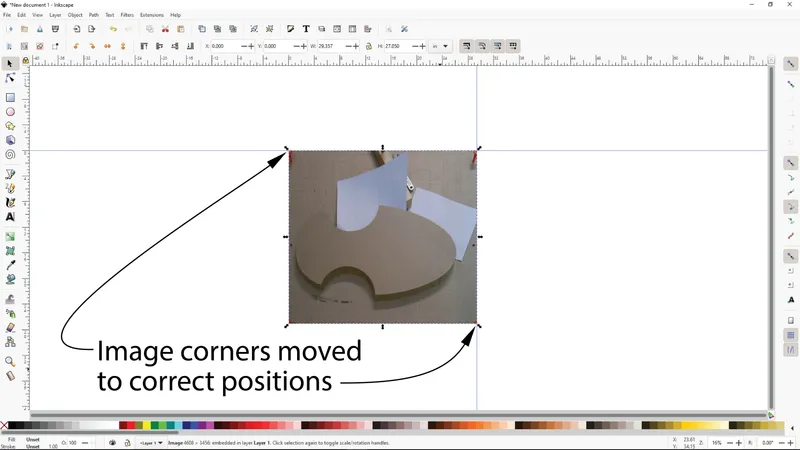
• Click and hold anywhere inside the image and move the image until the upper left corner of the image “snaps” to the tiny “x” of the horizontal guideline. Next click and hold on the diagonal arrow outside the lower right corner of the image and drag it to “snap” to the tiny “x” on the vertical guideline.
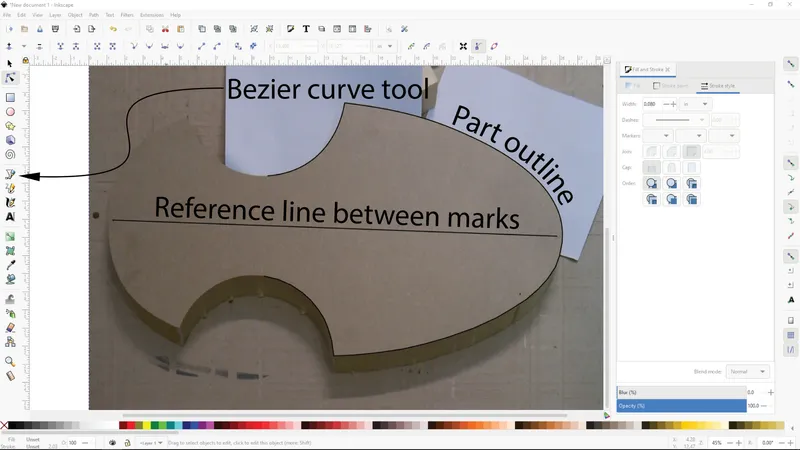
• You now have a background image, with the perspective removed and scaled accurately to the stock you want to use. Now it's simply a matter of using the “Draw Bezier curves and straight lines tool (shortcut “B”) to trace the outline of the area you want to use for your next project as well as any reference marks you made. You can click and drag to create curves or simply click to create straight line segments around your areas of interest.
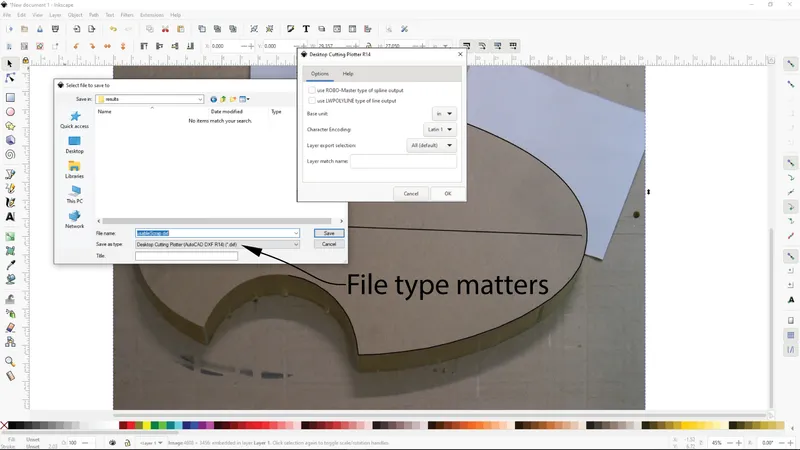
• After you're satisfied with the tracing, go to the File menu and select Save As. Choose your file location and name, then choose the “Desktop Cutting Plotter (AutoCAD DXF R14)(*.dxf)” option in the “Save as type:” pull-down. This file type is critical for the scale to work properly in some CNC programs such as Fusion 360. In the following dialog make sure no check boxes are checked and that the Base unit: is set to the same units as your Inkscape file and your CAM software. The rest can be left as default. Click OK to save your file.
• You're now ready to import the DXF file into Carbide Create, Vcarve, Lightburn, your cutting program of choice or my personal favorite, Fusion 360. Remember to use the reference marks on the stock to align your piece on the cutting bed and set your origin.
As a bonus, in the following step, I'll run through the process of importing the dxf file into Fusion 360 and cutting a part I need for one of my projects.