The latest version of the code is available on GitHub here. To get this code onto your Pi, log in and type This will create a folder called "videoscarer" containing the file videoscarer.py.
You need to modify this code to suit your installation. In particular, you'll need to make sure that the variables "normVideos" and "scareVideos" contain python lists of your videos. Both lists need to be the same length, and they need to correspond one-to-one. That means that the video in the first slot of "normVideos" needs to correspond to the jump scare video in the first slot of "scareVideos". The code will jump from the video in the current slot of normVideos to the video in the same slot of scareVideos when the PIR sensor is activated.
VideoScarer class features
• Support for a fast-forward button (easily extrapolated to a rewind button if you wish)
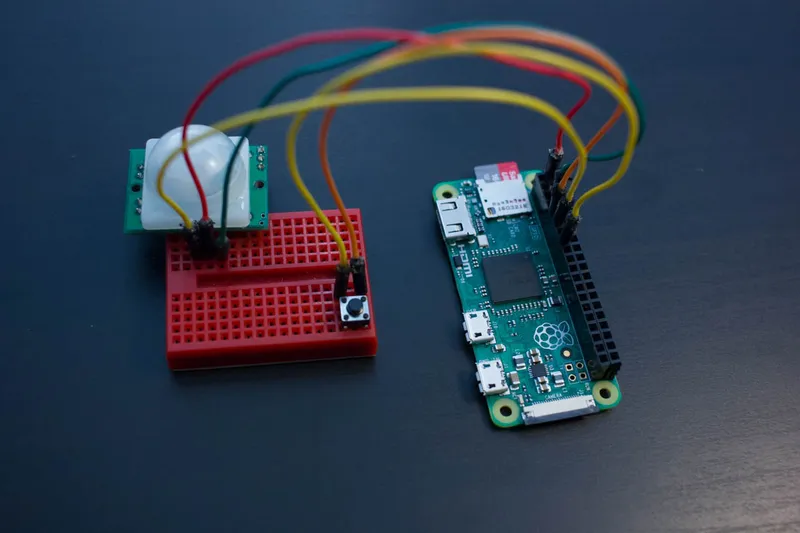
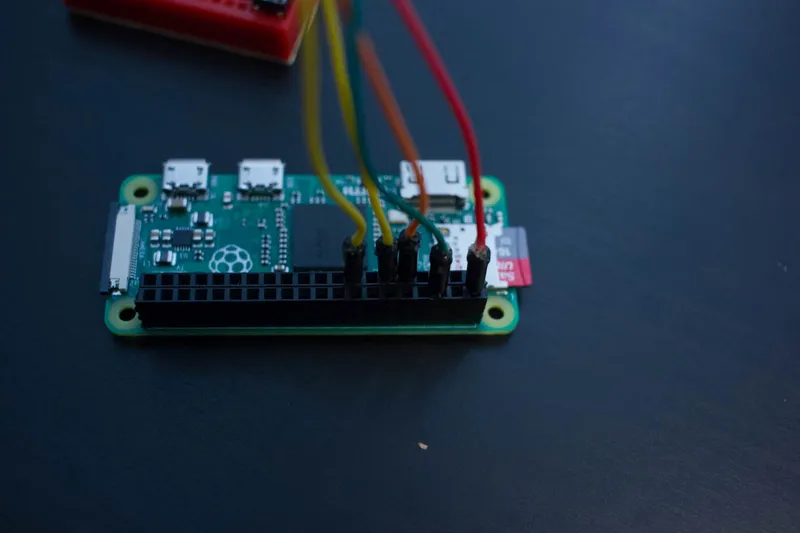
• Support for PIR sensor triggering
• Customizable interval between valid PIR triggers (set to 10 seconds in the attached code)
• Black screen during video switches and rest periods hides the desktop automatically
Credit for the screen blanking portion goes to Adafruit's VideoLooper. You may wish to incorporate some of their features as well, but I've kept the code as simple as possible. Note that the Adafruit code has a small bug--it's unstoppable. PyGame traps keyboard (including ctrl-c, rendering their SIGINT handler unusable), so you need to add the PyGame event handling that VideoScarer has in order to honor quit key sequences like ctrl-c. This won't matter anyway if you don't have a keyboard attached, and you're just SSHing into the PI. I did during debugging, so it mattered a great deal to me. Also of note is the seemingly unnecessary timer resetting after each video begins to play. When I tested the PIR sensor triggering without videos playing, I noticed that the PIR sensor would trigger whenever videos started, leading to a constant loop of scare videos. After some playing around and some research, I found that video playing is so power consuming that the reference voltage for the PIR sensor changes, and it incorrectly registers a hit. The PIR stabilizes fairly quickly, so we just need to wait a bit. About 10 seconds works. Since this was already my "scare interval", I just reused that variable. The other alternative is to have a separate power supply for the PIR sensor, but that seems like overkill to me.
Code explanation
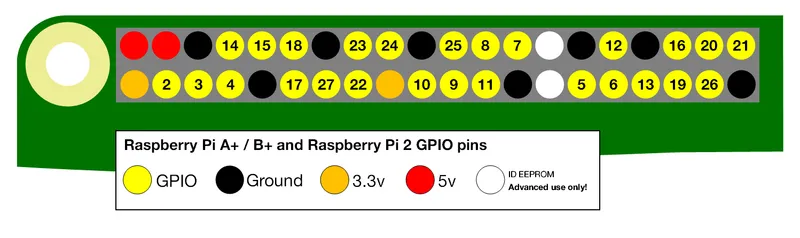
• Initialize the VideoScarer classset up the Pi's GPIO using the Broadcom numbering scheme
• Initialize the PIR sensor with an interval between activations called "scareInterval"
• Initialize the fast-forward button
• Check the video lists
• Black out the screen using PyGame. Unfortunately, this also disables the ability to quit our player with Ctrl-C, so we'll handle that later.
• Set up the player command. We're using omxplayer, a lightweight movie player that comes with Raspbian. You may want to alter the volume level and the output here, as indicated in the comments.
• Attach SIGTERM and SIGINT to the kill subroutine of VideoScarer. These lines actually do nothing if PyGame is running.
• Run VideoScarerCheck if the user pressed Ctrl-C or ESC. If so, quit
• If nothing is playing, advance to the next video and play it.
• Check the PIR sensor. If it has been set off, play the scare video
• Check the fast-forward button. If it has been pressed, skip to the next video and play it
• Kill VideoScarer.Shut down omxplayer
• Quit PyGame
A test run
You may want to run the code directly to give it a test before installing. You can either open IDLE for Python 3 (under the Raspberry Menu->Programming) and run it from there, or you can open a terminal and run the module as (substituting your directory)
python3 -u /home/pi/Documents/videoscarer/videoscarer.py