advancedSmart Home & IoT5-Jun-2022
Installation of Japanese water ionizer OSG HumanWater HU-88 under kitchen sink

Anton Shagaev
Tashkent, UZ
3 days
--
14

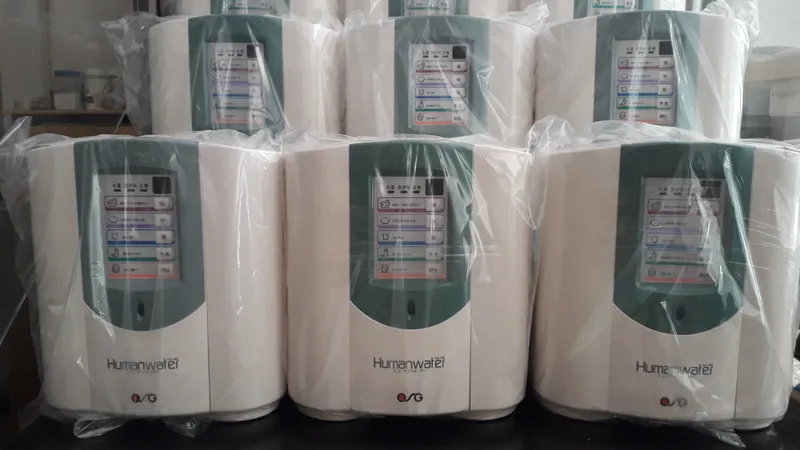
Friends, several years ago I ordered a wonderful device for alkalizing the body from Japan, namely the OSG HumanWater HU-88 flow-through water ionizer. Regarding how beneficial water ionizers are for health, you can conduct your own research and draw appropriate conclusions. Initially, this ionizer was intended for installation on a countertop surface (instructions ), which occupied useful space, and an additional spout with two hoses had to be mounted onto the water faucet spout, which noticeably spoiled the appearance of the kitchen, as, for example, in this video:
It was also necessary to find an additional electrical outlet to connect the ionizer to the power supply. In this instruction, I will show you how you can place this water ionizer under the sink, and instead of a bulky device with hoses and wires, have a neat faucet for ionized water, which will be turned on and off by a 433 MHz remote control. This technology is also suitable for any other ionizers that start the ionization process when water is supplied (i.e., without additionally pressing any buttons on the control unit).
What you'll need
Materials
- 1 pc
- 1 pc
- 1 pc
- 1 pc
- 1 pc
- 1 pc
- 1 pc
- 1kOhm resistor, 1/4Watt1 pc
- 1 pc
- 1 pc
- 2 pcs
- 1 pc
- 1 pc
- 2 pcs
- 1 pc
- 1 pc
- 1 pc
- 1 pc
- 1 pc
- 1 pc
- 1 pc
- Fittings for ionized and tap water hoses (3/8” hose x 1/4” quick jack)2 pcs
- 1 pc
- 3 pcs
Steps
1
Reading remote control codes
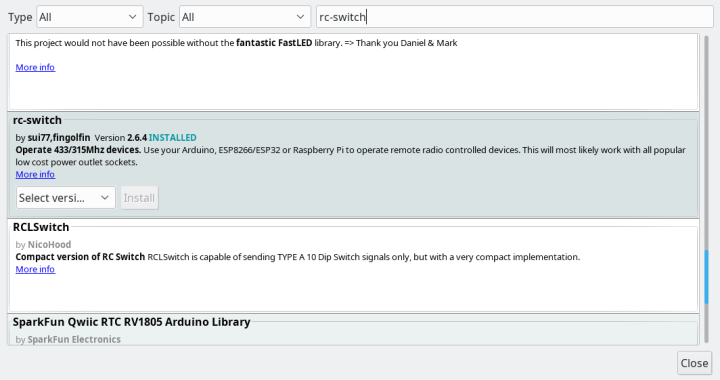
Reading remote control codes

433_receiver_sketch_bb
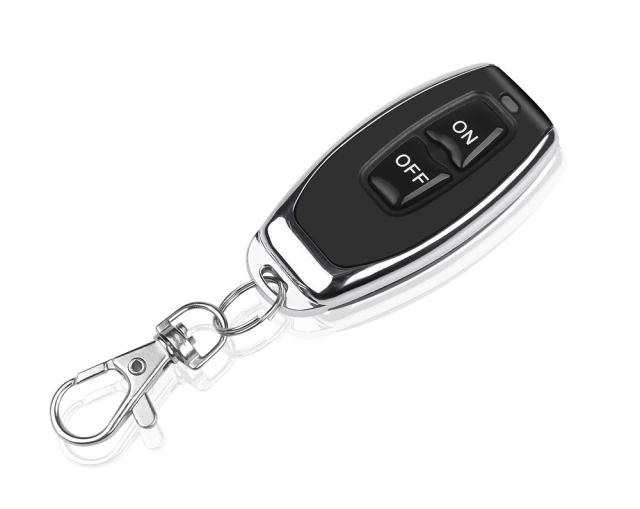
433MHz radio key fob
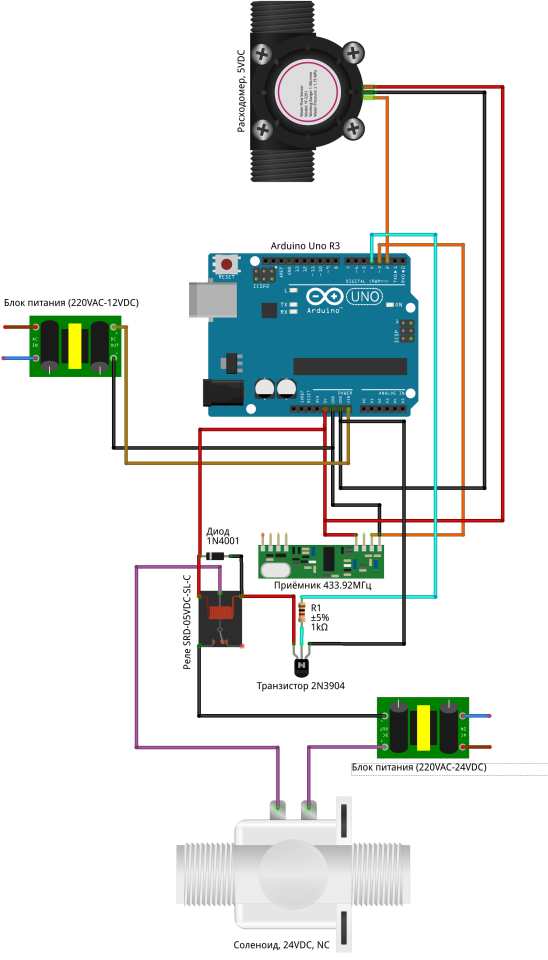
Connect the 433.92MHz receiver to Arduino according to the diagram:
It is not necessary to connect Arduino to the power supply at this stage. Then connect Arduino to the computer in any free USB port.
Next, create a folder /home/user/ReceiveDemo_Advanced/ and copy two files (ReceiveDemo_Advanced.ino и output.ino) there from https://github.com/sui77/rc-switch/tree/master/examples/ReceiveDemo_Advanced
Open the file ReceiveDemo_Advanced.ino in Arduino IDE. Change mySwitch.enableReceive(0) to mySwitch.enableReceive(1), and change Serial.begin(9600) to Serial.begin(500000), so that it becomes like this:
tinkster@almalinux:~#
1#include <RCSwitch.h>23RCSwitch mySwitch = RCSwitch();45void setup() {6Serial.begin(500000);7mySwitch.enableReceive(1);8}910void loop() {11if (mySwitch.available()) {12output(mySwitch.getReceivedValue(), mySwitch.getReceivedBitlength(), mySwitch.getReceivedDelay(), mySwitch.getReceivedRawdata(),mySwitch.getReceivedProtocol());13mySwitch.resetAvailable();14}15}
Upload the sketch to Arduino and open Tools -> Serial Monitor, in the window that appears, select the speed 500000baud, take our remote control and press the buttons one by one On и Off.
Similar lines will appear in the window:
tinkster@almalinux:~#
1Decimal: 8535410 (24Bit) Binary: 100000100011110101110010 Tri-State: not applicable PulseLength: 336 microseconds Protocol: 12Raw data: 10468,1056,308,364,996,364,992,368,992,372,984,368,992,84,312,372,984,368,992,368,988,1052,316,1048,316,1044,320,1052,312,364,992,1048,320,368,988,1052,312,1052,316,1048,316,364,996,368,988,1044,320,364,992,3Decimal: 8535412 (24Bit) Binary: 100000100011110101110100 Tri-State: not applicable PulseLength: 336 microseconds Protocol: 14Raw data: 10464,1064,300,372,988,372,988,364,992,140,980,376,984,1052,312,372,988,376,980,376,984,1060,304,1056,312,1052,312,1056,312,368,988,1060,308,364,996,1052,316,1048,316,1052,312,372,988,1056,312,364,992,372,988,
Accordingly, the ON code will be 8535410, and the OFF code will be 8535412.
2
Controller firmware and component assembly
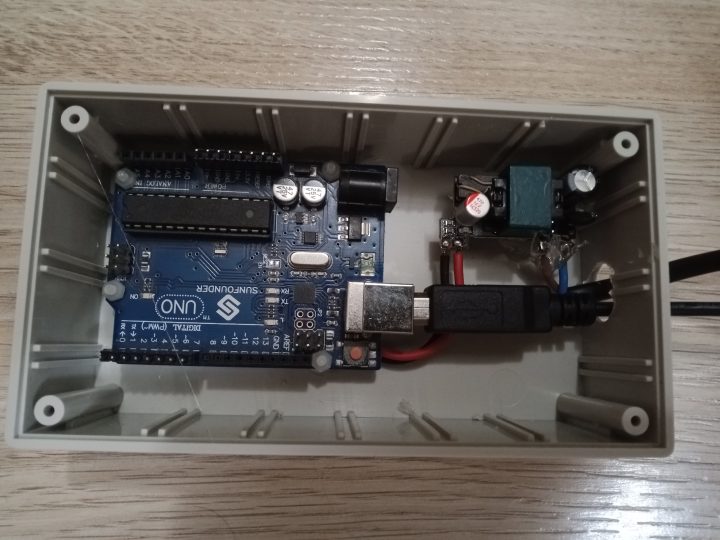
Controller firmware and component assembly
Controller firmware and component assembly
Controller firmware and component assembly
+3

Assemble the components based on Arduino according to the schematic:
Note that the transistor emitter in this schematic is connected to GND.
Connect the Arduino to the computer, open the Arduino IDE and flash the controller with this sketch:
tinkster@almalinux:~#
1#include <RCSwitch.h>23RCSwitch mySwitch = RCSwitch();4int relayPin = 4;5float revolutions;6int rpm;7long timeold;8int oldState, newState;9int period = 5000;10unsigned long time_now = 0;1112void setup() {13Serial.begin(500000);14pinMode(relayPin,OUTPUT);15pinMode(3,INPUT);16digitalWrite(relayPin, LOW);17mySwitch.enableReceive(1);18attachInterrupt(0, magnet_detect, RISING);19revolutions = 0;20rpm = 0;21timeold = 0;22oldState = 0;23newState = 0;24}2526void loop() {27check_state();2829time_now = millis();30while(millis() < time_now + period && newState == 1 && oldState == 0) {31check_state();32}3334if (revolutions >= 1) {35rpm = (max(1, revolutions) * 60000) / (millis()-timeold);36timeold = millis();37revolutions = 0;38delay(100);39} else { rpm = 0; }4041if (rpm < 1 && newState == 1) { newState = 0; digitalWrite(relayPin, LOW); }4243oldState = newState;44}4546void magnet_detect()47{48revolutions++;49//Serial.println("detect");50}5152void check_state()53{54if (mySwitch.available()) {55if (mySwitch.getReceivedValue() == 8535410 && mySwitch.getReceivedProtocol() == 1 && mySwitch.getReceivedBitlength() == 24) { newState = 1; digitalWrite(relayPin, HIGH); }56if (mySwitch.getReceivedValue() == 8535412 && mySwitch.getReceivedProtocol() == 1 && mySwitch.getReceivedBitlength() == 24) { newState = 0; digitalWrite(relayPin, LOW); }57mySwitch.resetAvailable();58}59}
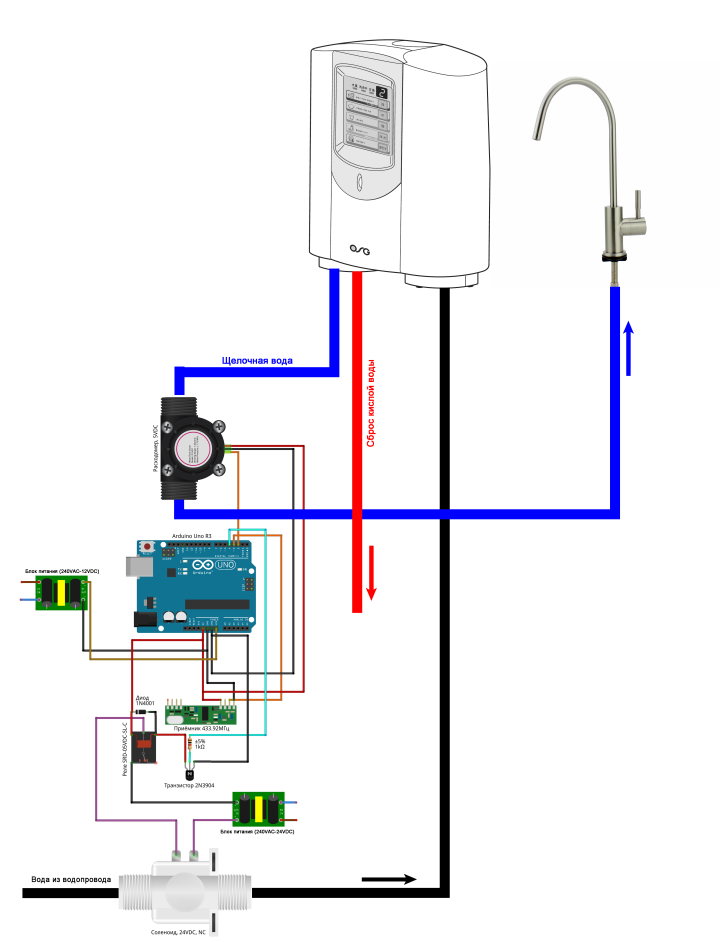
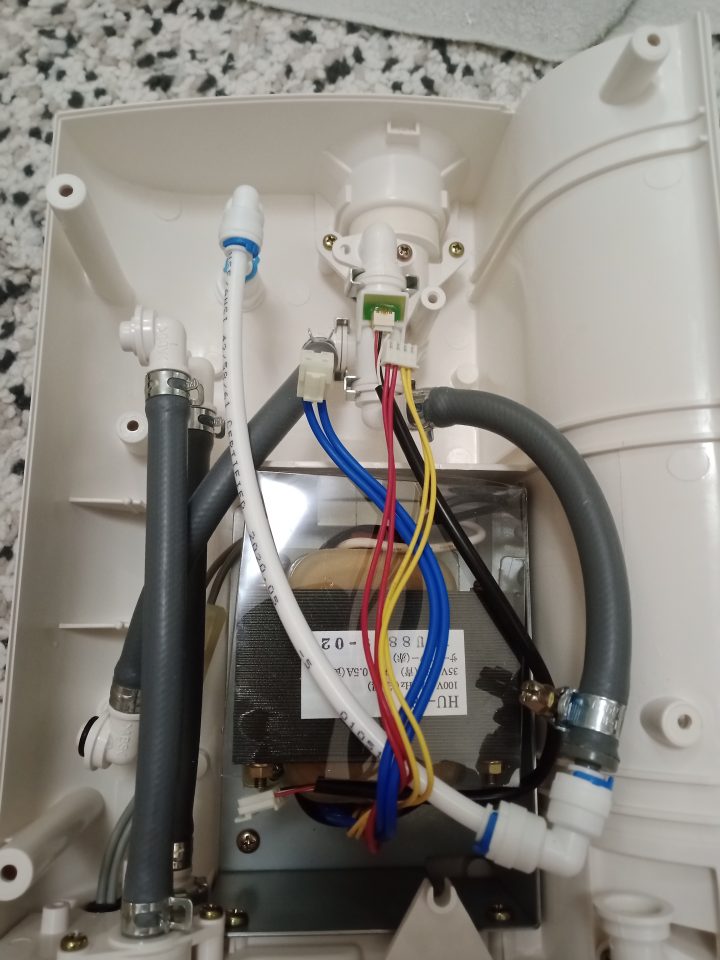
Connect the electric ball valve and flow meter to the ionizer according to the schematic.
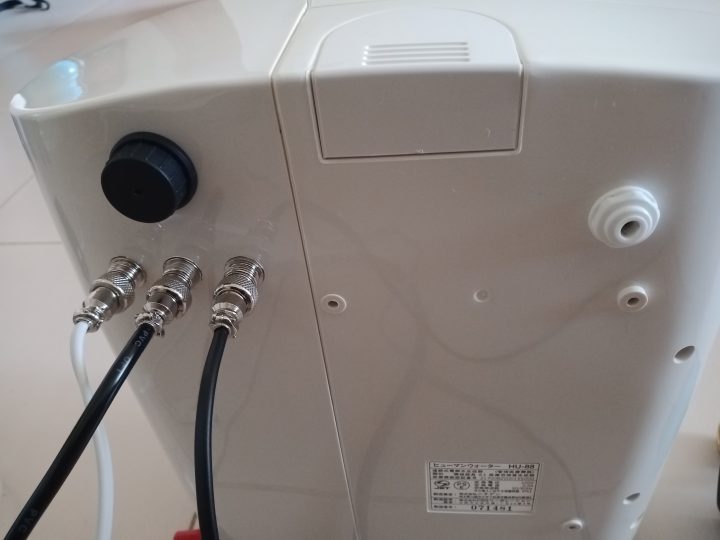
In my case, for beauty and aesthetic appearance, I used GX12 connectors for power supply, connecting the electric ball valve and flow meter. I powered the Arduino power supply from the 100V AC of the ionizer itself (the voltage in Japan is 100V and this ionizer was connected to the network via a 220VAC-100VAC transformer). I also connected the Arduino to an external data port so that I wouldn't have to open the case unnecessarily if I needed to reflash the controller. This ionizer used a Japanese water filter and I had no desire to order a separate filter from Japan again. Therefore, I excluded this filter from the system, re-routed the hoses inside the ionizer and ultimately brought the water supply out through an external port with a 1/4” quick jack connection.
Subsequently, I supplied water after 3 pre-filters of the reverse osmosis system, which I also have at home. If you don't have such filters at the moment, you can supply water directly from the water pipe using a tee with a 1/2x1/2x1/4 ball valve. But I strongly recommend using pre-filters to avoid contaminating the ionizer with mechanical particles.
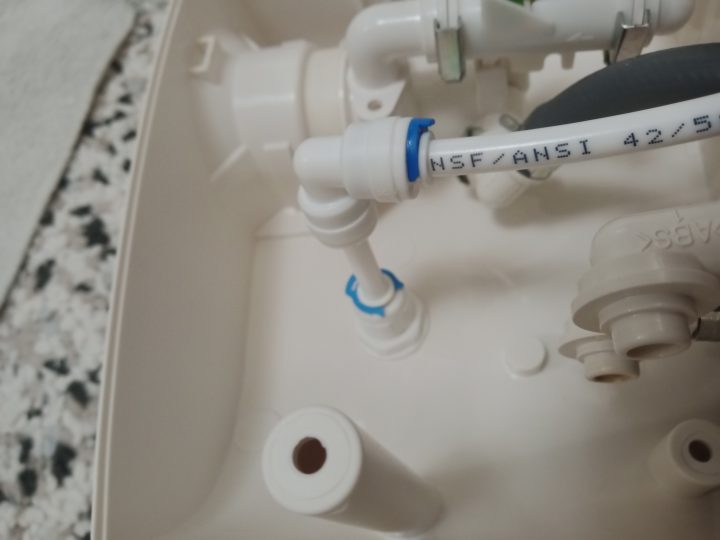
I cut all the ionizer hoses and connected them with hose fittings so that at the output I only had 1/4” quick jack connections. I extended these connections with 1/4” tubes, each 1m long.
Then, I attached a cuff to the 40mm sewer pipe and connected it to the acidic water tube (in this setup we will not use acidic water, but discharge it into the sewer pipe).
I connected the ionized water tube to the flow meter and the drinking water faucet, previously installed on the sink. In my case, I had a faucet with two spouts and I connected one of them to the ionizer. In your case, you will have to install a separate faucet for drinking water, but this is a very simple procedure. You only need to drill one hole with a diameter of 13mm in the countertop or sink, install the faucet and tighten it with the mating nut from the back side.
I connected the tube from the 1/2x1/2x1/4 tee with ball valve to the electric ball valve, and connected the tube from the ball valve to the water supply port of the ionizer.
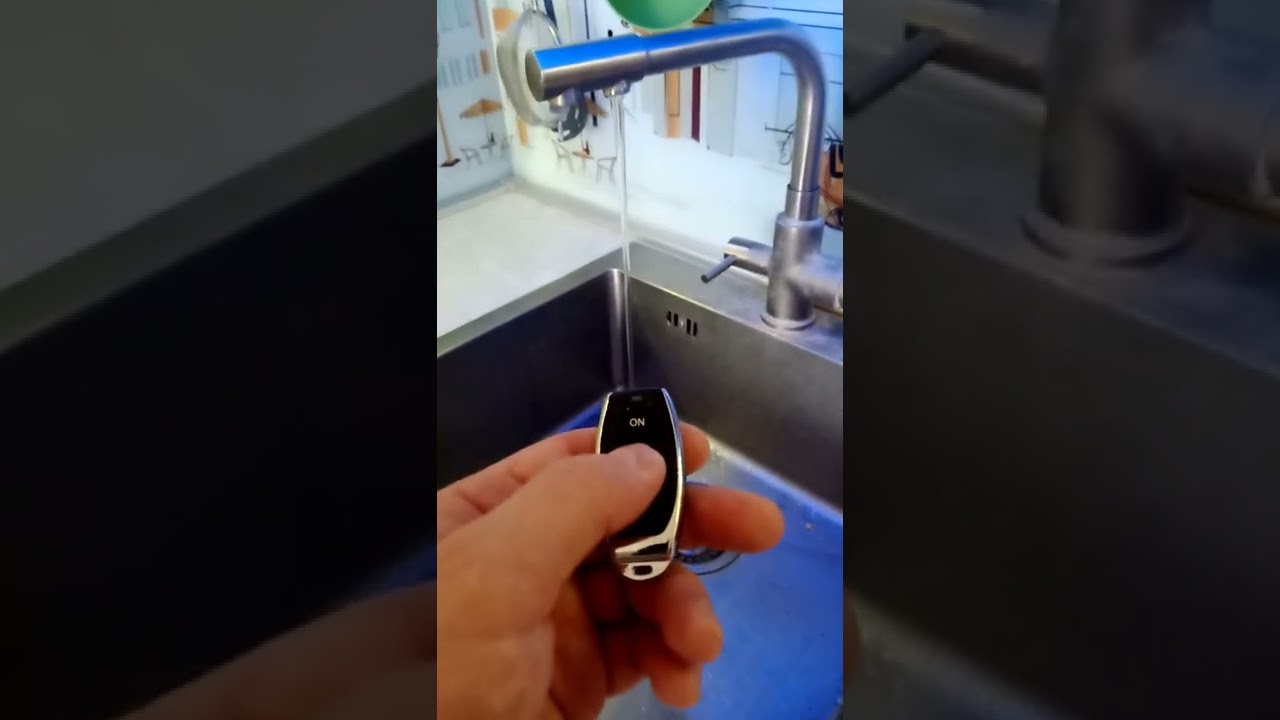
When everything is connected, plug all components into the electrical network, keep the drinking water faucet itself always open, and press the On button on the control key fob. The electric ball valve should open, water will begin to flow into the ionizer, which in turn will start the ionization process (from the ionizer's internal flow meter) and at the output from the faucet you will get a stream of alkaline water from the ionizer, which from now on will be located under your sink. If for some reason you mechanically close the drinking water faucet, the protection will activate and the electric ball valve for water supply will still close. Afterwards, don't forget to open it and keep it open. If you try to turn on the water supply with the drinking faucet closed, after 5 seconds the protection will also activate and the electric ball valve will automatically close.
Conclusion
I hope this instruction will be useful to you and you can apply it to modify your water ionizers for under-sink installation. And I recently upgraded my HU-88, specifically by purchasing a South Korean water ionizer PrimeWater 901-R and remote faucet with electronic control, installed on the countertop surface. The ionization block of this device uses nine titanium plates with platinum coating, which provides better indicators of pH and ORP, and using the remote faucet with touch control is a real pleasure.
Discussion (0)
No comments yet. Be the first!
Maker
Anton Shagaev
Tashkent, UZ
Anton is the Founding Engineer at Tinkster. He translates industrial reliability into software architecture, ensuring the platform's core is built to last. Anton studied oil and gas engineering in the United States and also holds two honors degrees from Tomsk Polytechnic University.
Related Projects

AI Project Assistant
Tinkster Neural Core
Hi! I am the AI assistant for this project. Ask me any questions about the assembly, code, or components.