advancedLinux & Homelab1-Apr-2020
Creating a TV Server at Home on Linux

Anton Shagaev
Tomsk, RU
1 day
--
11

Friends, today we'll talk about how to create your own TV server for subsequently distributing video streams to any devices on your home network, as well as beyond it to Android devices.
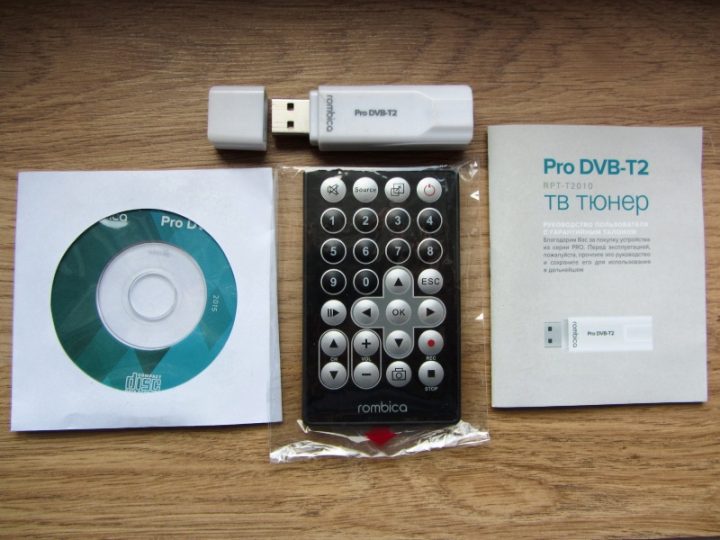
The idea to create my own TV server came about because my Sony TV lacks a TV tuner for the standard DVB-T2, and only has DVB-T. I could have bought a regular TV tuner for 1000 rubles and connected it to the TV, but then I would only have digital TV on one device, so I decided to go a bit further and expand this functionality. I had to buy 2 TV tuners, because over-the-air digital TV in Russia consists of two multiplexes, and to watch TV on all devices simultaneously, you need a separate tuner for each multiplex, since the frequency of the multiplexes is different — for the first one it is 474MHz, and for the second one 658MHz.
What you'll need
Materials
- Home server with Centos 7 operating system1 pc
- 2 pcs
- 1 pc
- 1 pc
- 5 pcs
- 2 pcs
- Antenna cable with 75 ohm wave impedance1 pc
- At least two USB 2.0 inputs on the home server1 pc
Steps
1
Setting up CentOS 7 OS
![[object Object]](https://tinkster.dev/api/images/file/Rufus.png)
[object Object]
We will install CentOS 7 from a USB flash drive. For this, we need to download the CentOS 7 distribution without a graphical user interface (GUI):
Next, download the Rufus program for Windows:
Launch Rufus on a separate Windows machine and specify the operating system ISO file:
Click the START button and create a bootable USB flash drive.
Next, enter the BIOS of the server's motherboard (usually by pressing the F2 or F10 keys during boot) and set the USB flash drive as the disk from which the system should boot. Save the settings and reboot the server. Follow the installer's instructions and install CentOS 7. Reboot the system and log into CentOS using the username and password set during installation.
2
Compiling the latest kernel for CentOS 7
Compiling a fresh kernel is necessary so that it ultimately 'sees' the TV tuner driver files in the folder /lib/firmware/. The kernel that comes by default with CentOS 7 distributions for some reason does not 'see' the TV tuner drivers. In my case, I installed kernel version 5.1.15. Download the kernel source code. Go to the terminal and type:
Unpack the archive:
tinkster@almalinux:~#
1wget https://cdn.kernel.org/pub/linux/kernel/v5.x/linux-5.1.15.tar.xz
Next, download the newest compiler from the devtoolset-8 set and development tools for kernel compilation:
tinkster@almalinux:~#
1tar -xvf linux-5.1.15.tar.xz
Activate the compiler for the current terminal session:
tinkster@almalinux:~#
1sudo yum update2sudo yum groupinstall 'Development Tools'3sudo yum install centos-release-scl4sudo yum install devtoolset-85sudo yum install ncurses-devel make gcc bc bison flex elfutils-libelf-devel openssl-devel grub2
Check the compiler version:
tinkster@almalinux:~#
1sudo scl enable devtoolset-8 bash
Before starting the kernel build, you need to configure the Linux kernel configuration. You should also specify which kernel modules (drivers) are needed for your system. I suggest you copy the existing configuration file using the cp command:
tinkster@almalinux:~#
1gcc --version
tinkster@almalinux:~#
1gcc (GCC) 8.3.1 20190311 (Red Hat 8.3.1-3)2Copyright (C) 2018 Free Software Foundation, Inc.3This is free software; see the source for copying conditions. There is NO warranty; not even for MERCHANTABILITY or FITNESS FOR A PARTICULAR PURPOSE.
Start compiling the new kernel:
tinkster@almalinux:~#
1cd linux-5.1.152cp -v /boot/config-$(uname -r) .config
Guys, compiling and building the Linux kernel takes a significant amount of time. The build time depends on your system's resources, such as the number of processor cores and the current system load. So pour some coffee and have a bun :)
tinkster@almalinux:~#
1make -j $(nproc)
Install the Linux kernel modules:
And finally, install the Linux kernel itself:
tinkster@almalinux:~#
1sudo make modules_install
This command will install three files in the /boot folder and also make changes to your grub configuration file:
tinkster@almalinux:~#
1sudo make install
You also need to change the Grub 2 bootloader settings. Enter the following command in the command line according to your Linux distribution:
tinkster@almalinux:~#
1initramfs-5.1.15.img2System.map-5.1.153vmlinuz-5.1.15
Reboot the server:
tinkster@almalinux:~#
1sudo grub2-mkconfig -o /boot/grub2/grub.cfg2sudo grubby --set-default /boot/vmlinuz-5.1.15
Check the current kernel version with the command:
tinkster@almalinux:~#
1sudo reboot
Activate the compiler for the current terminal session again:
tinkster@almalinux:~#
1uname -mrs
tinkster@almalinux:~#
1Linux 5.1.15 x86_64
Enable the compiler for the current terminal session again:
tinkster@almalinux:~#
1sudo scl enable devtoolset-8 bash
3
Installing V4L-DVB drivers for TV tuners
Installing V4L-DVB drivers for TV tuners
Insert TV tuners into USB ports on the server and connect them to the external outdoor antenna via a TV splitter.
Then enter in the terminal:
tinkster@almalinux:~#
1git clone --depth=1 git://linuxtv.org/media_build.git2cd media_build3sudo ./build
Reboot the server.
tinkster@almalinux:~#
1sudo reboot
4
Setting up the TV server TVHeadend
The easiest way to install a TV server for CentOS 7 is through Snap.
In the terminal, enter:
tinkster@almalinux:~#
1sudo yum install epel-release2sudo yum install snapd3sudo systemctl enable --now snapd.socket4sudo ln -s /var/lib/snapd/snap /snap5sudo snap install tvheadend
Next, open ports 9981, 80, and 443 on the server:
tinkster@almalinux:~#
1sudo firewall-cmd --add-port=9981/tcp --permanent --zone=public2sudo firewall-cmd --add-port=80/tcp --permanent --zone=public3sudo firewall-cmd --add-port=443/tcp --permanent --zone=public4sudo firewall-cmd —reload
After installation, open a browser on another computer connected to the local network and enter the address:
http://[IP address]:9981
where [IP address] is the local IP address of your CentOS server.
Follow the instructions of the Assistant, but I want to highlight the main points:
In the field Language: select either Russian or English
Allowed network: enter 0.0.0.0/0
Admin username: create a username in English
Admin password: create a password in English
Tuner: select DVB-T
Predefined-muxes: select DTT — Russian Federation
After all manipulations, the multiplex scanning process will begin.
Next, check the boxes for:
Map all services
Create provider tags
Create network tags
The simplest way to check the configured channels is to do it through the VLC player. Install it on another Linux machine with Ubuntu via snap (it is also available for Windows):
tinkster@almalinux:~#
1sudo snap install vlc
Next, in the home folder of this Ubuntu machine, create a file TV.m3u:
tinkster@almalinux:~#
1nano ~/TV.m3u
and enter just one line in it:
tinkster@almalinux:~#
1http://[IP-address]:9981/playlist/channels
Where [IP address] is the local IP address of your CentOS server.
Save the file.
Open it in VLC by double-clicking. Next, VLC will ask you to enter a username and password. Enter the Admin username and Admin password that you created earlier.
On the TV, I connected to the TV server through a KODI set-top box and the TVHeadend client application. Everything there is extremely simple.
5
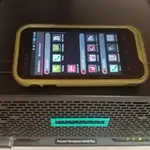
Watching TV on an Android smartphone outside the home network

Screenshot from my smartphone
To enable viewing TV on an Android smartphone outside the home network, you need to:
2. Have a fixed IP address for your home router and set up port forwarding for ports 80 and 443 to the server.
3. Have a domain name linked to your router's IP address.
4. Install the nginx web server.
tinkster@almalinux:~#
1sudo yum install nginx
Open the file and insert the following lines into it:
tinkster@almalinux:~#
1sudo nano /etc/nginx/nginx.conf
And add the following lines to it:
tinkster@almalinux:~#
1user nginx;2worker_processes auto;34error_log /var/log/nginx/error.log;5pid /run/nginx.pid;67# Load dynamic modules. See /usr/share/doc/nginx/README.dynamic.8include /usr/share/nginx/modules/*.conf;910events {11worker_connections 1024;12}1314http {15client_max_body_size 256M;16log_format main '$remote_addr - $remote_user [$time_local] "$request" '17'$status $body_bytes_sent "$http_referer" '18'"$http_user_agent" "$http_x_forwarded_for"';19server_names_hash_bucket_size 64;20access_log /var/log/nginx/access.log main;2122sendfile on;23tcp_nopush on;24tcp_nodelay on;25keepalive_timeout 65;26types_hash_max_size 2048;2728include /etc/nginx/mime.types;29default_type application/octet-stream;3031# Load modular configuration files from the /etc/nginx/conf.d directory.32# See http://nginx.org/en/docs/ngx_core_module.html#include33# for more information.34include /etc/nginx/conf.d/*.conf;35server_tokens off;3637server {38listen 80 default_server;39listen [::]:80 default_server;40server_name _;41root /usr/share/nginx/html;4243# Load configuration files for the default server block.44include /etc/nginx/default.d/*.conf;4546location / {47index index.php index.html index.htm;48}4950error_page 404 /404.html;51location = /40x.html {52}5354error_page 500 502 503 504 /50x.html;55location = /50x.html {56}57}58}
In the /etc/nginx/conf.d/ folder, create a file named tvheadend.conf:
tinkster@almalinux:~#
1sudo nano /etc/nginx/conf.d/tvheadend.conf
Add these lines to the file:
tinkster@almalinux:~#
1server {2listen 80;3server_name domain.ru;4set $root_path /var/www/domain.ru/html;5root $root_path;6}
domain.ru - will be your own domain name.
Next, create a folder for the server:
tinkster@almalinux:~#
1mkdir /var/www/domain.ru/html/2mkdir /var/www/domain.ru/log/3sudo chown nginx:nginx /var/www/domain.ru/html/*4sudo chown nginx:nginx /var/www/domain.ru/log/*
Start nginx and add it to autostart:
tinkster@almalinux:~#
1sudo systemctl enable nginx2sudo systemctl start nginx
5. Install an SSL certificate for Nginx using Let’s Encrypt:
Guys, you don't want someone to intercept your TV server passwords, say, when you connect to some public wireless internet, and then without your permission some cool hacker connects to you, do you? I think not :)
Install Let’s Encrypt and obtain the secret and public key:
tinkster@almalinux:~#
1sudo yum install certbot python2-certbot-nginx2sudo certbot --nginx
In the terminal, follow the assistant's instructions.
6. Open the tvheadend.conf file again:
tinkster@almalinux:~#
1sudo nano /etc/nginx/conf.d/tvheadend.conf
erase everything and insert the following content:
tinkster@almalinux:~#
1server {2listen 80;3server_name domain.ru;4return 301 https://domain.ru$request_uri;5}67server {8listen 443 ssl;9server_name domain.ru;10set $root_path /var/www/domain.ru/html;1112ssl_certificate /etc/letsencrypt/live/domain.ru/fullchain.pem;13ssl_certificate_key /etc/letsencrypt/live/domain.ru/privkey.pem;1415access_log /var/www/domain.ru/log/nginx-ssl-requests.log;16error_log /var/www/domain.ru/log/nginx-ssl-error.log;1718root $root_path;1920location /tvh/ {21proxy_pass http://127.0.0.1:9981/;22proxy_redirect off;23proxy_set_header Host $host;24proxy_set_header X-Forwarded-Proto $scheme;25proxy_set_header X-Real-IP $remote_addr;26proxy_set_header X-Forwarded-For $proxy_add_x_forwarded_for;27}2829location /stream/ {30proxy_pass http://127.0.0.1:9981/stream/;31proxy_redirect off;32proxy_set_header Host $host;33proxy_set_header X-Forwarded-Proto $scheme;34proxy_set_header X-Real-IP $remote_addr;35proxy_set_header X-Forwarded-For $proxy_add_x_forwarded_for;36}3738}
Reload nginx:
tinkster@almalinux:~#
1sudo systemctl restart nginx
7. On the smartphone, in the folder /storage/emulated/0/Download/ create a file named TV.m3u using the application ES File Explorer and paste this line:
tinkster@almalinux:~#
1https://domain.ru/tvh/playlist/channels
Save the file and launch it using VLC. The program will also request a login and password. Enter them and watch your home television from anywhere in the world.
Discussion (0)
No comments yet. Be the first!
Maker
Anton Shagaev
Tomsk, RU
Anton is the Founding Engineer at Tinkster. He translates industrial reliability into software architecture, ensuring the platform's core is built to last. Anton studied oil and gas engineering in the United States and also holds two honors degrees from Tomsk Polytechnic University.
Related Projects
AI Project Assistant
Tinkster Neural Core
Hi! I am the AI assistant for this project. Ask me any questions about the assembly, code, or components.