expertSmart Home & IoT14-Sept-2020
Creating a mini-PBX for calls to Russia from abroad

Anton Shagaev
Tashkent, UZ
3 days
--
5
Friends, we've all had to travel abroad and call Russian phones while roaming. As you know, the prices for such calls leave much to be desired, and we limit ourselves to calls of 1-2 minutes to say the most important things. Today I will show you a method where you will only need the internet to make calls to Russian phones at local rates.
What you'll need
Materials
- 1 pc
- Asterisk IP telephony server installed on CentOS 71 pc
- OpenVPN server installed on CentOS 71 pc
- Free encryption certificates from LetsEncrypt1 pc
- Fixed IP address for home router (must be obtained from provider)1 pc
- Domain name linked to home router IP address1 pc
- 1 pc
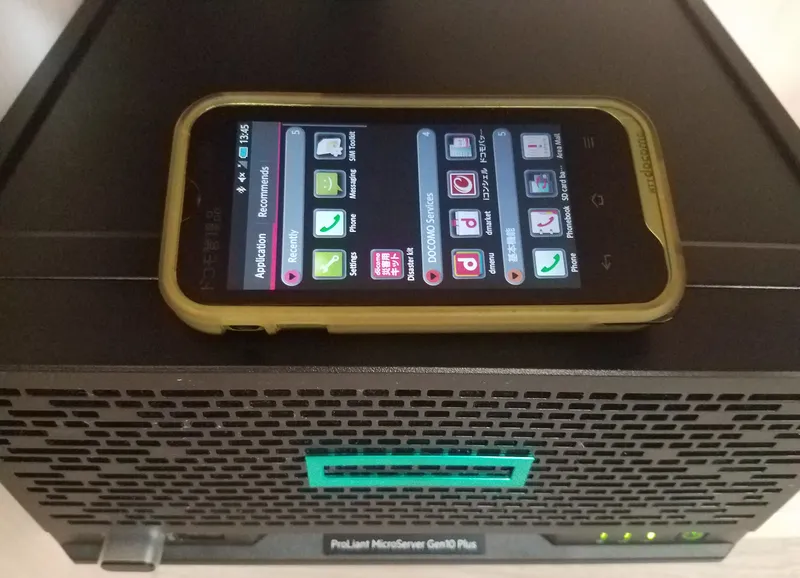
- Mobile phone with built-in Bluetooth module (hereinafter GSM gateway)1 pc
- Tele2 SIM card or from another mobile operator1 pc
- 1 pc
- 1 pc
Steps
1
Installing a server on Linux
Friends, to avoid repetition, I'll provide the link for installing the server on CentOS, which was discussed in the previous guide:
The installation implies using a home server as a platform for the Asterisk telephony server.
2
Installing Nginx for automatic LetsEncrypt certificate acquisition
Open the terminal on the server either directly (by connecting a keyboard and monitor) or through another computer via the protocol SSH.
Deactivate SELinux:
tinkster@almalinux:~#
1sudo setenforce 0
Add ports 80 и 443 in Firewalld:
tinkster@almalinux:~#
1sudo firewall-cmd --add-port=80/tcp --permanent --zone=public2sudo firewall-cmd --add-port=443/tcp --permanent –zone=public
Reload the rules:
tinkster@almalinux:~#
1sudo firewall-cmd —reload
You will also need to forward ports (80 and 443) from your home router to the local IP address of your server. An example of port forwarding on an Asus router can be viewed here.
tinkster@almalinux:~#
1sudo yum install nginx
Open the file nginx.conf:
tinkster@almalinux:~#
1sudo nano /etc/nginx/nginx.conf
Delete all lines from it and insert the following:
tinkster@almalinux:~#
1user nginx;2worker_processes auto;3error_log /var/log/nginx/error.log;4pid /run/nginx.pid;5# Load dynamic modules. See /usr/share/doc/nginx/README.dynamic.6include /usr/share/nginx/modules/*.conf;7events {8worker_connections 1024;9}1011http {12client_max_body_size 256M;13log_format main '$remote_addr - $remote_user [$time_local] "$request" '14'$status $body_bytes_sent "$http_referer" '15'"$http_user_agent" "$http_x_forwarded_for"';16server_names_hash_bucket_size 64;17access_log /var/log/nginx/access.log main;18sendfile on;19tcp_nopush on;20tcp_nodelay on;21keepalive_timeout 65;22types_hash_max_size 2048;23include /etc/nginx/mime.types;24default_type application/octet-stream;25# Load modular configuration files from the /etc/nginx/conf.d directory.26# See http://nginx.org/en/docs/ngx_core_module.html#include27# for more information.28include /etc/nginx/conf.d/*.conf;29server_tokens off;30server {31listen 80 default_server;32listen [::]:80 default_server;33server_name _;34root /usr/share/nginx/html;35# Load configuration files for the default server block.36include /etc/nginx/default.d/*.conf;37location / {38index index.php index.html index.htm;39}40error_page 404 /404.html;41location = /40x.html {42}43error_page 500 502 503 504 /50x.html;44location = /50x.html {45}46}47}
Save the file.
In the /etc/nginx/conf.d/ folder, create a file domain.ru.conf:
tinkster@almalinux:~#
1sudo nano /etc/nginx/conf.d/domain.ru.conf
And add the following lines to it:
tinkster@almalinux:~#
1server {2listen 80;3server_name domain.ru;4set $root_path /var/www/domain.ru/html;5root $root_path;6}
domain.ru – will be your own domain name.
Also, let's create a server folder:
tinkster@almalinux:~#
1mkdir /var/www/domain.ru/html/2mkdir /var/www/domain.ru/log/3sudo chown -R nginx:nginx /var/www/domain.ru/html/4sudo chown -R nginx:nginx /var/www/domain.ru/log/
Start nginx and add it to autostart:
tinkster@almalinux:~#
1sudo systemctl start nginx2sudo systemctl enable nginx
3
Associate the domain name with the router's fixed IP address.
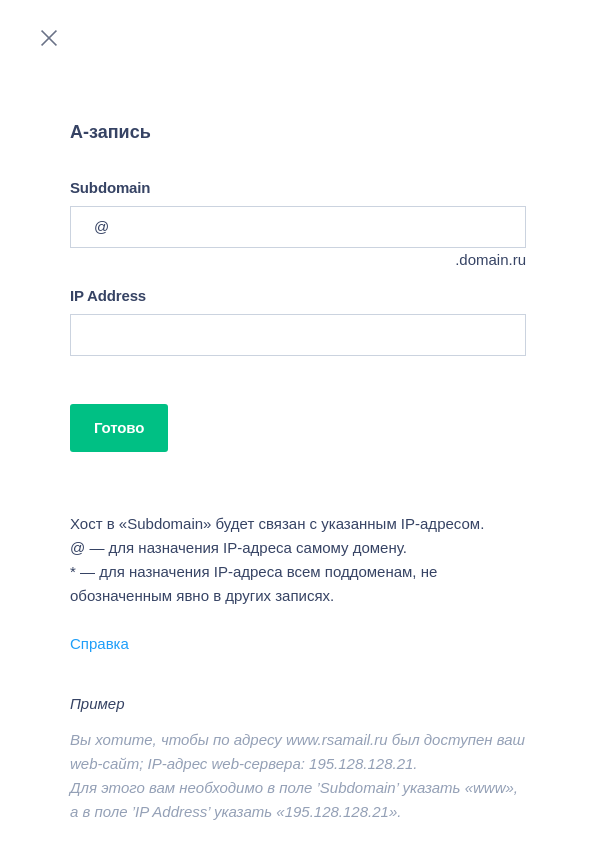
Screenshot from REG.ru
On the domain name registrar's website, you will need to add an A record in your account and link it to the fixed IP address of your router.
4
Obtaining a certificate from LetsEncrypt
tinkster@almalinux:~#
1sudo yum install certbot python2-certbot-nginx2sudo certbot --nginx
In the terminal, follow the assistant's instructions.
Open the file again domain.ru.conf:
tinkster@almalinux:~#
1sudo nano /etc/nginx/conf.d/domain.ru.conf
erase everything and insert the following content into it:
tinkster@almalinux:~#
1server {2listen 80;3server_name domain.ru;4return 301 https://domain.ru$request_uri;5}67server {8listen 443 ssl;9server_name domain.ru;10set $root_path /var/www/domain.ru/html;11ssl_certificate /etc/letsencrypt/live/domain.ru/fullchain.pem;12ssl_certificate_key /etc/letsencrypt/live/domain.ru/privkey.pem;13access_log /var/www/domain.ru/log/nginx-ssl-requests.log;14error_log /var/www/domain.ru/log/nginx-ssl-error.log;15root $root_path;16}
Friends, once again I remind you that domain.ru will be your own domain name.
Let's create a file index.html:
tinkster@almalinux:~#
1sudo nano /var/www/domain.ru/html/index.html
And insert the following into it
tinkster@almalinux:~#
1<h1>It works</h1>
Save the file.
Reload nginx:
tinkster@almalinux:~#
1sudo systemctl restart nginx
Try accessing in the browser at the address:
https://domain.ru
If everything is configured correctly, you will see a page with a secure TLS connection (lock icon in the Chrome browser address bar).
Since the Let's Encrypt certificate expires in three months, it will need to be renewed periodically. To avoid doing this manually each time, let's add automatic renewal to CRON (automatic script execution on a schedule):
tinkster@almalinux:~#
1sudo nano /etc/crontab
And insert the following at the end of the file:
tinkster@almalinux:~#
10 0 * * * root /usr/bin/certbot renew >> /var/log/certbot-cron.log 2>&1
Save the file.
5
OpenVPN installation
OpenVPN installation
If your server will be located behind NAT (i.e., in a home network, connected to your router), then most likely there will be a problem with voice transmission over Asterisk, because configuring Asterisk behind NAT is very finicky. You may observe the following situation — the other party will hear you, but you won't hear them. I spent more than one day trying to solve this problem but couldn't do it. The best solution is to set up a free OpenVPNserver. It will solve three problems at once: first – complete encryption of data from your Android device to the server, second – voice transmission problems disappear, third – the external port (5060) of Asterisk on the router will be closed, meaning hackers won't be able to brute-force passwords.
Go to the server terminal and install the OpenVPN package along with the web admin panel:
tinkster@almalinux:~#
1yum -y install https://as-repository.openvpn.net/as-repo-centos7.rpm2yum -y install openvpn-as
Set a password for the openvpn user in the terminal:
tinkster@almalinux:~#
1sudo passwd openvpn
Add the OpenVPN service, port 943, port 1194, and masquerade to Firewalld:
tinkster@almalinux:~#
1sudo firewall-cmd --zone=public --permanent --add-service openvpn2sudo firewall-cmd --zone=public --permanent --add-port=943/tcp3sudo firewall-cmd --zone=public --permanent --add-port=1194/udp4sudo firewall-cmd --zone=public --permanent --add-masquerade
Reload the rules:
tinkster@almalinux:~#
1sudo firewall-cmd –reload
Restart openvpnas:
tinkster@almalinux:~#
1sudo systemctl restart openvpnas
After that, go to the address
https://192.168.0.107:943/admin/
Login: openvpn
Password: previously created password
In the admin panel, go to the menu Network Settings and in "Hostname or IP Address" enter the domain name domain.ru. Click Save Settings.
Next, create a file openvpn.sh (this is needed for automatically importing LetsEncrypt certificates into OpenVPN):
tinkster@almalinux:~#
1sudo nano /root/openvpn.sh
And insert the following content into it:
tinkster@almalinux:~#
1#!/bin/bash2/usr/local/openvpn_as/scripts/sacli --key "cs.priv_key" --value_file "/etc/letsencrypt/live/domain.ru/privkey.pem" ConfigPut3/usr/local/openvpn_as/scripts/sacli --key "cs.cert" --value_file "/etc/letsencrypt/live/domain.ru/fullchain.pem" ConfigPut4/usr/bin/cat /etc/letsencrypt/live/domain.ru/fullchain.pem /etc/letsencrypt/live/domain.ru/privkey.pem > /etc/letsencrypt/live/domain.ru/bundle.pem5/usr/local/openvpn_as/scripts/sacli --key "cs.ca_bundle" --value_file "/etc/letsencrypt/live/domain.ru/bundle.pem" ConfigPut6/usr/local/openvpn_as/scripts/sacli start7/usr/bin/systemctl restart openvpnas
Save the file.
Make the file executable:
tinkster@almalinux:~#
1sudo chmod +x /root/openvpn.sh
Add the file to CRON:
tinkster@almalinux:~#
1sudo nano /etc/crontab
And insert the following at the end of the file:
tinkster@almalinux:~#
15 0 * * * root /root/openvpn.sh
Save the file.
Run the file openvpn.sh:
tinkster@almalinux:~#
1cd /root2sudo ./openvpn.sh
After this, the certificates from LetsEncrypt will be automatically imported into OpenVPN.
Next, you need to go into the router and set up port forwarding for ports 943 (TCP) and 1194 (TCP, UDP) to the local IP address of your server.
If everything was successful, you will be able to access OpenVPN via your domain name address. In the browser, enter the address:
https://domain.ru/943/admin/
Replace domain.ru with your domain name. The connection should be secure (lock icon to the left of the address in the Chrome browser).
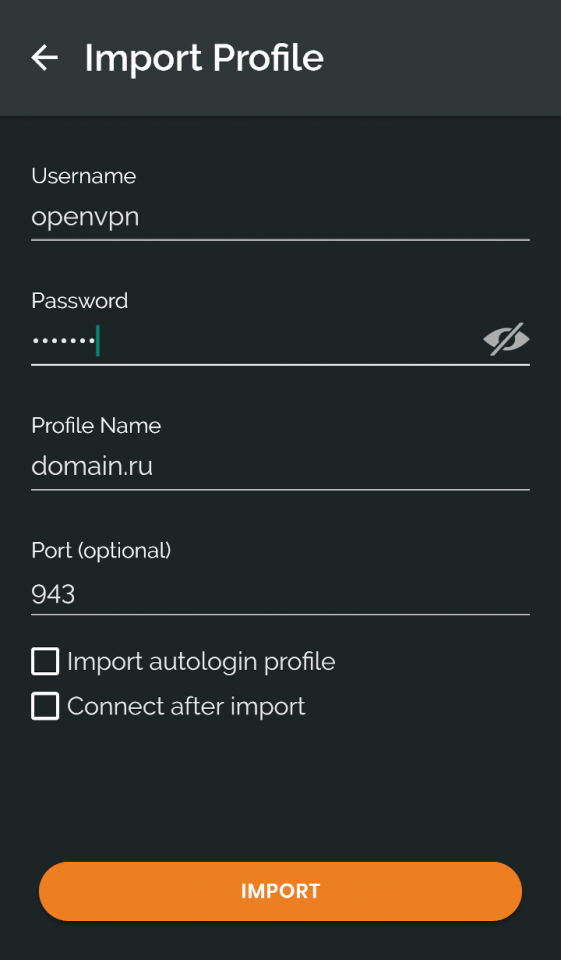
If everything was successful, you can start testing the connection via OpenVPN through the application on your smartphone.
Install the OpenVPN for Android application on your main smartphone and enter the registration details:
When establishing a connection, check your IP address by opening the Chrome browser on your smartphone and entering the address:
The address must match the external fixed IP address of your router.
6
Installation of Bluetooth transmitter Espada ESM07
Insert the Bluetooth transmitter into the server's USB port and install the necessary packages via the terminal:
tinkster@almalinux:~#
1sudo yum install bluez bluez-libs bluez-libs-devel bluez-tools
Run the command to check if the system has detected the Bluetooth transmitter:
tinkster@almalinux:~#
1hcitool dev
In the command output, you should see something like:
tinkster@almalinux:~#
1hci0 XX:XX:XX:XX:XX:XX
XX:XX:XX:XX:XX:XX – the MAC address of your Bluetooth transmitter
Copy and save this data to a file; we will need it later.
If the Bluetooth transmitter is not detected, do the following:
Enter in the terminal:
tinkster@almalinux:~#
1hciconfig -a
And find out the name of the Bluetooth transmitter interface. In my case, it is hci0.
Manually enable this device:
tinkster@almalinux:~#
1sudo hciconfig hci0 up
Next, open the file:
tinkster@almalinux:~#
1sudo nano /etc/bluetooth/main.conf
And change the parameter AutoEnable from false to true:
tinkster@almalinux:~#
1[Policy]2AutoEnable=true
Reboot the server and check if the Bluetooth transmitter is detected. If it still does not detect automatically, do the following.
Create a file 10-local.rules:
tinkster@almalinux:~#
1sudo nano /etc/udev/rules.d/10-local.rules
And insert the following into it:
tinkster@almalinux:~#
1ACTION=="add", KERNEL=="hci0", RUN+="/usr/bin/hciconfig hci0 up"
Save the file, reboot the server, and check that the Bluetooth transmitter is detected automatically.
Next, enable Bluetooth on the GSM gateway and put it into discovery mode.
Enter the command in the terminal:
tinkster@almalinux:~#
1hcitool scan
You should see something like:
tinkster@almalinux:~#
1Scanning ...23XX:XX:XX:XX:XX:XX SM-G900H
Where XX:XX:XX:XX:XX:XX – the MAC address of your GSM gateway
Copy and save this data to a file; we will need it later.
7
Establishing a bluetooth connection between the server and the GSM gateway
Open the terminal and enter the command:
tinkster@almalinux:~#
1sudo rfkill unblock bluetooth
Next, enter the command:
tinkster@almalinux:~#
1bluetoothctl
After this, the line in the terminal will change to [bluetooth]#
Next, enter the commands:
tinkster@almalinux:~#
1agent KeyboardOnly2default-agent3power on4devices5scan on
Make sure that our GSM gateway and its MAC address are present in the list.
Next, pair the GSM gateway with the server:
tinkster@almalinux:~#
1pair XX:XX:XX:XX:XX:XX
Where XX:XX:XX:XX:XX:XX is the MAC address of your GSM gateway
After entering this command, a dialog box with a confirmation code will appear on the GSM gateway screen, which needs to be entered in the terminal:
tinkster@almalinux:~#
1Request passkey2[agent] Enter passkey (number in 0-999999): 6626803Pairing successful
Check again that the smartphone is paired with the server:
tinkster@almalinux:~#
1paired-devices
Next, enter the command:
tinkster@almalinux:~#
1trust XX:XX:XX:XX:XX:XX
Exit bluetoothctl:
tinkster@almalinux:~#
1exit
Next, open the file dbus-org.bluez.service:
tinkster@almalinux:~#
1sudo nano /etc/systemd/system/dbus-org.bluez.service
And to the line ExecStart=/usr/lib/bluetooth/bluetoothd add --compat, so that it ultimately looks like this:
tinkster@almalinux:~#
1ExecStart=/usr/lib/bluetooth/bluetoothd --compat
Also, after this line, you need to add another line:
tinkster@almalinux:~#
1ExecStartPost=/bin/chmod 777 /var/run/sdp
Save the file and reload the systemd configuration manager:
tinkster@almalinux:~#
1sudo systemctl daemon-reload
Let's restart the bluetooth system process:
tinkster@almalinux:~#
1sudo systemctl restart bluetooth
8
Asterisk PBX Installation
Asterisk PBX Installation
Asterisk PBX Installation
Asterisk PBX Installation
Asterisk PBX Installation
+1
We will install Asterisk version 16 from source because it has fewer bugs, more stability, and the compiled version from the CentOS repositories is version 11.
Install the necessary dependencies:
tinkster@almalinux:~#
1sudo yum install wget net-tools2sudo yum groupinstall "Development Tools"3sudo yum install libedit-devel sqlite-devel psmisc gmime-devel ncurses-devel libtermcap-devel sox newt-devel libxml2-devel libtiff-devel audiofile-devel gtk2-devel uuid-devel libtool libuuid-devel subversion kernel-devel kernel-devel-$(uname -r) git subversion kernel-devel crontabs cronie cronie-anacron
Download the Asterisk source code:
tinkster@almalinux:~#
1cd /usr/src/2sudo wget http://downloads.asterisk.org/pub/telephony/asterisk/asterisk-16-current.tar.gz3sudo tar xvfz asterisk-16-current.tar.gz4sudo rm -f asterisk-16-current.tar.gz5cd asterisk-*6sudo ./configure --libdir=/usr/lib64
If everything went well, you will see in the terminal:
tinkster@almalinux:~#
1configure: Menuselect build configuration successfully completed
Set the configuration menu parameters by executing the following command:
tinkster@almalinux:~#
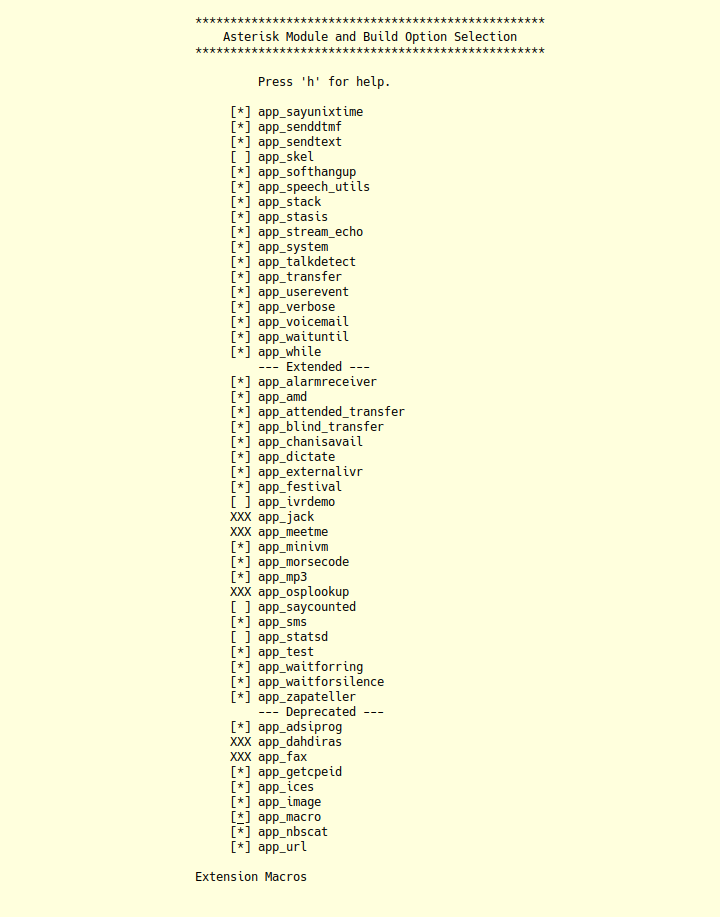
1sudo make menuselect
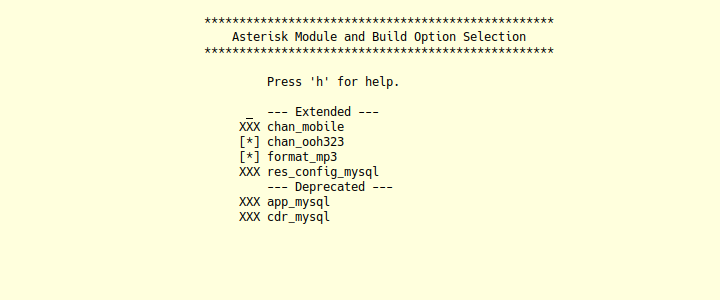
Go toAdd-ons.
Select chan_ooh323 and format_mp3
Press Esc to exit to the main menu.
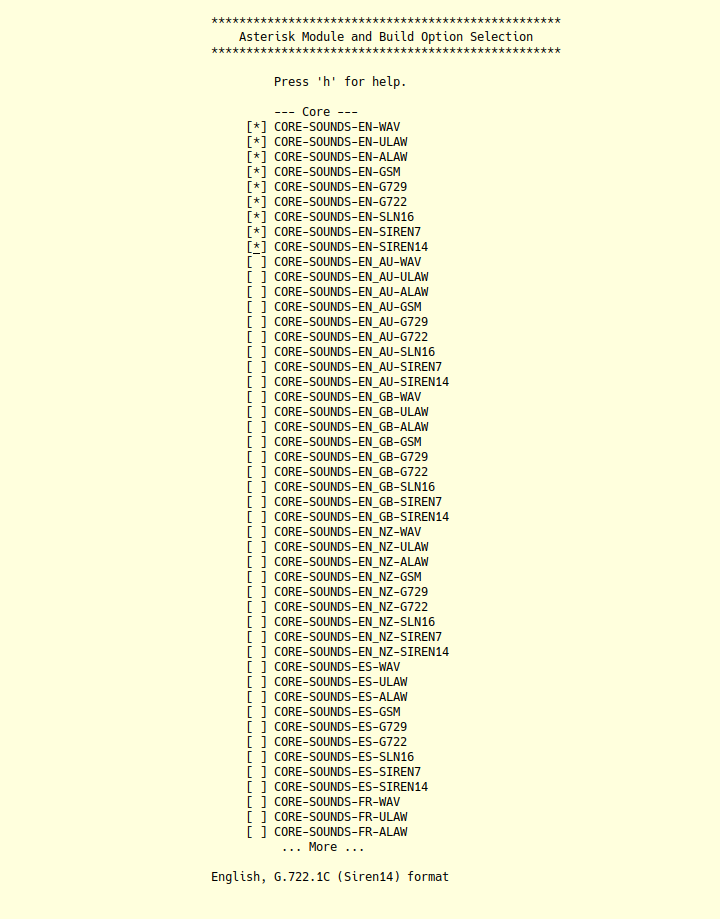
Next, go to Core Sound Packages:
Select audio formats, as shown in the picture:
Press Esc to exit to the main menu.
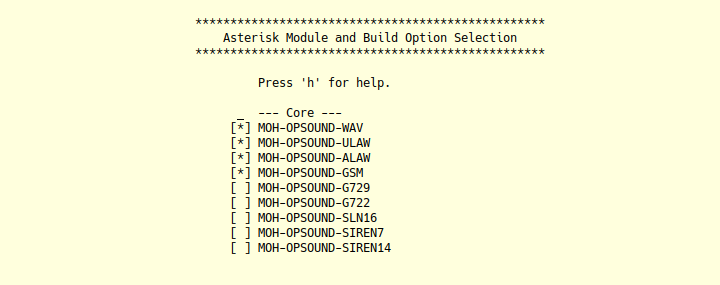
Next, go to Music On Hold File Packages and mark as shown in the picture:
Press Esc to exit to the main menu.
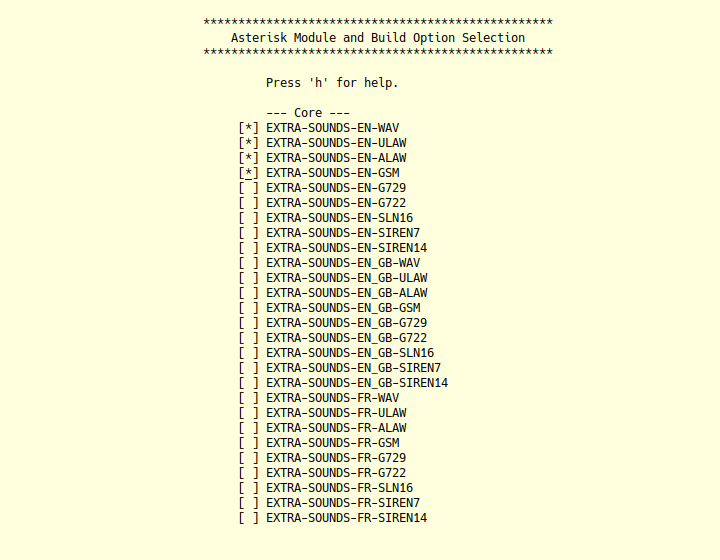
Go toExtras Sound Packages and select the menu items:
Press Esc to exit to the main menu.
Go to Applications and mark the menu item with an asterisk app_macro.
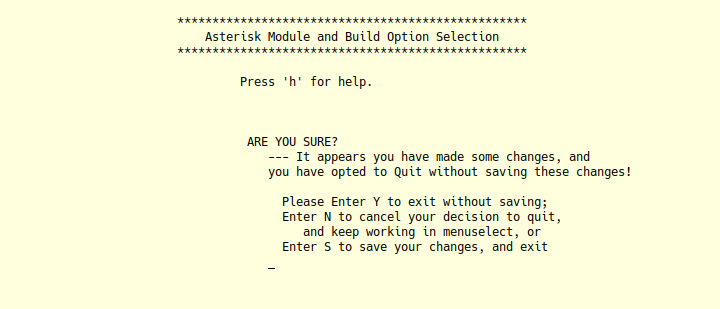
Press Esc twice and see a menu like this
Save the settings by pressing S.
Now execute the following command to load the mp3 decoder library into the source code.
tinkster@almalinux:~#
1sudo contrib/scripts/get_mp3_source.sh
Start compiling Asterisk:
tinkster@almalinux:~#
1sudo make2sudo make install3sudo make samples4sudo make config5sudo ldconfig
Create a separate user and group to run asterisk services and assign the correct permissions:
tinkster@almalinux:~#
1sudo groupadd asterisk2sudo useradd -r -d /var/lib/asterisk -g asterisk asterisk3sudo usermod -aG audio,dialout asterisk4sudo chown -R asterisk.asterisk /etc/asterisk5sudo chown -R asterisk.asterisk /var/{lib,log,spool}/asterisk6sudo chown -R asterisk.asterisk /usr/lib64/asterisk
Set the default user for Asterisk:
tinkster@almalinux:~#
1sudo nano /etc/sysconfig/asterisk
and add to the file:
tinkster@almalinux:~#
1AST_USER="asterisk"2AST_GROUP="asterisk"
Also for the file asterisk.conf:
tinkster@almalinux:~#
1sudo nano /etc/asterisk/asterisk.conf
Let's add the lines:
tinkster@almalinux:~#
1runuser = asterisk2rungroup = asterisk
Next, restart the Asterisk service:
tinkster@almalinux:~#
1sudo systemctl restart asterisk
and make sure it's running:
tinkster@almalinux:~#
1sudo systemctl status asterisk
Let's set up automatic startup of Asterisk after CentOS loads:
tinkster@almalinux:~#
1sudo systemctl enable asterisk
Next, enter the Asterisk command line interface:
tinkster@almalinux:~#
1sudo asterisk -r
Load the module chan_mobile, if it's not already loaded:
tinkster@almalinux:~#
1module load chan_mobile.so
Next, type:
tinkster@almalinux:~#
1mobile search
You should see something like:
tinkster@almalinux:~#
1Address Name Usable Type Port23XX:XX:XX:XX:XX:XX SM-G900H Yes Phone 1
Your port number may differ.
Next, open the file chan_mobile.conf:
tinkster@almalinux:~#
1sudo nano /etc/asterisk/chan_mobile.conf
Delete all lines from it and insert the following:
tinkster@almalinux:~#
1[general]2interval=1034[adapter]5address = XX:XX:XX:XX:XX:XX ; MAC address of the Bluetooth transmitter6forcemaster=yes7id = Dongle8rxgain=49txgain=41011[SM-G900H]12address = XX:XX:XX:XX:XX:XX ; MAC address of the GSM gateway13port = 1 ; Port number14context = from-phone15adapter = Dongle
Save the file.
Open the file sip.conf:
tinkster@almalinux:~#
1sudo nano /etc/asterisk/sip.conf
Delete all lines from it and insert the following:
tinkster@almalinux:~#
1[general]2context=public3allowguest=no4match_auth_username=yes5allowoverlap=no6bindaddr=0.0.0.0:50607udpbindaddr=0.0.0.0:50608tcpenable=yes9tcpbindaddr=0.0.0.0:506010transport=udp11srvlookup=no12qualifyfreq=6013alwaysauthreject = yes14subscribecontext = default15localnet=192.168.0.0/255.255.0.016externrefresh=18017nat=no18icesupport = yes19transport=udp,tcp2021[internal](!)22type = friend23directmedia=no24host = dynamic25context = home26dtmfmode = rfc283327canreinvite = no28qualify = yes29allow=!all,ilbc,g729,gsm,g723,ulaw,alaw3031[alex](internal) ; Change 'alex' to your own username32defaultuser=alex ; Change 'alex' to your own username33secret = Password ; Your password
Save the file and open the file extensions.conf:
tinkster@almalinux:~#
1sudo nano /etc/asterisk/extensions.conf
Delete all lines from it and insert the following:
tinkster@almalinux:~#
1[from-phone]2exten => s,1,Answer3exten => s,2,Dial(SIP/alex,25)4exten => s,n,Hangup5[home]6exten => _.,1,Dial(MOBILE/SM-G900H/${EXTEN},60)7exten => _.,n,Hangup()
Save the file.
Add port 5060 to firewalld:
tinkster@almalinux:~#
1sudo firewall-cmd --add-port=5060/tcp --permanent --zone=public2sudo firewall-cmd --add-port=5060/udp --permanent –zone=public
Reload the rules:
tinkster@almalinux:~#
1sudo firewall-cmd --reload
Restart Asterisk:
tinkster@almalinux:~#
1sudo systemctl restart asterisk
Enter the Asterisk command line interface again
tinkster@almalinux:~#
1sudo asterisk -r
And check if our GSM gateway is connected:
tinkster@almalinux:~#
1mobile show devices
You should see something like:
tinkster@almalinux:~#
1ID Address Group Adapter Connected State SMS2SM-G900H XX:XX:XX:XX:XX:XX 0 Dongle Yes Free No
9
CsipSimple application settings
CsipSimple application settings
CsipSimple application settings
CsipSimple application settings
CsipSimple application settings
Launch OpenVPN on your main smartphone.
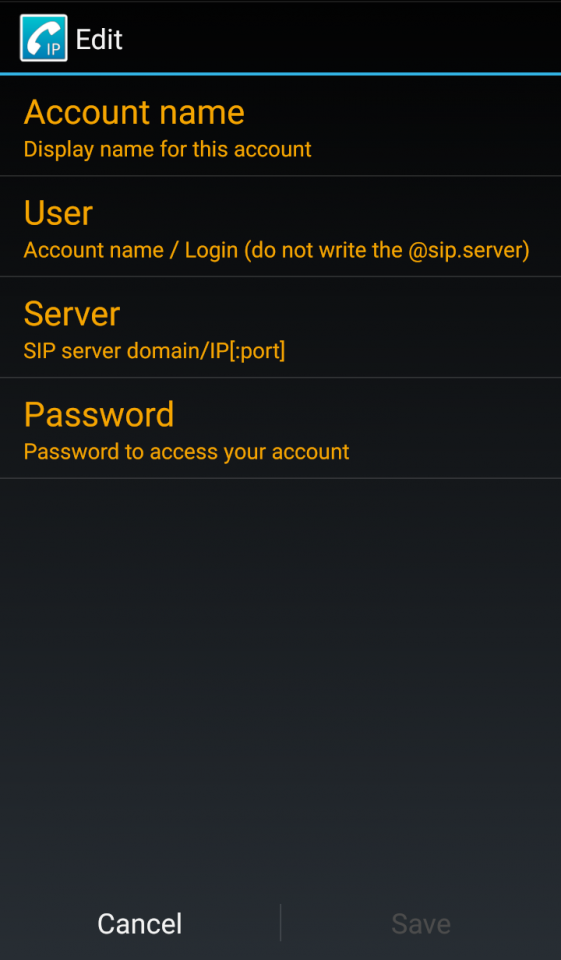
Launch CsipSimple and click on the key icon (bottom left):
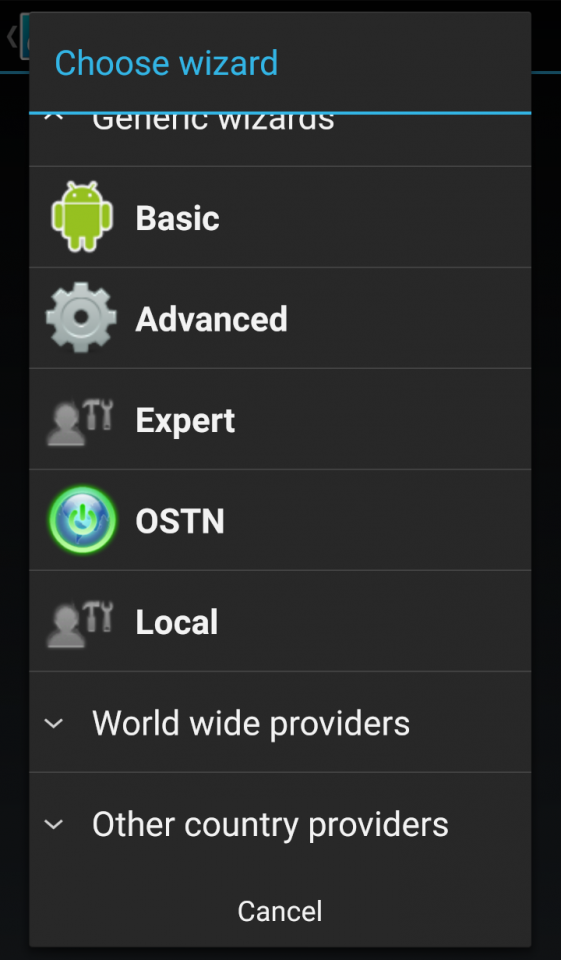
Click Add account and select Basic at the very bottom:
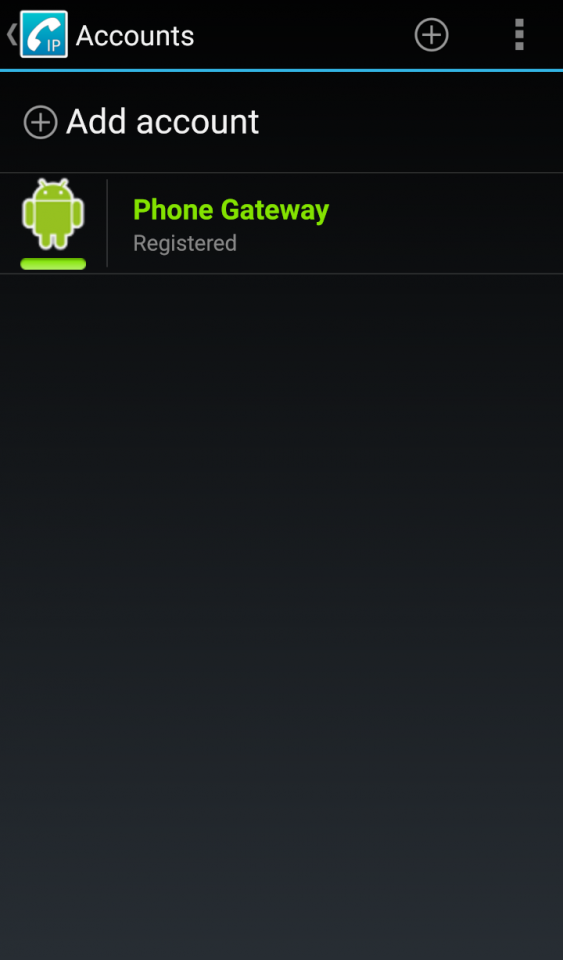
В AccountIn the name field, enter the account name, for example,Phone Gateway. In the field User enter the username, for example, alex. In the field Server enter the local IP of your server and port, for example,192.168.0.15:5060. In the field Password enter your password.
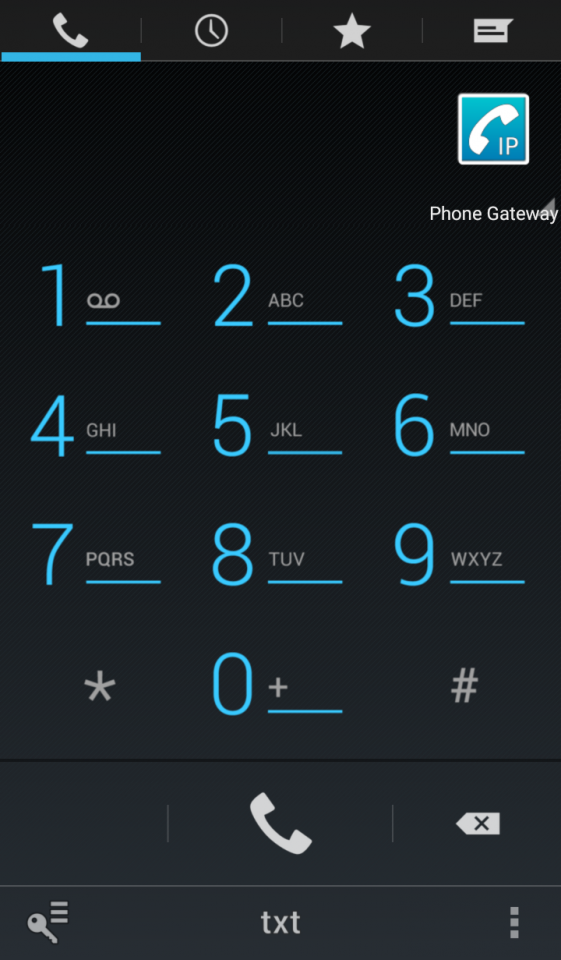
After saving the settings, you will see the following picture:
Next, go to the dialer and try to make a test call to another number.
Friends, that's all. Now you have a full-fledged GSM gateway through which you can call Russian numbers at local rates from anywhere in the world! You will also be able to receive calls via CsipSimple if someone calls the SIM card number installed in the GSM gateway.
Profit :)
Discussion (0)
No comments yet. Be the first!
Maker
Anton Shagaev
Tashkent, UZ
Anton is the Founding Engineer at Tinkster. He translates industrial reliability into software architecture, ensuring the platform's core is built to last. Anton studied oil and gas engineering in the United States and also holds two honors degrees from Tomsk Polytechnic University.
Related Projects


AI Project Assistant
Tinkster Neural Core
Hi! I am the AI assistant for this project. Ask me any questions about the assembly, code, or components.