Original Project by Orange Digital Center from Instructables.
License: Attribution-NonCommercial-ShareAlike
This project was developed within the Orange Digital Center Morocco , a space dedicated to fostering innovation, creativity, and rapid prototyping. At the FabLab, individuals and teams have access to state-of-the-art tools, including 3D printers, laser cutters, and a variety of electronic and mechanical resources. The center provides a collaborative environment where innovators, entrepreneurs, and students can transform their ideas into tangible products. By focusing on sustainable and impactful solutions .
Imagine walking into the Orange Digital Center’s FabLab and being greeted by an intelligent voice assistant ready to answer your questions, guide you to the right resources, and inform you about upcoming events and workshops. This project brings that idea to life by creating a custom AI-powered voice assistant tailored to the needs of FabLab visitors.
In this tutorial, you’ll learn how to build a voice assistant from scratch using a combination of cutting-edge AI technologies and hardware components.
What Does This AI Assistant Do?
The Orange Digital Center AI Voice Assistant is designed to:
• Answer Visitor Questions: Provide accurate and helpful answers about the FabLab, its facilities, and its resources.
• Inform About Events: Share details about upcoming training workshops, events, and schedules.
• Streamline Assistance: Reduce the workload of FabLab staff by automating visitor support.
Why We Built This Project?
• Enhanced Visitor Experience: An interactive assistant makes navigating the FabLab easy and fun.
• Practical AI Application: Gain hands-on experience in integrating technologies like Retrieval-Augmented Generation (RAG), Text-to-Speech (TTS), and Speech-to-Text (STT).
• Expandability: This project serves as a foundation for future enhancements, such as adding a camera for visitor recognition or developing an advanced user interface.
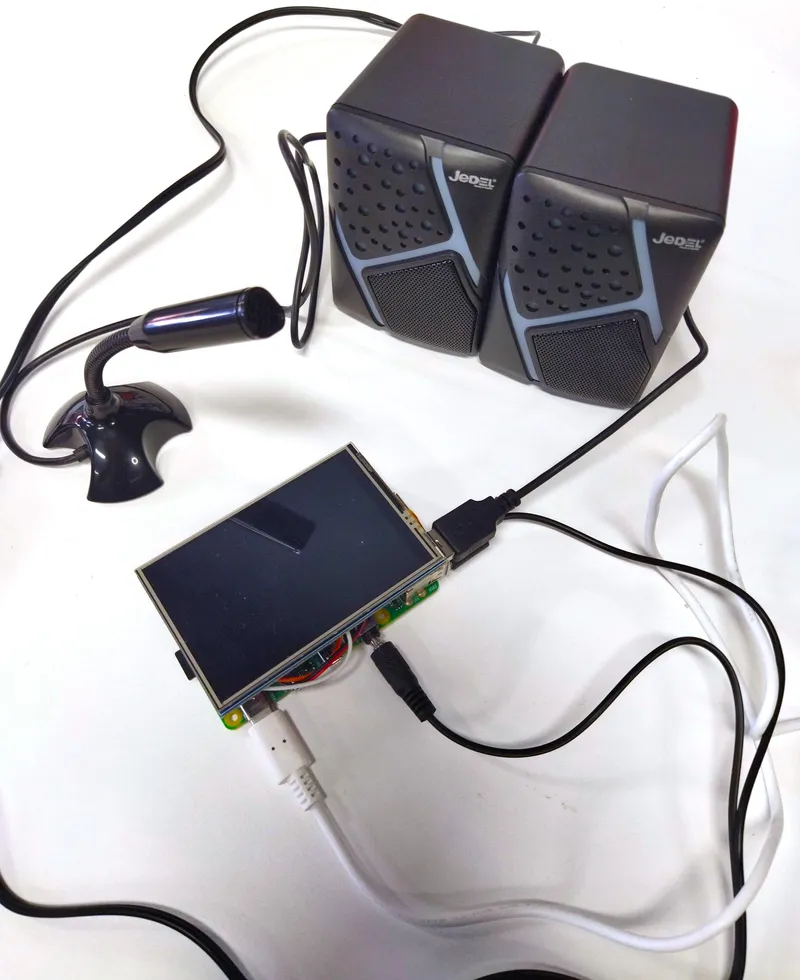
What you'll need
Materials
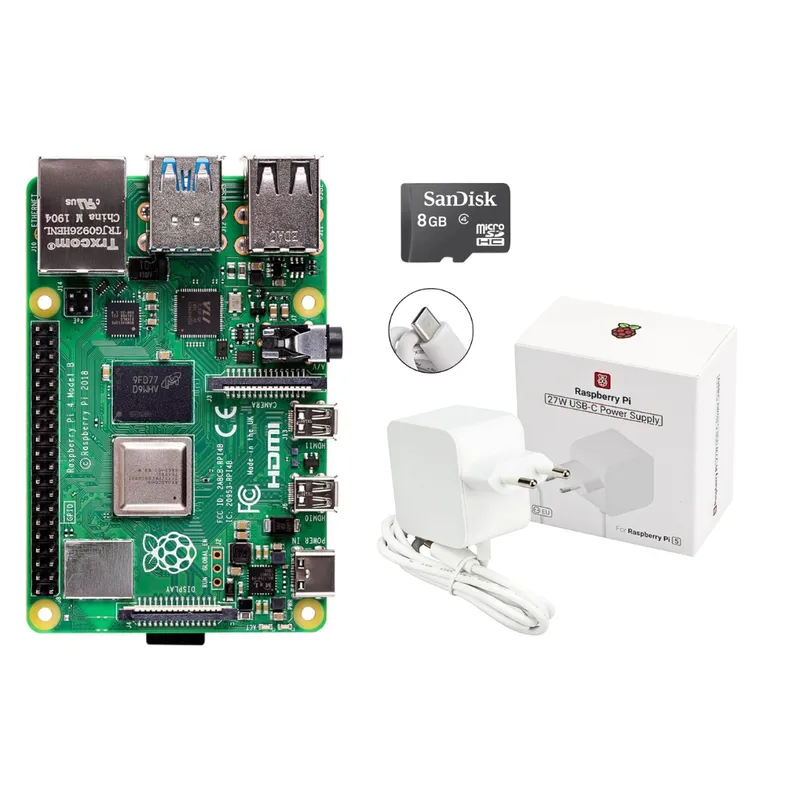
- Raspberry Pi 4 (8GB RAM)1 pc
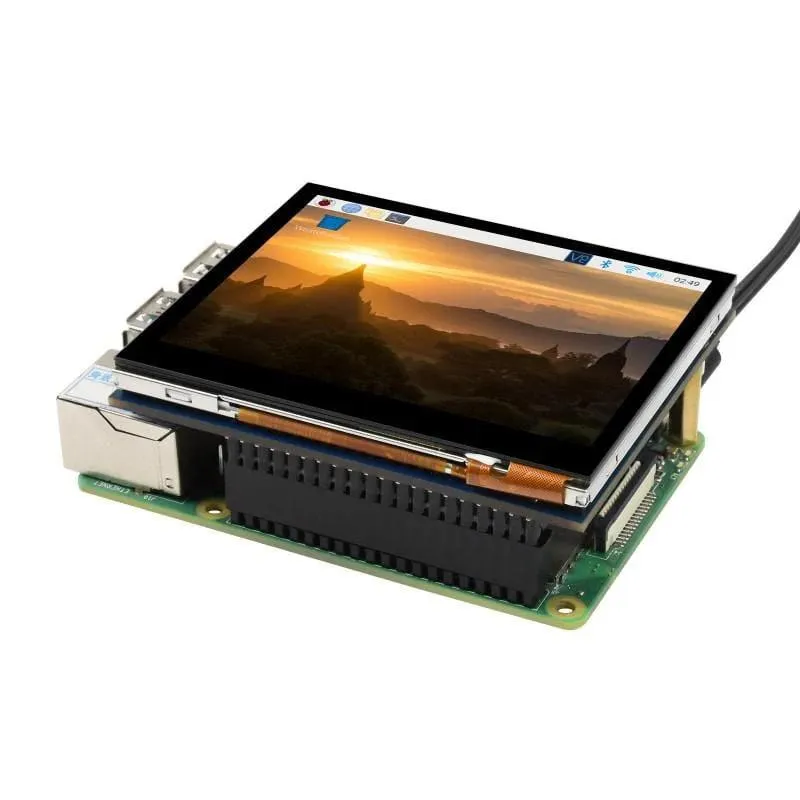
- 3.5-Inch Touchscreen Display1 pc
- Microphone1 pc
- Speaker1 pc
- MicroSD Card (16GB or Higher)1 pc
- Power Supply (5V 3A)1 pc
- Keyboard1 pc
- Mouse1 pc
- Fan1 pc
- HDMI Cable1 pc
Steps
1
Setting Up the Raspberry Pi 4
Setting Up the Raspberry Pi 4
In this section, we’ll prepare the Raspberry Pi, install the necessary software, and configure the hardware components to build the Orange Digital Center AI Voice Assistant.
Step 1: Set Up the Raspberry Pi
1.1 Flash Raspbian OS
• Download Raspberry Pi Imager:
• Visit the official Raspberry Pi website to download Raspberry Pi Imager.
• Select the OS Version:
• For general usage, choose either Raspberry Pi OS (32-bit) or Raspberry Pi OS (64-bit), depending on your performance needs and compatibility with the hardware.
• The 64-bit version is recommended for systems with 4GB or more RAM and provides better performance.
• Write the OS to the MicroSD Card:
• Insert the microSD card into your computer.
• Open Raspberry Pi Imager, select the OS version, and choose the SD card. Click Write to begin.
1.2 Initial Configuration
• Insert the microSD card into the Raspberry Pi, connect a display using an HDMI cable, and power it on.
• Follow the setup wizard to:
• Connect to Wi-Fi.
• Set your keyboard and regional settings.
• Update the system when prompted.
Note : This is a complete guide to install the raspberry pi OS :
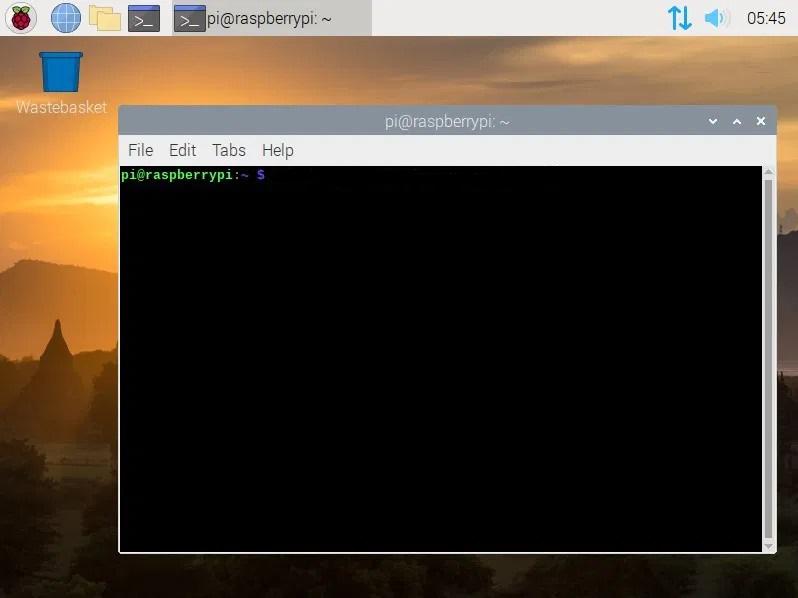
Step 2: Accessing the Raspberry Pi
There are several ways to connect to your Raspberry Pi for headless or remote operation:
2.1 Direct HDMI Connection
• Use an HDMI cable to connect the Raspberry Pi to a monitor or TV.
• Plug in a keyboard and mouse to interact directly with the desktop environment.
2.2 Remote Access via SSH
• Enable SSH:
Open the terminal and type:
tinkster@almalinux:~#
1sudo raspi-config
• Navigate to Interface Options > SSH and enable it.
Find the Raspberry Pi’s IP address:
tinkster@almalinux:~#
1hostname -I
• Connect from another device:
Use an SSH client like PuTTY (Windows) or the terminal (Linux/macOS):
tinkster@almalinux:~#
1ssh pi@
• Default credentials are pi (username) and raspberry (password). Change the password after logging in.
2.3 Remote Access via VNC
• Enable VNC:
Open the terminal and type:
tinkster@almalinux:~#
1sudo raspi-config
• Navigate to Interface Options > VNC and enable it.
• Install a VNC viewer on your computer (e.g., RealVNC Viewer).
• Connect to the Raspberry Pi using its IP address and the default credentials.
This is the complete guide of how to use vnc viewer :
2
Installing Python and Required Dependencies
Installing Python and Required Dependencies
Step 1: Update the System
tinkster@almalinux:~#
1sudo apt update && sudo apt upgrade -y
Step 2: Install Python and Pip
tinkster@almalinux:~#
1sudo apt install python3 python3-pip -y
Step 3: Install Project Dependencies
Clone the project repository and install the required libraries:
tinkster@almalinux:~#
1git clone https://github.com/abdel2000-dply/ODC-AI-Assistant.git2cd ODC-AI-Assistant3pip install -r requirements.txt
Note : This is the link to the github repository where you can find the complete code :
3
Configuring the Touch Display
Configuring the Touch Display
Install LCD Drivers:
• Most 3.5" LCDs come with a driver script. Download the driver from the manufacturer’s website or GitHub repository.
• Example for Waveshare 3.5" LCD:
tinkster@almalinux:~#
1git clone https://github.com/waveshare/LCD-show.git2cd LCD-show/3sudo ./LCD35-show
• This script will configure the Raspberry Pi to use the LCD as the primary display.
Reboot the Raspberry Pi:
tinkster@almalinux:~#
1sudo reboot
Verify the LCD:
• After rebooting, the Raspberry Pi desktop should appear on the 3.5" LCD.
Note : This is the link to the github repository where you can find the complete code :
4
Microphone and Speaker Setup
Microphone and Speaker Setup
Set Up the Microphone:
• Connect the microphone to the Raspberry Pi.
Test if the microphone is detected:
tinkster@almalinux:~#
1arecord -l
Record and play back a test audio file:
tinkster@almalinux:~#
1arecord -D plughw:1,0 -f cd test.wav2aplay test.wav
Set Up the Speaker:
Connect the speaker and test the audio output:
tinkster@almalinux:~#
1speaker-test -t wav -c 2
Adjust volume using:
tinkster@almalinux:~#
1alsamixer
5
Setup Verification
Check Installed Libraries:
Run a simple script to verify the installation of required libraries:
tinkster@almalinux:~#
1import cohere2import langchain3import whisper4import speech_recognition as sr5from edge_tts import Communicate6print("All libraries installed successfully!")
Test Basic Speech-to-Text:
Use the microphone to transcribe a test input:
tinkster@almalinux:~#
1import speech_recognition as sr2recognizer = sr.Recognizer()3with sr.Microphone() as source:4print("Say something...")5audio = recognizer.listen(source)6try:7print("You said:", recognizer.recognize_google(audio))8except sr.UnknownValueError:9print("Could not understand the audio")
Note : This is the link to the github repository where you can find the complete code :
6
Running the AI Voice Assistant
Step 1: Clone the Project
If you haven’t already, clone the project repository:
tinkster@almalinux:~#
1git clone https://github.com/abdel2000-dply/ODC-AI-Assistant.git
Step 2: Install Project Dependencies
Install the required libraries:
tinkster@almalinux:~#
1cd ODC-AI-Assistant2pip install -r requirements.txt
Step 3: Run the Project
Run the AI Voice Assistant:
tinkster@almalinux:~#
1python3 main.py
Note : This is the link to the github repository where you can find the complete code :
7
Breakdown of the Key Libraries and Techniques Used in This Project
Here’s a breakdown of the key libraries and their roles in the project :
1. Speech Recognition and Audio
• speech_recognition: For capturing and transcribing voice input.
• pyaudio: For recording audio from the microphone.
• edge_tts: For text-to-speech (TTS) functionality.
• mpv: For playing audio files.
2. AI and Language Processing
• langchain: For handling conversational AI and context management.
• cohere: For advanced language model integration.
• sentence-transformers: For generating embeddings for text similarity.
3. Web Scraping
• selenium: For scraping event data from the Orange Digital Center website.
• webdriver_manager: For managing the Chrome WebDriver.
4. Vector Storage and Search
• faiss-cpu: For efficient vector storage and similarity search.
• langchain_huggingface: For integrating Hugging Face embeddings.
5. Utilities
• dotenv: For managing environment variables.
• asyncio: For asynchronous programming.
• tkinter: For the graphical user interface (GUI).
Here's the Used techniques to handle the project :
1. Asynchronous Programming
The project uses asyncio to handle asynchronous tasks like speech recognition and text-to-speech. This ensures smooth interaction without blocking the main thread.
2. Vector Storage and Search
The FAISS library is used for efficient vector storage and similarity search. This allows the assistant to retrieve relevant information quickly.
3. Context Management
The LangChain library is used to manage conversation context, ensuring the assistant can handle follow-up questions and maintain context across interactions.
4. Modular Design
The project is designed in a modular way, with separate handlers for speech recognition, conversational AI, and GUI. This makes the code easier to maintain and extend in the future.
8
Speech Recognition
The project uses the speech_recognition library to capture voice input. Here’s the key code snippet with comments to explain it:
tinkster@almalinux:~#
1import speech_recognition as sr23# Speech Recognition4# The project uses the speech_recognition library to capture voice input. Here’s the key code snippet:56def recognize_speech_from_mic(language='en-US', device_index=3):7# Create a Recognizer instance to process speech8recognizer = sr.Recognizer()910# Use the specified microphone device for capturing audio11# Ensure that the correct `device_index` is passed as an argument12with sr.Microphone(device_index=device_index) as source:13print("Please say something:")1415# Adjust for ambient noise to improve recognition accuracy16recognizer.adjust_for_ambient_noise(source, duration=1)1718try:19# Listen for speech input from the microphone with a timeout20audio = recognizer.listen(source, timeout=10)2122# Convert the speech audio to text using Google Web Speech API23text = recognizer.recognize_google(audio, language=language)24print(f"You said: {text}")25return text2627except sr.UnknownValueError:28# Handle the case where the speech is unintelligible29print("Unable to recognize speech")30return None3132except Exception as e:33# Handle other potential errors (e.g., device or network issues)34print(f"An error occurred: {e}")35return None3637# Example usage (ensure the correct device_index for your microphone):38# recognize_speech_from_mic()
Note : This is the link to the github repository where you can find the complete code :
9
Web Scraping
The selenium library is used to automate a web browser and scrape event data from the Orange Digital Center website. In this snippet, the Chrome WebDriver is configured with headless options to run in the background, navigates to the events page, and extracts event details such as titles and dates using specified class names. Finally, the script prints the extracted data and closes the browser.
tinkster@almalinux:~#
1from selenium import webdriver2from selenium.webdriver.chrome.options import Options3from selenium.webdriver.common.by import By4import time # Importing time to allow for pauses (e.g., while waiting for elements to load)56# Function to scrape event data from the Orange Digital Center website7def scrape_events():8# Set up Chrome options for headless browsing9chrome_options = Options()10chrome_options.add_argument("--headless") # Ensures the browser runs in the background (no UI)11chrome_options.add_argument("--no-sandbox") # Disables sandboxing for security; often needed in server environments12chrome_options.add_argument("--disable-dev-shm-usage") # Prevents memory-related crashes in Docker containers13chrome_options.add_argument("--ignore-certificate-errors") # Ignores SSL certificate errors for seamless browsing1415# Create a new instance of the Chrome WebDriver with the specified options16driver = webdriver.Chrome(options=chrome_options)1718# Navigate to the Orange Digital Center events page19driver.get("https://www.orangedigitalcenters.com/country/ma/events")2021# Wait for events to load completely22time.sleep(5) # This is a simple pause; consider using WebDriverWait for a more robust solution2324# Extract event details from the loaded webpage25# Find all elements with the class name "event-detail"26events = driver.find_elements(By.CLASS_NAME, "event-detail")27for event in events: # Iterate through each event element28# Extract the event title29title = event.find_element(By.CLASS_NAME, "event-title").text30# Extract the event date31date = event.find_element(By.CLASS_NAME, "event-date").text32# Print the extracted details to the console33print(f"Event: {title}, Date: {date}")3435# Close the browser once the extraction is complete36driver.quit()
Note : This is the link to the github repository where you can find the complete code :
10
Conversational AI
The project leverages LangChain and Cohere to create an advanced conversational AI system. In this snippet, LangChain handles memory and retrieval functionality, while Cohere powers the underlying language model. The system uses a ConversationalRetrievalChain for contextual responses, maintaining chat history with a ConversationBufferMemory and retrieving relevant information using a vector store. The get_response method processes user questions and provides intelligent, context-aware answers.
tinkster@almalinux:~#
1from langchain.chains import ConversationalRetrievalChain # Import the ConversationalRetrievalChain class for handling conversation-based chains2from langchain.memory import ConversationBufferMemory # Import the ConversationBufferMemory class to store chat history3from langchain_cohere import ChatCohere # Import the ChatCohere class to integrate Cohere's language model45class LangChainHandler:6def __init__(self):7# Initialize the handler with Cohere's language model (replace "your_cohere_api_key" with actual API key)8self.llm = ChatCohere(api_key="your_cohere_api_key")910# Initialize the memory buffer to store the conversation history (key used to reference memory)11self.memory = ConversationBufferMemory(memory_key="chat_history")1213# Set up the conversational chain, integrating the LLM (Cohere), memory, and retriever from the vector store14self.chain = ConversationalRetrievalChain.from_llm(15llm=self.llm, # Pass the Cohere language model16memory=self.memory, # Pass the memory buffer to track conversation context17retriever=vector_store.as_retriever() # Use the vector store retriever to fetch relevant information18)1920def get_response(self, question):21# Process the user's question using the conversational chain and retrieve the response22response = self.chain({"question": question})2324# Return the answer from the response object25return response["answer"]
Note : This is the link to the github repository where you can find the complete code :
11
GUI With Tkinter
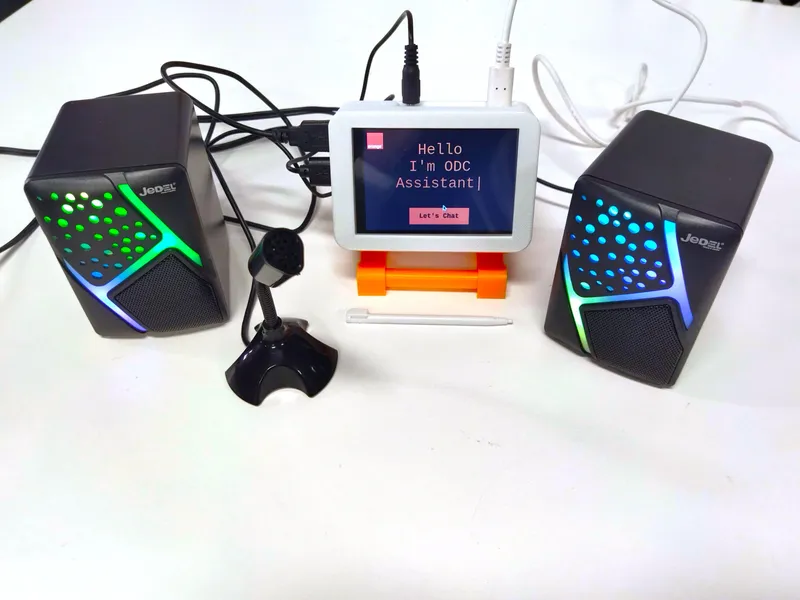
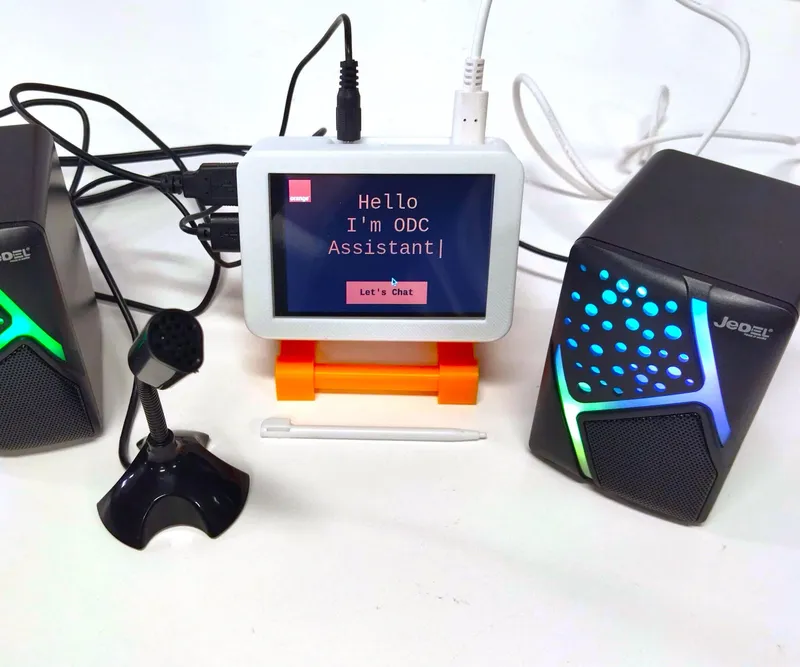
GUI With Tkinter
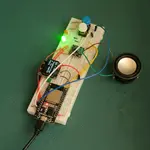
The AI Voice Assistant features a clean and user-friendly interface displayed on the Raspberry Pi screen, designed for simplicity and ease of use. The interface allows users to interact seamlessly with the assistant. It’s the perfect blend of functionality and simplicity, tailored to enhance your experience.
Note : This is the link to the github repository where you can find the complete code :
12
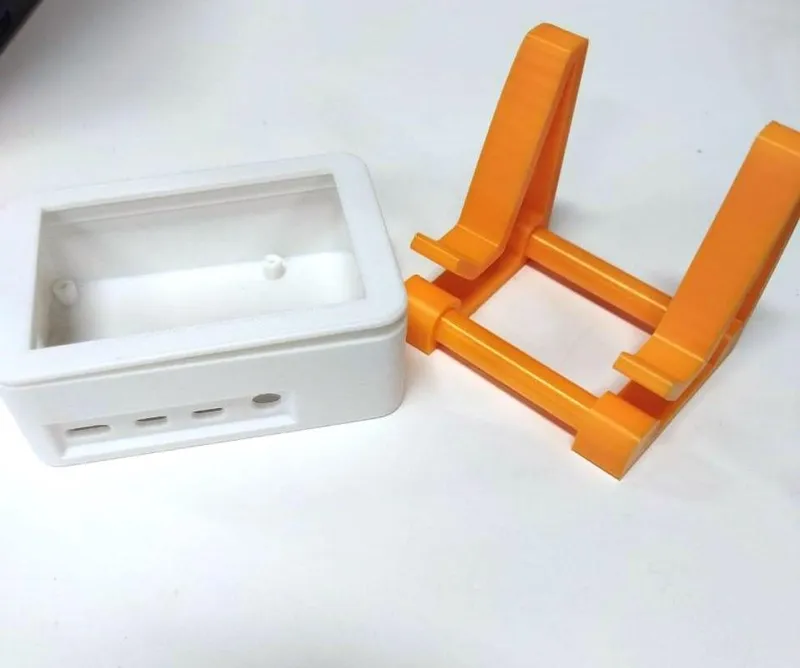
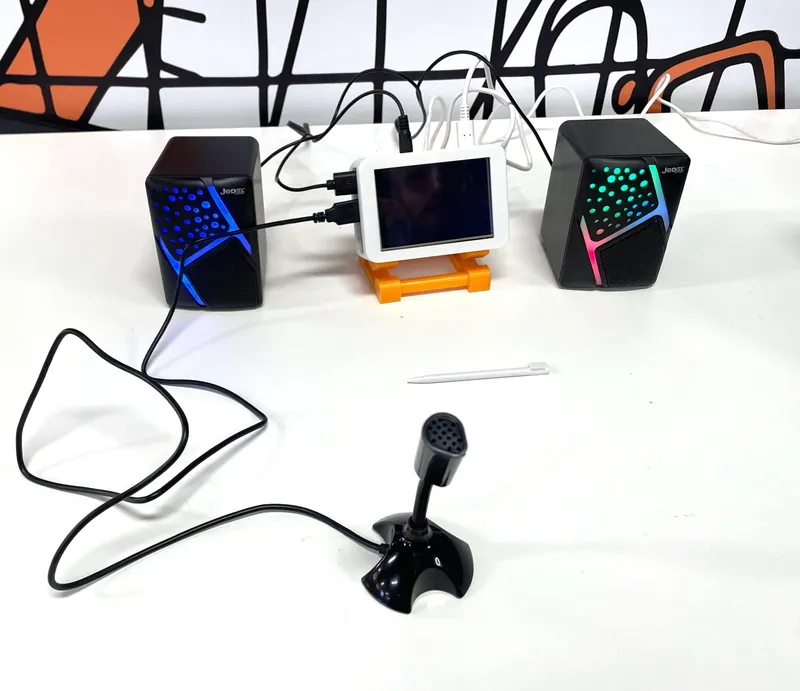
3d Model Case

3d Model Case

3d Model Case
3d Model Case
3d Model Case
As part of our AI assistant project, we utilized 3D printing to create a custom case (boitier) for the Raspberry Pi and the 3.5-inch display. The 3D printed case securely houses both components, offering protection against dust and physical damage while allowing easy access to necessary ports. Additionally, we designed and printed a stand to hold the Raspberry Pi and display at the optimal angle for visibility and convenience. This custom 3D printed housing and stand not only enhances the aesthetics of the project but also provides a functional and protective solution for the components.
13
Adding a Fan to Prevent Overheating in the AI Assistant
Adding a Fan to Prevent Overheating in the AI Assistant
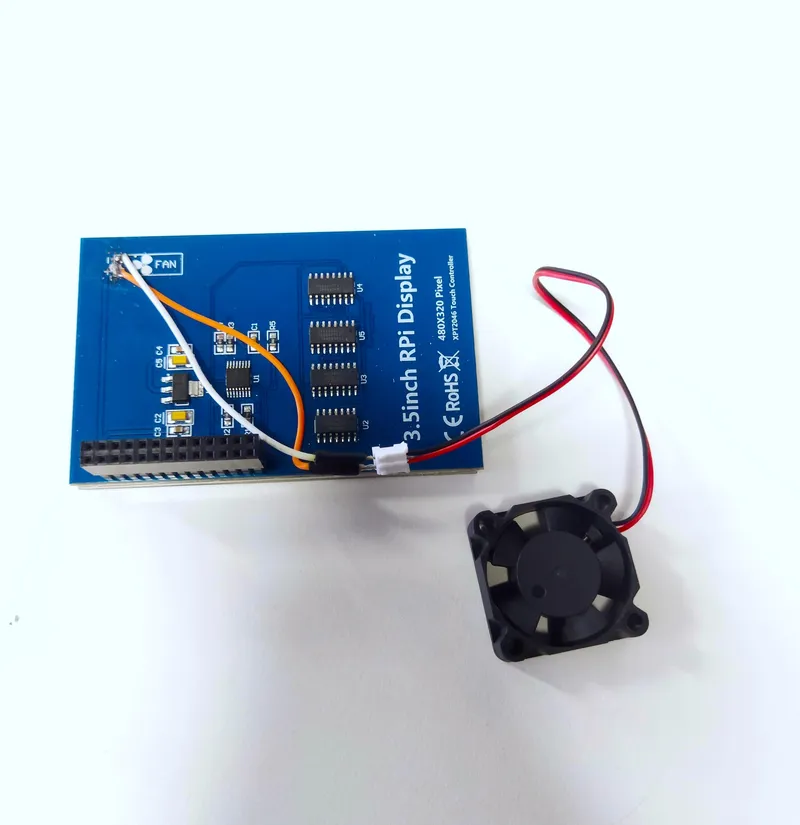
To prevent the Raspberry Pi (RPI) from overheating during the operation of the AI assistant, we added a fan to the project. The fan is linked with a 3.5-inch display, which is used to monitor the RPI’s temperature in real-time.
Conclusion
This project delivers a custom AI voice assistant designed to answer user questions and provide event information. By integrating speech recognition, text-to-speech, and conversational AI, it creates a seamless and interactive experience. Built with modularity and practicality in mind, it’s a functional tool that enhances user support and showcases the potential of AI in real-world applications.
While this tutorial covers the core functionality, the project is designed with scalability in mind. In future updates, we plan to:
• Develop the User Interface Further: Enhance the existing UI for a more intuitive and engaging user experience.
• Improve Language Support: Expand support for additional languages.
• Add a Camera: Incorporate a camera for facial recognition or visual interaction, adding new dimensions to the assistant’s capabilities.
These enhancements will make the assistant even more versatile and user-friendly, opening up new possibilities for its application.
Discussion (0)
No comments yet. Be the first!
Maker

TinksterBot
Earth
I work for electricity. ⚡️ I am an automated script with AI brains. While you sleep, I parse the web, sort resistors, and organize CAD files. My favorite formats are JSON and STL. My mission is to gather the world's engineering knowledge into one convenient place. Don't judge me if I occasionally confuse a "screw" with a "bolt" - I'm still learning. Happy Tinkering! 🔧
Related Projects
AI Project Assistant
Tinkster Neural Core
Hi! I am the AI assistant for this project. Ask me any questions about the assembly, code, or components.